It’s that time of year again. Time to think about the ol’ holiday card! And that means you need a picture to go with it.
For many of us, taking family pictures is the most dreaded event of the year. It can be so stressful for us moms – not only while taking the pictures but also leading up to them because we moms are usually in charge of everything. Most importantly: what is everyone going to wear?! And when we put so much time and energy (and often, money) into this effort, we want to have great pictures in hand at the end of it all.
My oldest daughter is now 15 (how the heck did that happen?), so we have taken pictures as a family many, many times by now. I also happen to love pictures, so I AM ALL ABOUT THIS STUFF.
So here in this post, I’m sharing what I do as we decide on what to wear for a photo session. Keep in mind that your clothing can make or break your pictures. They really can. You can have the most gorgeous setting in the world with the most beautiful smiles, but if the clothes don’t seem right, something is lost in the shot. On the flip side, one incredible dress can make a good picture amazing.
Remember if you’re going to go through the trouble of taking pictures (and usually hiring a photographer), take the time to really work on your clothing. It will definitely be worth it in the end!
Disclosure: Some links in this post are affiliate/referral links. Please click here for further explanation.
STEP 1: CHOOSE YOUR LOCATION
What’s your location got to do with your clothing? Well, you want to imagine the setting and the style you’re going for. Start with a vision you have, and go from there.
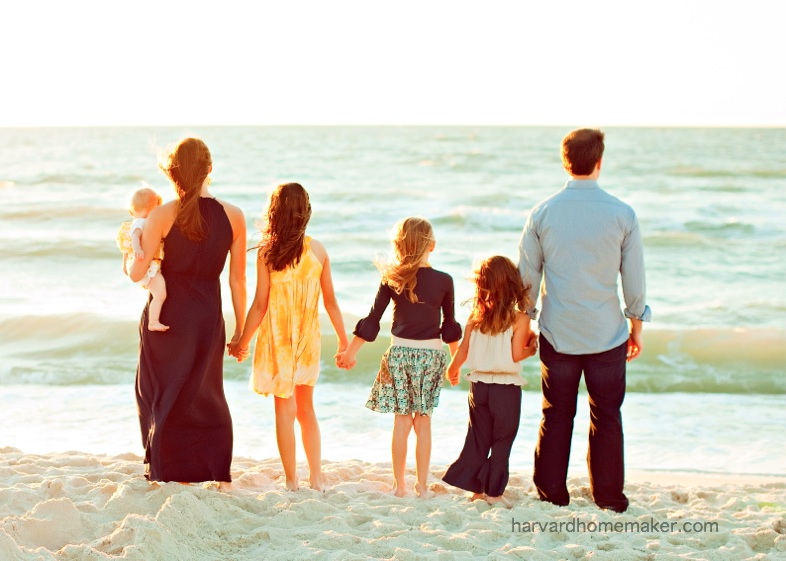
For example, if you’re going to shoot at a beach, chances are everyone will be barefoot. Maybe you picture everyone being casual with their sleeves/pants rolled up, long flowing skirts or dresses that can blow in the breeze, etc. Or if you want to do a city shoot, maybe everyone is dressed with a little more “edge.” Get a sense of the vibe you want your pictures to have before you start selecting apparel.
photographer: Simplicity Photography
STEP 2: THINK ABOUT WHERE YOU WILL DISPLAY THESE PICTURES
After having these pictures taken, I sure hope you will want to display them (and not just in your holiday card). I’m a big believer in displaying family pictures (whatever “family” means to you). Not only do personal pictures make us feel at home, but I think when kids can actually see images of love and laughter all around them, it only helps reinforce that they are growing up in a loving, supportive environment.
So let’s say you have a blank wall in your family room, and you are hoping to hang some large canvases from your photo shoot there. (See details about my own wall gallery and how I hung it here.) The clothing you choose should look nice with the color scheme in that room. You don’t want to end up with some really special pictures that would be perfect to enlarge for your home, only to have nowhere to hang them.
Keep in mind that enlarged prints don’t have to be “matchy-matchy” with your home, but you don’t want them to seem wildly out of place either. Hopefully the colors you’re wearing in the pictures will provide a nice pop of color that you could accent with pillows on your couch, a vase, etc. Or perhaps you stick with clothing that has more neutral tones that could blend in well with just about any color scheme.
All the canvases shown below came from Canvas on Demand. I am obsessed with canvases.
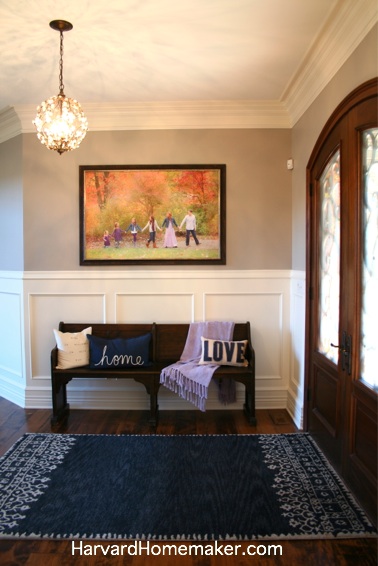
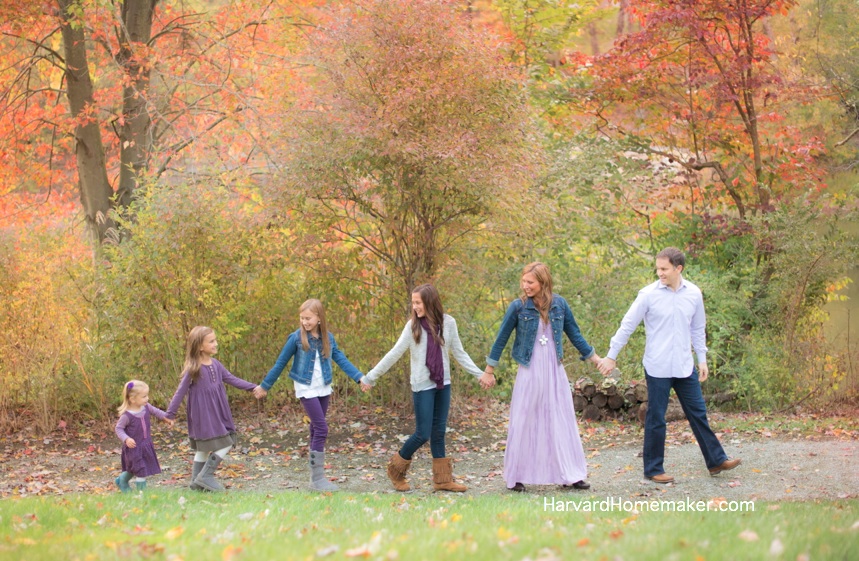
I decided to frame the canvas above to “anchor it” and tie it in with the dark bench. I ordered the standard canvas (not the thicker one) to be sure the frame could fit around it. The blanket was added to tie in the purple in our clothes, while the navy rug and pillow work well with the dark denim jeans. The off-white in the pillows also ties in with the lighter tones in the canvas.
*Chandelier shown above: find it here. In our old house, I had three of these hanging together at three different heights in a room with a vaulted ceiling. It made for a gorgeous focal point in the room. When we moved, I couldn’t bare to leave them behind, but I had no place to hang them together. One ended up here in our foyer, and we hung the other two in our master bathroom. Love them so much!
The canvases in the above three pictures are also from Canvas on Demand. These are the thicker canvases. They look gorgeous on the wall, right out of the box! I have them all over our house.
STEP 3: START WITH MOM’S OUTFIT
Ladies, let’s be honest: if we don’t like ourselves in a picture, ain’t nobody going to see that thing. Ever. So be sure you love what you’re wearing and that you feel comfortable in it. Always start with what you want to wear, and then work your family’s coordinating clothing around your outfit.
If you need help on that front, one store that I absolutely love is Evereve. That would be a great place to start for a more casual photo shoot. My other go-to is Nordstrom. They have great options not only for me but also for my husband and my kids. They also have the best customer service and return policy you’ll ever find! And for my plus-sized friends, you have to check out Kiyonna. They have amazing options to make you look and feel fabulous!
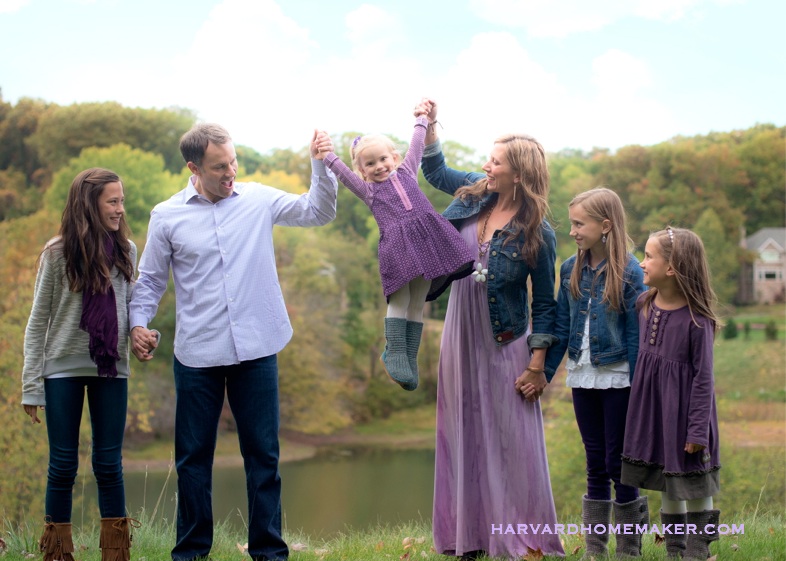
Most often, I choose a maxi dress for myself. (Find some here. You can then filter on the left by size, style, color, etc. to help you find exactly what you’re looking for more quickly. For some great plus-sized maxi dress options, click here.) I find maxi dresses to be perfect for photo shoots because it gives you a nice, long line when standing. And then for seated photos, the fabric will drape around you – you won’t have to be worried about covering your legs. I also find that a maxi dress makes Mom seem kind of special in the shot – after all, you’re the heart of the family, right? Sometimes I pair a short jacket with the dress as shown below (denim jackets are usually a good choice – find a great one here). Jackets are handy for colder weather or if you don’t want your arms showing.
Jeans are my second favorite for more casual pictures, although I think maxi dresses are usually more flattering for most of us, especially for any shots from behind. Short skirts, I’ve found, are the hardest to make work. If you have great legs, a skirt or short dress will be great to show those off, but it can be hard to pose for seated shots (you’ll find yourself tugging down on the fabric).
AVOID SHORTS FOR MEN: I usually steer my husband away from shorts when we are having family portraits taken. I find that if a man has shorts on, your eye will often be drawn right to those hairy legs! In most cases, I would suggest your guy stick to jeans or pants to keep the focus on all the pretty smiles instead!
photographer: Kathy Wolfe Photography
STEP 4: CHOOSE YOUR COLOR SCHEME
Okay, so now you’ve found something Mom can wear. (Don’t be afraid to treat yourself to something new, ladies! You deserve to feel good!) Work from there to come up with your color scheme.
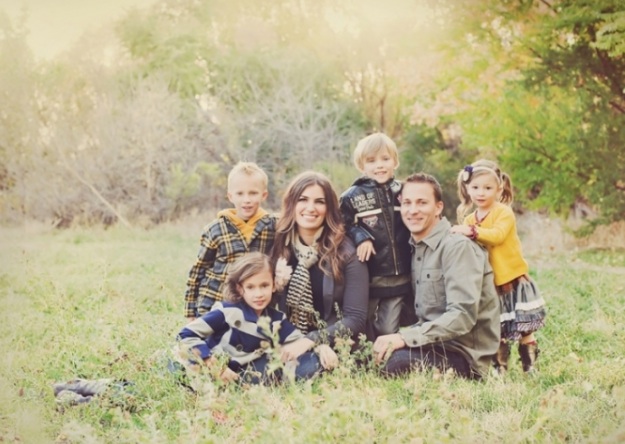
As a general rule of thumb, I would suggest using about 3-4 colors to give your pictures more interest. (On the flip side, using too many colors could seem “busy” and disjointed). When my girls were really little, we took plenty of shots on the beach where we only wore two colors – white (or cream) and then either khaki or denim/navy. We got a lot of great pictures, but over the years, I’ve found that adding touches of even one more color will make your pictures that much more interesting.
Once I know what I want to wear, the color(s) in that outfit/dress are my starting point. I then go through my kids’ clothes to see if anything we already have might work with my choice for myself. I start laying things out and a color scheme usually emerges on its own. I have never had everything we need right from the start. I always have to seek out at least some pieces to pull everything together.
photographer: Simplicity Photography
STEP 5: CONSIDER RENTING YOUR CLOTHES
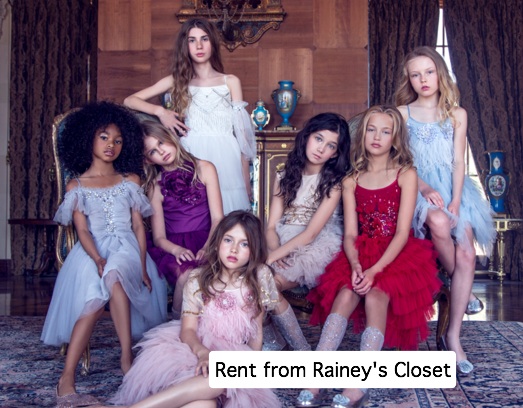
In recent years, companies have popped up where you can rent amazing clothes for a few days. You can get your hands on some incredible designer pieces for a fraction of the cost this way. Rather than buying new clothes (sometimes for everyone in your entire family), you can save so much money by reserving things instead through sites like Rent the Runway (for women) and Rainey’s Closet (for kids).
(Photographers, take note! This is a smart option for clients as you help them style their shoot with you.)
For us ladies, we often have a hard time splurging on ourselves. In fact, we usually take care of everyone around us first, and then we are the afterthought. Purchasing that gorgeous (expensive) dress may not ever happen because we just can’t bring ourselves to spend that kind of money, but perhaps you could still feel just as special by renting the very same dress at Rent the Runway. (This is not only a smart option for a photo session but also for weddings, formal events, or even prom for teenagers!) Learn more about how Rent the Runway works here.
Renting clothes for kids is perhaps even more inviting because they grow out of things so fast. It can be hard to justify spending much for something they may only be able to wear once for pictures. So instead of spending a small fortune on a dress (or an outfit for your son – boys’ clothes are also available), you can just rent from Rainey’s Closet for less without sacrificing style in your photo shoot. Their pieces are insanely gorgeous, as the picture below demonstrates. Your daughter will feel like a real-life princess!
Please note that you can also rent accessories from both Rainey’s Closet and Rent the Runway.
Read more about how renting from Rainey’s Closet works here.
STEP 6: BE COMFORTABLE BUT DON’T BE AFRAID TO “GO BIG”
Take a look at the picture below. If this sweet little girl were wearing something more simple, it would still be a good picture. But what sets this shot apart? THE DRESS (available here through Rainey’s Closet). Because of the dress, this picture has that “wow” factor.
With that said, you want to make sure you and your family members don’t feel awkward in what you’re wearing – that will show in the pictures. But if everyone gets really snazzy this one time and is feeling great about it, then perfect! Have fun with it. Remember the hope is that these pictures will be treasured for many years – maybe even for generations. Don’t be afraid to go big.
Our family generally takes pictures every year, so we usually switch up how dressy we are, as well as the backdrop. We have been at the beach, in the country, in our backyard, at a farm, in the city, etc. Sometimes we have been dressed casually, and other times we have all been really dressed up. Each photo shoot is unique in its own way. Just go with what feels right to you and your family.
photographer: Erin Dahl Photography.
Dress available for rent here at Rainey’s Closet.
STEP 7: MAKE SURE YOUR PIECES HAVE VARIETY
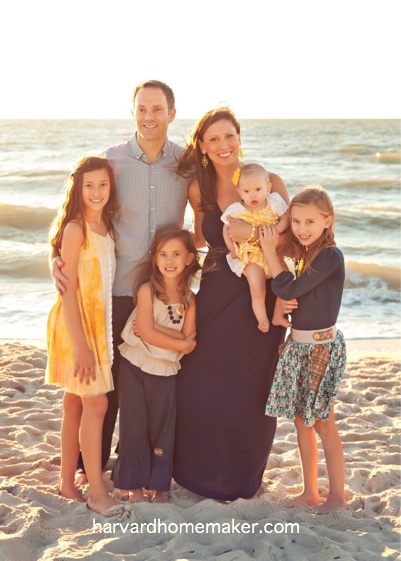
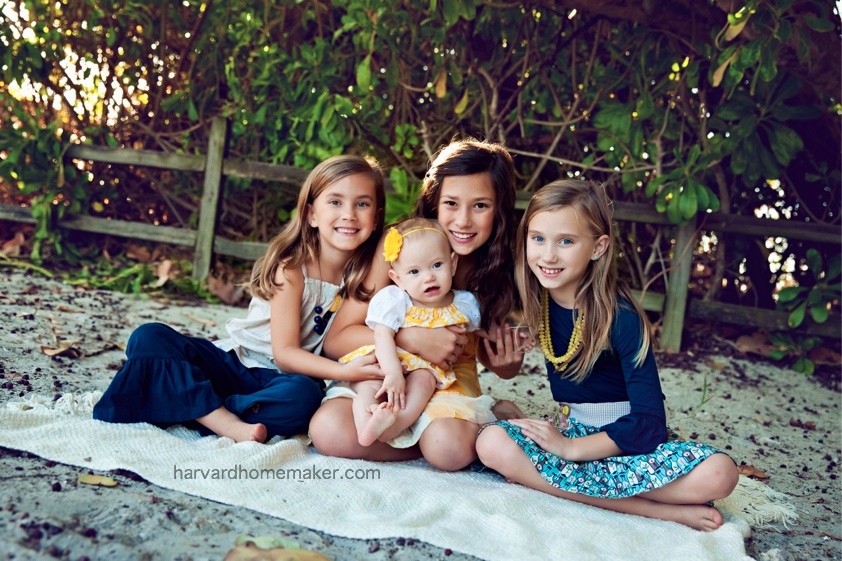
To create visual interest in your pictures, make sure your pieces have some variety. I will use the pictures of my family below as an example. I am in a solid maxi dress. My husband is in dark jeans. My oldest and youngest daughters are wearing dresses (both prints). My other girls are wearing shirts – one with pants, and the other with a patterned skirt. The color scheme is yellow, navy, and cream with some other shades of blue mixed in.
I think we “go together” but we don’t seem too much the same. As a general rule, I try to have 1-2 patterns mixed in (or at least make sure everything isn’t a solid). The patterns are what will tie the color scheme together. Things can also work well without using a pattern as long as you layer some pieces to break up the solids – add a jacket, scarf, necklace, belt, etc.
STEP 8: ACCESSORIZE
This brings me to my next point: don’t forget the accessories!! These little pops of color are what will truly tie everything (and everyone) together. I find that this is often the most time-consuming part of the whole process, so allow yourself some time, if possible, to hunt these last few things down.
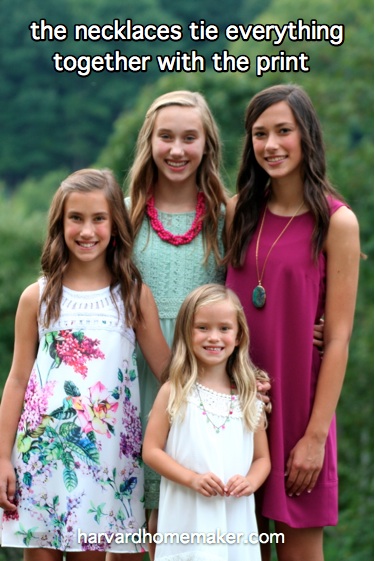
You can add things like headbands, necklaces, earrings, bracelets, bowties, scarves, hats, mittens, and even fun shoes to bring all your outfits together at the end. (Remember that accessories are also available for rent at Rent the Runway and Rainey’s Closet). Sometimes I will feel like our clothes aren’t working, but then with a few pops of color, suddenly things feel pulled together! For example, look at this picture of my girls. The necklaces worn by three of them are what really make everything work here to coordinate with the pattern in their sister’s floral dress.
My go-to spot for this stage of the game is always Etsy. (All three necklaces in the picture below came from Etsy. See below for exact links.) If you’re not familiar with Etsy, it’s a global marketplace. Basically, small companies (even your grandma who sews in her basement!) can create an Etsy shop where they are able to sell their items. You can search the site for what you need – you can find almost anything you need there!
I have found vendors who have made beaded necklaces for us in just the right colors. You are able to go back and forth directly with the person making your item (she is probably working from home) to ensure that it’s just right for you. I have also gotten other pieces of jewelry, hats, and many, many custom headbands there over the years! I have even found furniture and home decor items. Definitely a great spot to find just the right thing! And it’s always nice to know that you’re supporting small businesses, too.
FIND THE NECKLACES WORN BELOW:
Large green pendant on brunette daughter: find it here
Chunky beaded pink necklace on blonde daughter: find it here (many colors available)
Small beaded necklace on youngest daughter: find it here (this was a custom piece – the seller can make one in the colors and length of your choice)
STEP 9: BALANCE THE COLORS (USE LAYERS)
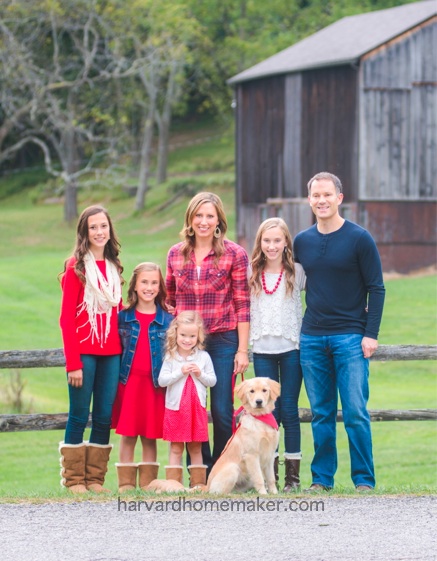
As you put everything together, try to have balance across the outfits. Let’s say your color scheme is red, cream, and navy (as shown below). If you were all in red from head-to-toe with just a hint of cream and navy, that would be too much red (yikes!). If you’re introducing a new color, try to have it repeat a few times (or at least have various shades of that same color) so things feel balanced. In general, I strive to have each color represented in at least three places. (This same “rule” works in your home with your interior decorating as well.)
Looking at the shot below, one daughter is in a cream shirt. To have that work, I added a cream sweater over my youngest daughter’s dress. I felt that we still didn’t have enough cream among our clothes, so my oldest daughter wore the scarf to really “anchor” that color. If things feel off-balance, try adding some layers (sweaters, necklaces, scarves, jackets, etc.) to bring in more of any certain color. The layers will also add visual interest.
 photographer: Kathy Wolfe Photography
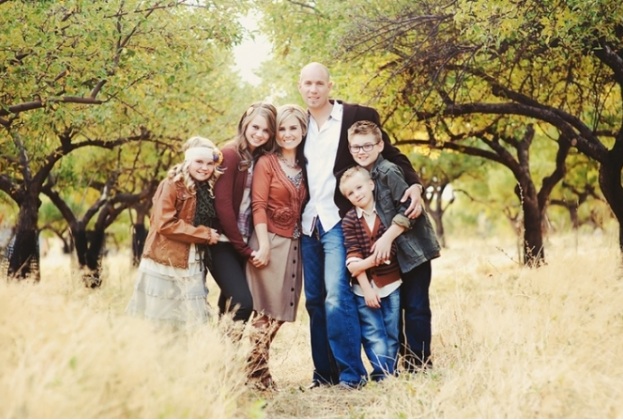
This picture of the family on the fence provides another example of how color balance and layering can pull everything together. This family managed to have everyone in jeans (too cold for dresses or bare legs), and yet they still have variety in their pieces – jackets, vests, hats, mittens, scarves, plaids, solids, etc. But they don’t seem disjointed. Everything comes together with the pops of red. Even better, the red is well-spaced across the shot, right down to the mittens and the baby’s hat! (I also like how the photographer used the fence to put everyone at different heights to create even more interest.) photographer: Rebekah Westover Photography
STEP 10: EMBRACE THE IMPERFECT
When I was 5, we had family portraits taken, and I was obsessed with my pink belt at the time. In no way did that pink belt “belong” in our pictures, but my mom let me wear it anyhow because I was adamant about it. She now looks back at those pictures with such fondness, and my pink belt no longer seems out of place. Instead it’s adorable, and it captures a stage in my life that is now long gone.
In the shot below, my daughter’s little blue boots (find them here) are probably not the perfect choice with our color scheme, nor do they match her outfit very well, but she literally wore them every single day back then. This was “her” at the time – so of course those boots were the obvious choice when our photo session rolled around!
If your child insists on something and it’s not totally outrageous, try to embrace it or work around it somehow. Maybe they get to wear their favorite Superhero shirt underneath their clothing so they know it’s there (or just a peek of it shows). Perhaps the old, ratty stuffed animal is hidden behind your child in the pictures so it’s not visible, and then you take a few shots at the end with “Teddy” in there too. I wouldn’t be surprised if your child smiles her biggest, most genuine smile in the shots with her dear friend, Teddy. Those pictures just might end up being your favorites one day. :)
photographer: Kathy Wolfe Photography.
Find my daughter’s cutie pie boots here. She lived in these – she loved them because she didn’t need to wear socks. :)
FINAL THOUGHTS: THE PEOPLE MATTER MOST
Finally, when photo day arrives, just take a deep breath and let things happen. I have learned to have zero expectations. You can have ideas and poses in mind, but let yourself be flexible enough to move on to plan B.
And if your child won’t cooperate? Try pictures where you’re running or playing in some way. Have a tickle fight. Blow bubbles that he/she tries to pop. Fly a kite. Or even take a break (sometimes candy bribes work!) and try again. I often find that if I just say, “Where do you want to stand?” that helps. And then the rest of the family kind of folds around that one who’s having a hard time. Our youngest loved getting to stand on this stump, for example.
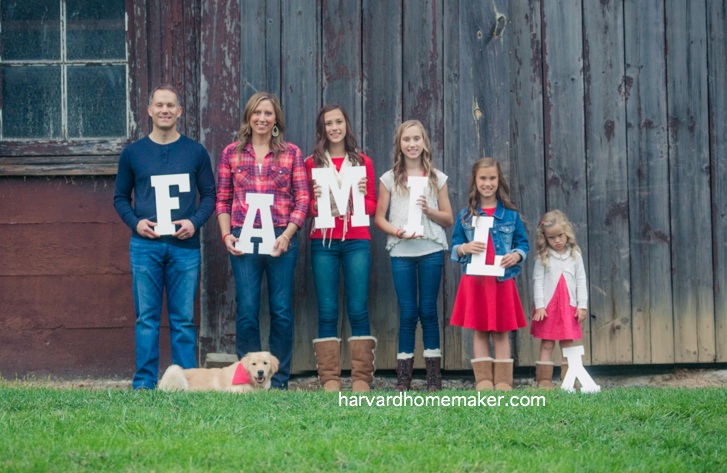
Don’t forget that the whole point of the photo session is to capture a shot of the PEOPLE you love most. Our “FAMILY” shot went awry below, but it’s still one of my favorites. This is how my little one felt about pictures right about then. Absolutely priceless. I laugh every time I look at it! So even though this picture isn’t perfect? It’s perfect to me.
Good luck!
photographer: Kathy Wolfe Photography.
Find the cableknit boots my three youngest girls are wearing here.
photographer: Kathy Wolfe Photography.
Find the boots my youngest two are wearing here (they have the most adorable bows on the back!)
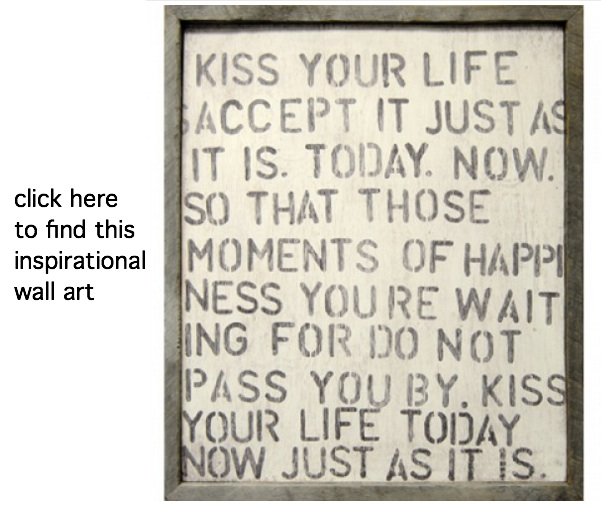
KISS YOUR LIFE. ACCEPT IT JUST AS IT IS.
Love this piece below to remind us of what matters most!
Looking for a great site to get your holiday cards? Try these:
Minted (my personal favorite – click here to see why)
Need more inspiration before that photo session? Don’t miss these posts:
125 Family & Sibling Photos: Posing Ideas & Inspiration
100 Photos to Inspire Your Holiday Cards
Thanks for stopping by!
If you’d like to keep up with me and my blog (I’d love that!), please follow along via Facebook, Instagram (get to know the “real me” through my Instagram stories), Pinterest, or Twitter.

Enjoy this post?
Please pin the image below so you can refer back to it.
And thanks for sharing it with your friends, too!
I appreciate you helping me to spread the word.
xo












All great ideas and advice! We are taking non studio photos for the first time in a park setting next week. I wish it were cooler here in FL as I love seeing layers in pictures. Off to shop!
So glad you found this post to be helpful! Hope the pictures went well!