If you like pumpkin bread, you have to try this! I have modified the original recipe by cutting out half the oil and replacing it with applesauce, too. You don’t miss that oil at all; I can’t even tell the difference myself!
I’ve also tried making it with no oil (using only applesauce or Greek yogurt in place of the oil), and that is also good, but I think it’s only best if it’s eaten right away (even while it’s still a bit warm). When you completely cut out the oil, the texture feels a bit chewier to me. But if you are really trying to be healthy, and “chewy” doesn’t bother you too much, then please know that it’s more than edible that way, too! (You simply replace the oil with equal amounts of applesauce or Greek yogurt. I do this all the time when baking, especially when I make cakes from a box. I never bake cakes with oil anymore!)
This recipe freezes well (like any baked bread), so it’s perfect to make ahead of time. Just remove it from the freezer when you’re ready to serve it or give it as a gift. I also bake in recycled cans sometimes. When wrapped in cellophane and ribbon, these make the cutest gifts for neighbors, teachers, friends, etc. Very handy around the holidays, at the end of a school year, or anytime!
I just love baking in the fall after a hot summer (when I wanted to be as far from the kitchen as possible)! This chocolate chip pumpkin bread is something we look forward to every year around this time!! I can’t tell you how many times I’ve made it to “give to someone”, and then somehow my family eats all three loaves in less than 24 hours. Oops. What can I say… we love us some pumpkin bread!!
Preheat oven to 350. Combine sugar, pumpkin, oil, applesauce, water, and eggs. Beat until smooth.

Add flour, cinnamon, nutmeg, baking soda, and salt. Blend. Fold in chocolate chips. (Walnuts are optional; I omit.)

Divide evenly between three 9×5 inch loaf pans that are greased and floured. (As shown here, I typically use the ones you can buy in a set of three at the store because I’m often giving them away as gifts.)

You can also bake in recycled cans. I love this idea!! Be sure to allow some room at the top for the batter to rise.

You can see here how much the pumpkin bread rose when filled as shown above.

These make great gifts! We made these for Teacher Appreciation Day and attached a card that said, “We CAN’t thank you enough for all you do!” You could also give these as hostess gifts, share some holiday cheer with neighbors, or let someone know you’re thinking of them for any reason.
I tucked each can into a cellophane bag and then tied them off with ribbon, but you could also cover the top with aluminum foil, add a square of cute fabric on top of that, and then secure with a rubber band. And then you could add a ribbon to hide the rubber band. Lots of ways to have fun with this. So start saving those cans, my friends! :)

Yum!

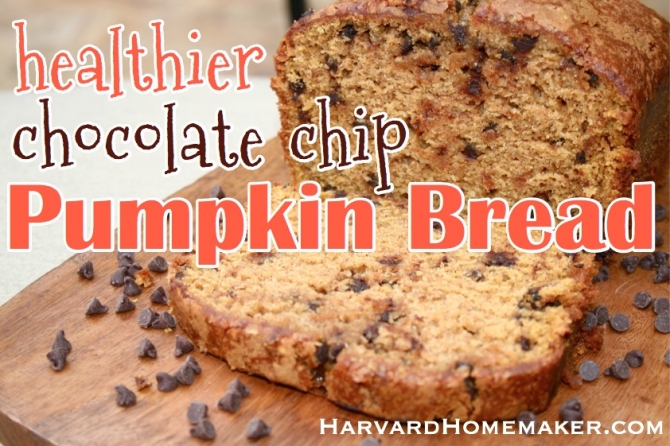
This bread is so moist. (I think you can actually see that in the picture below.) Be sure not to over-bake, though; it can be easy to do that. As soon as I press slightly in the middle and it bounces back to me, I take it out.

Healthier Chocolate Chip Pumpkin Bread
Find a printable version of the recipe by clicking this link: Healthier Chocolate Chip Pumpkin Bread by Harvard Homemaker
3 cups white sugar
1 (15 oz) can pumpkin puree
1/2 cup vegetable oil
1/2 cup applesauce (or Greek yogurt)
2/3 cup water
4 eggs
3 1/2 cups all-purpose flour
1 T. ground cinnamon
1 T. ground nutmeg
2 teaspoons baking soda
1 1/2 teaspoons salt
1 cup semi-sweet chocolate chips
optional: 1/2 cup chopped walnuts (I omit)
Preheat oven to 350. Grease and flour three 9×15 inch loaf pans or use recycled cans. (I have never made a batch of this solely with recycled cans, but my guess is you could probably get about 12 cans out of the recipe, depending on the size of the cans.) Combine sugar, pumpkin, oil, applesauce, water, and eggs. Beat until smooth. Add flour, cinnamon, nutmeg, baking soda, and salt. Blend. Fold in chocolate chips (and walnuts if desired).
Fill pans or cans to about 3/4 full, allowing room for it to rise. Bake three pans for about one hour. I usually set the timer for 50 minutes, and then I continue to check it. I don’t like mine to over-bake, as I think it’s better (more moist) when it’s just done. Although if you don’t cook it long enough, it can be gooey in the middle. My tip: when I tap it in the center and it bounces back to the touch, it’s done. If you are using recycled cans, reduce the baking time since it will cook faster in smaller containers.
Freezes well. You can make this ahead of time, and it tastes just as good after thawing out. Enjoy!
This recipe was adapted from one I originally found at All Recipes.
Happy Fall baking, my friends!
I like to use applesauce to cut out some oil without sacrificing taste. What substitutions do you regularly use?


Hi – This looks so good! I’m curious about using the cans though. How do you get it out of the can? Do you use a knife to cut around the inside of the can and then “thump” the bottom? Also, have you frozen these in the cans? Or do you give them out right away when using the cans?
It actually pops out really easily when you just nudge it with a butter knife. I really didn’t even need to cut around the edge much at all. As for freezing in the cans, I haven’t tried that because I’ve always had a reason to give them away immediately, but I’m sure it would work just fine. I freeze in the aluminum tins all the time, and I think it comes out just as well (if not better) after being frozen. It’s almost like the freezing seals in the moisture or something! I actually always freeze my cake layers before frosting because I think it spreads better, but it also seems to make the cake more moist, too… hope that helps. :)
What size cans are you using? Does one recipe make 3cans?
The cans shown here are regular size soup cans. A recipe probably makes maybe 10-12 standard cans is my guess. (or maybe 3-4 really large coffee cans). I typically am making a loaf or two, and then I have also made a few cans with it with the extra batter. When only making loaves, this recipe is enough for 3 medium-size loaves. Hope that helps!