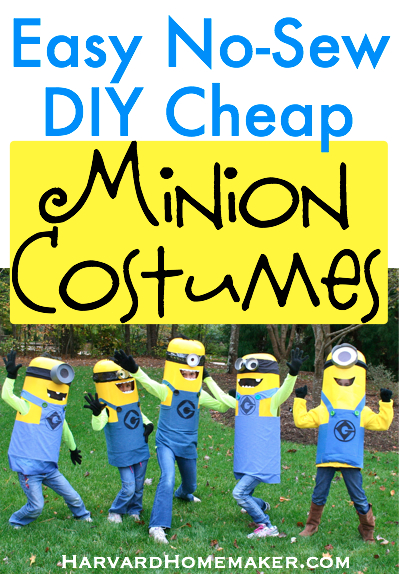
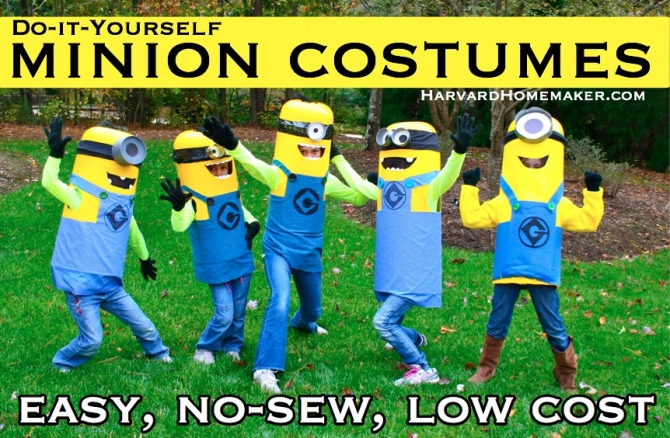
This Halloween costume idea is simply genius. I can say that because I didn’t come up with it; my super-creative friend did! Last fall, two of my daughters and a few of their friends all decided they wanted to be “Minions” together (from the movie Despicable Me). We moms searched and searched for a good costume that we could simply buy and be done with it, but they were all pretty expensive, and honestly, they were terrible.
And then my friend came up with this awesome idea and told us how to do it. When I made my girls’ Minion costumes, I took pictures along the way so I could share the tutorial with all of you. (I had only been blogging for a week back then! Time flies!) It really was so easy. You just need to allow some time to let the paint dry in between steps. And it cost very little–I spent maybe $10-15 or so. You might even have much of what you need!
See below for the step-by-step. This costume idea might even be more relevant this year since Despicable Me 2 came out this past summer. Can you imagine how funny it would be if you had a whole mess of kids out trick-or-treating as a group of Minions?! Love it! (By the way, the kiddos below won their fair share of “Best Costume Contests” last year. Just sayin’!) :)
Disclosure: Some links in this post are affiliate/referral links. Please click here for further explanation.
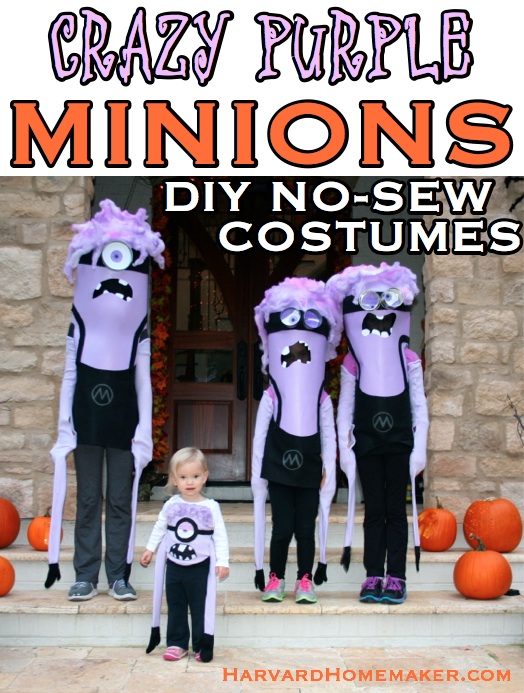
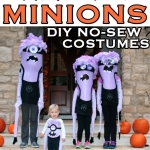
WANT TO MAKE THE CRAZY PURPLE MINIONS?
Click here or on the photo below for that tutorial (very similar to this one!)
WANT TO BUY COSTUMES INSTEAD?
If you know there is no way on God’s green Earth that you are going to be making these (!), here are some links where you can order costumes and call it a day! :)
Find all types of Minion Costumes here.
Find a Child’s Minion Costume here (overalls style).
Find an Adult Minion Costume here (overalls style – matches the style above).
Find a Minion Costume for your DOG here (LOL!!).
How awesome is this Adult Gru Mask (see below) – the perfect final touch! *Update: I have found that this typically sells out every Halloween, so I would suggest you go ahead and order it if it’s available and you really want to add a “Gru” to your clan! (A great job for Dad!) :)
Adult Despicable Me Gru Mask – $15.99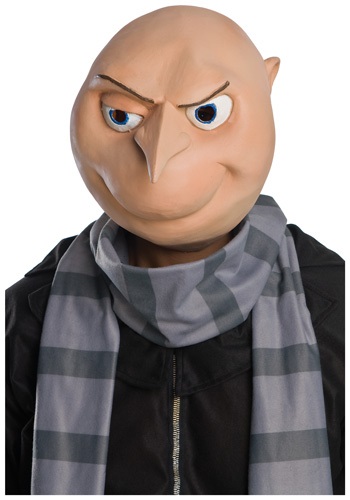
from: HalloweenCostumes.com

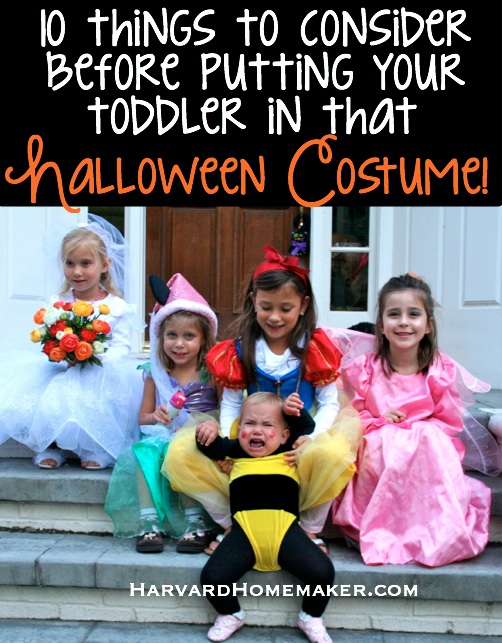
DRESSING A TODDLER FOR HALLOWEEN THIS YEAR?
Don’t miss this post: 10 Things to Consider Before You Put Your Toddler in that Halloween Costume!
SUPPLIES NEEDED
This is all you need… basic supplies you either already have or can find easily:
– A wide, shallow bowl (I found mine at Dollar Tree)
– Piece of poster board, large size (or large enough to wrap around torso; you might need a strip from a second poster board, so perhaps you want to get 2 at the store to be safe)
– Yellow spray paint (plan for about 1 can per Minion)
– Packing tape and/or duct tape
– Drill
– Yarn or pipe cleaners for hair
– Fabric for clothes (I think I bought about 1 yard per Minion)
– 2 large black buttons (or paint some black)
– Black Sharpie to draw logo on overalls
– Supplies for eyes (cans, lid from a jar, cut an oatmeal container, etc.)
– Glue gun (handy if you have one… used for attaching the clothes)
– Scissors and/or box cutter for cutting arm holes and mouth
– Fabric scraps or old socks to create shoulder straps inside for comfort
– Spray-on Polyurethane (optional… to keep paint from scratching off bowl over time)
– Black tulle fabric or similar (optional… to cover mouth yet allow person to see through it)
You’ll also need your child to wear jeans, a long-sleeved yellow shirt, and black gloves.

#1. I started with a large candy bowl I got for less than $1. I then drilled some holes in the bottom of it.
(I underestimated how hard it would be to drill the holes–my drill was sliding all over the place, and I even cracked the bowl a bit. Oops. I guess I was trying to put a little too much muscle into it!! I’m never one to under-do much of anything…)
HELPFUL TIP!!! This year I’m making crazy purple Minions (!), and I realized that it’s a million times easier to drill the holes from the inside! I wish I had figured that out last year! Just flip your bowl over (so it’s actually right-side up as if you were going to serve something in the bowl) and drill into an old rug or some magazines to cushion it a bit. Piece of cake!

#2. Spray the living daylights out of that candy bowl with yellow spray paint.
(I made two Minion costumes, and between the two bowls and the two poster boards, I ended up needing two cans of spray paint. I also discovered that it helps if you rough up the bowl a bit with some sandpaper. That will help the paint adhere.)

#3. Spray paint a piece of poster board. I used a pretty large piece of poster board (sorry, I didn’t write down the dimensions last year). If you do need a little bit more room, just cut a piece from another poster board and tape it on the inside to the larger piece. To be safe (and to save yourself a trip back to the store), perhaps you want to have two pieces of poster board just in case.


#4. Weave some hair into place. I used thick yarn; you could also use black pipe cleaners.

#5. Secure the yarn. I originally just tied some knots, but the hair fell right out when I turned the bowl over. So then I taped them down as well. Worked like a charm.

#6. If you use yarn for the hair, pull the yarn apart to make the hair appear crazier! :)

#7. Wrestle with your poster board, show it who’s boss, and tape it to the bowl as best you can… this step isn’t pretty. I was glad no one was watching me do this!
On second thought, it might be smart to have another person help you do this part!


#8. Cut some arm holes. You might want to slide the contraption over your child first to get a sense of where you want to make the cut.

#9. Adjust the arm holes. I started with small holes, and then made them bigger as needed. You definitely need the holes to be large enough in the end so your child can get the costume ON. It can be a bit tricky to wiggle into it! We found that it’s easiest if your child holds her arms up, someone else slides the costume over her head, and then she pops her arms into the holes at once. (For a more detailed description with tips for getting it on and off, please see the comment section at the bottom of this post.)

#10. Figure out the height of your child’s eyes, and then cut accordingly. (Don’t try to make the cut with your child still wearing the costume, of course!!)

#11. To make the costume more comfortable, add some shoulder straps inside. I used old socks; my friends used some fabric scraps. We all secured them with duct tape.

#12. I found that the straps were sliding off my girls’ shoulders, so I also used some duct tape to hold the straps together across their backs. This seemed to really help, but you could do this step after-the-fact if needed; perhaps your child’s costume will sit fine without doing this.

#13. Create some teeth. I simply cut some printer paper quickly and added some lines with a pen.

#14. Tape in the teeth (from the inside), and cover the seam where the bowl and the poster board meet. I used black duct tape, but you could also use a glue-gun to secure some black fabric.

#15. Add some eyes with tape or a glue-gun (I used packing tape). Look around the house for anything that might work. I used the lid from a large plastic jar of almonds for the single eye, and for the two-eyed Minion, I used two small cans. (When making chicken chili, I was dumping in the chopped green chilies, and I realized those cans would make perfect Minion eyes!!) One of my friends cut a large oatmeal container to make an eye. We also just taped some white paper inside to create the white of the eye and then drew an eyeball (to match each daughter’s eye color, of course!).

#16. Time for clothes! I cut some blue fabric (I bought a yard per Minion I think… maybe 1.5 yards, and I still had leftovers), and I traced the “Gru logo” on the center of the overalls. Find the logo my friend created here–simply print it and then cut it out.
(Only now that I’m writing this post a year later do I realize that the logo I drew is upside down!! The little “stick” on the G should be on the bottom and not on the top–oops! Turn it over when you do it, people!!)

SEE BELOW FOR WHAT LOGO SHOULD LOOK LIKE.
(I accidentally traced mine upside down, and I’m only just realizing this a year later!) :)

#17. After tracing the logo, fill it in well with black marker. I used a Sharpie.
Note: Mine is upside down below. OOPS!!! Look at the Minion cartoon above for how it’s supposed to sit!!

#18. Attach the fabric to create the overalls and straps. I used a glue-gun for this. I then glued on some large, black buttons. (I couldn’t find black buttons, so I just painted some. This was the first time I had ever really done much spray-painting, and you kind of get addicted! After a while, it was like, “What else can I paint?!”)

Ta-da! MINIONS!
Tip: The yellow paint might start to scratch off the bowl over time, especially if your child wears the costume multiple times (to school, a Halloween party, etc.) To help prevent this, we did spray on some Polyurethane (found near the spray paint at stores). That seemed to help. This step isn’t necessary, though.

Other items needed: Jeans, a long-sleeved yellow shirt, and black gloves.
You could also add some black tulle fabric across the mouth. That will hide your child’s face but still allow him/her to see. I actually did that (but forgot to take a picture of that step), but the fabric wasn’t really dark enough. You can hardly even tell it’s there.
On two of the girls’ costumes, though (follow the arrows below), their mom took some tulle fabric that had a denser weave–she could only find white, so she spray-painted it black. Whatever she did, it worked! Look how well it hides her kids’ faces–I think it’s a great final touch for a fun costume!


Hats off to my friend for this awesome idea! Love it! I hope you do, too.
Have a fun Halloween everybody! :) It will be here before we know it!
If you’d like to keep up with me and my blog, please follow along via Facebook, Pinterest, Twitter, Instagram, Google+, or you can sign up for my monthly newsletter in the footer of my site! :)


I’m having a terrible time finding a bowl that doesn’t have a flat bottom! I’ve looked at Walmart, Dollar Tree & Dollar General. Anyone else have this problem or have a solution?
Shoot, sorry! I just saw some perfect bowls at Target!! Hope you find something!
Thank you very much for this awesome idea made one for my little girl this year and I had made her with pigtails and eyelashes using pipe cleaners. I used the trick with heating up the nail and it was perfect and fast!! Also put her in a blue jean skirt. A little girl minion super cute. I wish we could post pictures on here. I can’t wait for Halloween. Thank you again!!
I did this just today and it turned out great!!!
I used the elastic headbands from dollar tree that hold your hair back for the strap on the goggle. I also used the left over cardboard for the eye part of the goggle. My son loves it and it turned out awesome!! Thank you and your friend for such an awesome idea and tutorial!!!
Yay, so glad!! Sounds like you were very resourceful! Glad it worked out so well and that you didn’t have any trouble with the tutorial!
My work has a costume contest every year for Halloween and I paired up with my other coworkers in the same position as I and made us all the minion costumes for this years contest. It was a success! First place wins $100 and our boss loved them so much that we all won first place, $100 each! So thank you for this brilliant idea! We are all grown adults and it still worked for our shape and size. Just took a bit more poster board and very large arm holes.
Thanks again!
This is great to hear!!! I bet you guys were quite a sight in your costumes! Congrats on the big win! :) So much fun!
This is such a fun costume idea! I linked to it in my blog post on Halloween costumes for siblings. Thanks for the idea!
Thanks, Cathy! And thanks for linking back, too! :) Happy Halloween!