
I might live in the South now, but I’ll always be a Minnesota girl. This year we’ve had a cold winter even for the Carolinas, and I must say that there’s this feeling of comfort and familiarity that comes over me every time I get to put on mittens and boots. Well, let’s just say I had that feeling of “coming home” a lot this year!
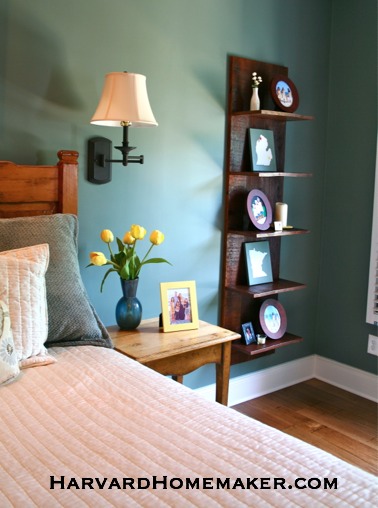
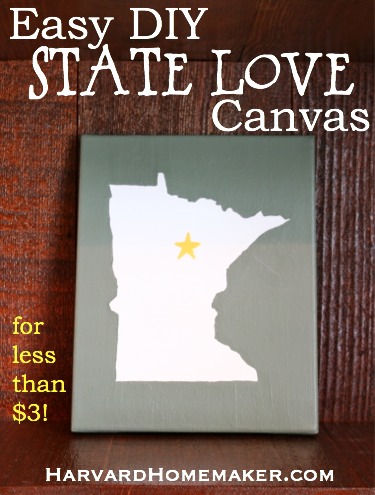
So even though I’ve put down new roots away from my home state, Minnesota will never be far from my heart. And since my husband is from Michigan and we also got married there, I decided to show Michigan some love as well. We recently had some new shelves built in the corner of our bedroom (I wish I could say we were handy enough to build them ourselves!), and even though I wanted to display a lot of pictures, I didn’t want every single shelf to hold a frame. I thought I should mix it up to make things look better… so I decided to make these canvases to give us a reminder of some of the most special places in our life.
I absolutely love how they turned out! They were super easy to make, and they cost me only $2.50 each! Not bad for an afternoon of work. See the step-by-step tutorial below to make one (or more) for yourself!
Find another easy DIY canvas idea here. My kids even helped me make it!
Disclosure: Some links in this post are affiliate/referral links. Please click here for further explanation.

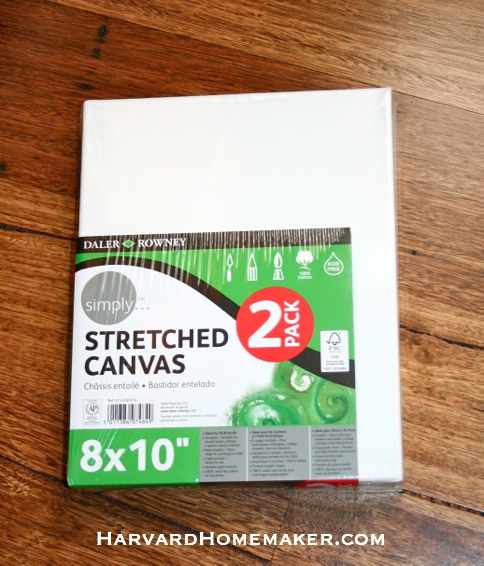
CHOOSE YOUR CANVAS
I bought a set of two 8 x 10 canvases at Wal-Mart for $5. So each canvas only cost me $2.50! They may not be the most high-quality canvases on the planet, but they were good enough for me. I needed mine to be fairly small so they would fit on our shelves, but you could use any size as long as you can find a state to paint around that fits properly.
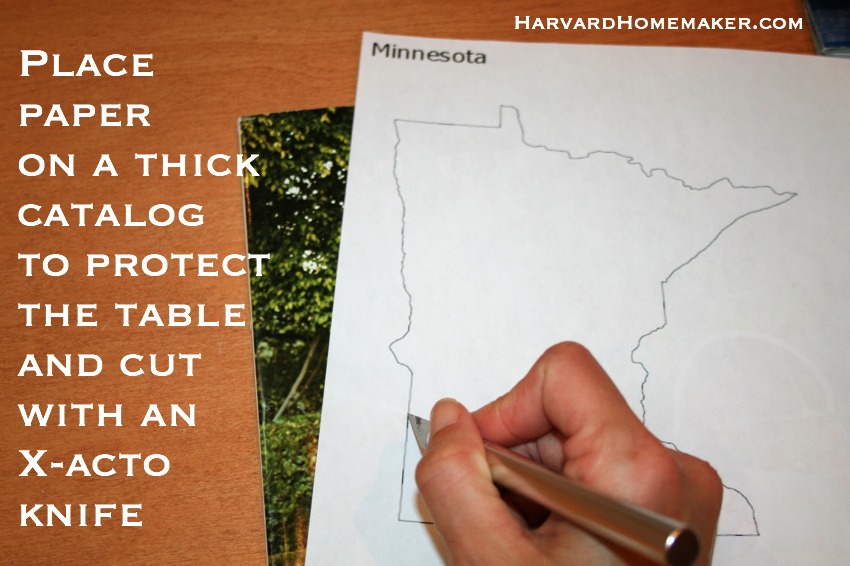
FIND & CUT OUT YOUR STATE
I printed my states by finding a website to download the maps (for free) – find all 50 states here. I simply printed on a piece of standard copy paper. You could also use a map you have on hand (that would work well if you wanted to make your map larger than an 8 1/2 x 11 sheet of paper).
Another idea: print a map of the entire United States and place stars or hearts on the various places you want to highlight.
Once you have your state, use an X-acto knife (find one here) to carefully cut it out. This really isn’t as hard or as time-consuming as it might seem – it doesn’t have to be absolutely perfect.
Tip: Place a thick catalog under your paper to protect the table from the blade.
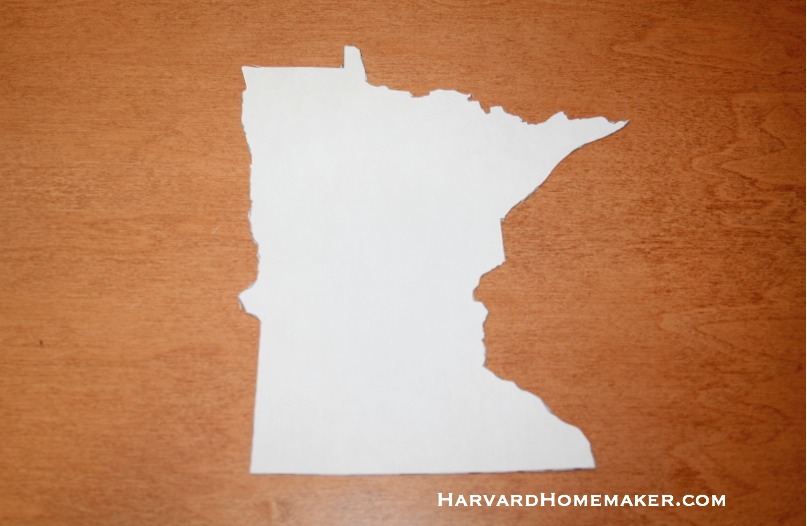
It looks pretty good! And Minnesota even has a lot of tricky spots to cut. The X-acto knife really makes it fairly easy.
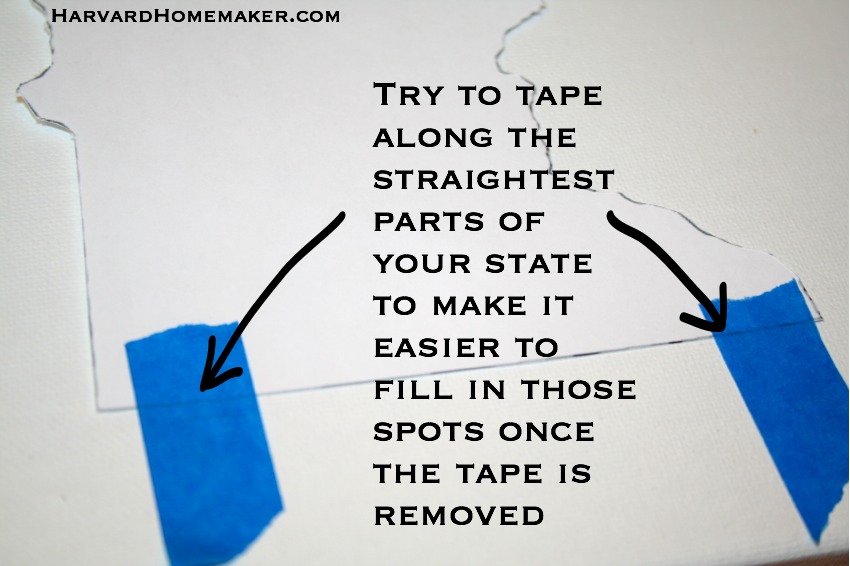
TAPE YOUR STATE TO YOUR CANVAS
Center your state carefully, and then use painter’s tape to secure it. I tried to put tape in places where the state lines were fairly straight. That way, when I pulled the state off, I basically just had to paint straight across without worrying about intricate state lines.
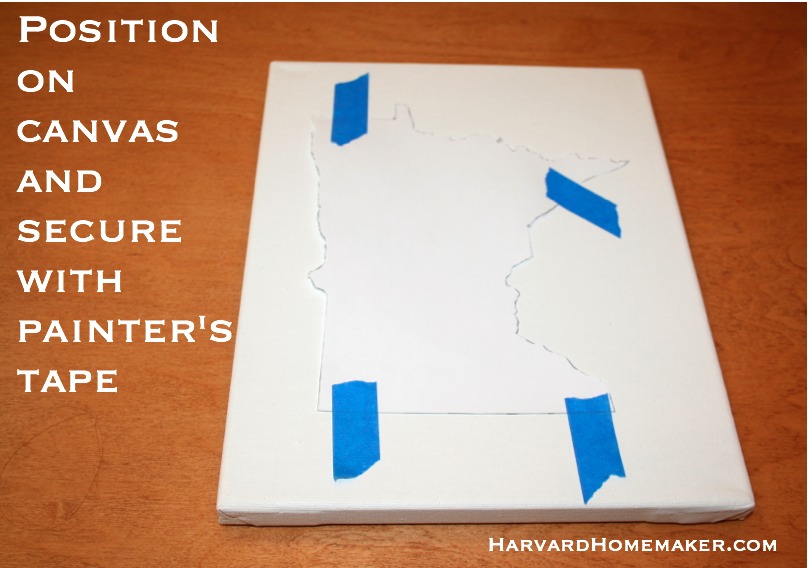
Note how I tried to place the tape across the straightest portions of my state.
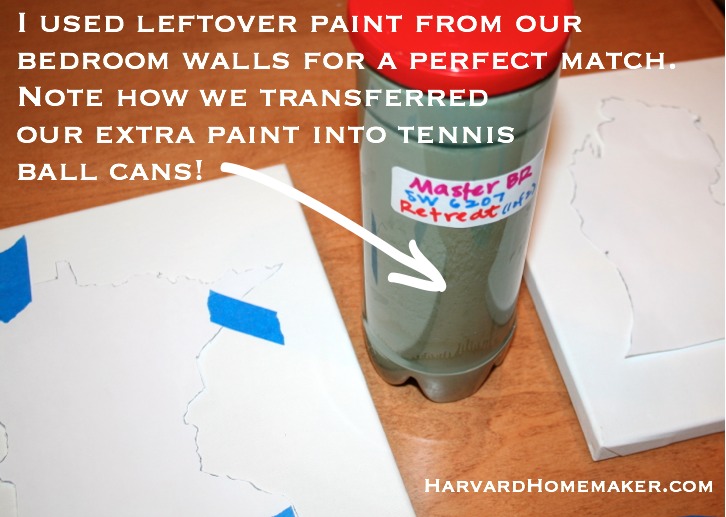
CHOOSE YOUR PAINT
I chose to use leftover paint from our bedroom walls so I knew the canvas would perfectly coordinate with our room. I’m sure any paint would work just fine.
*Note that we have transferred our extra paint to tennis ball cans! This has been a great system for us – we were able to get rid of so many paint cans that were taking up precious space in our garage! Some only had a very small amount of paint remaining, yet we wanted to hang onto the paint for any necessary touch-ups. Someday I’ll write a post about this handy way to organize your paint and keep it visible, too!
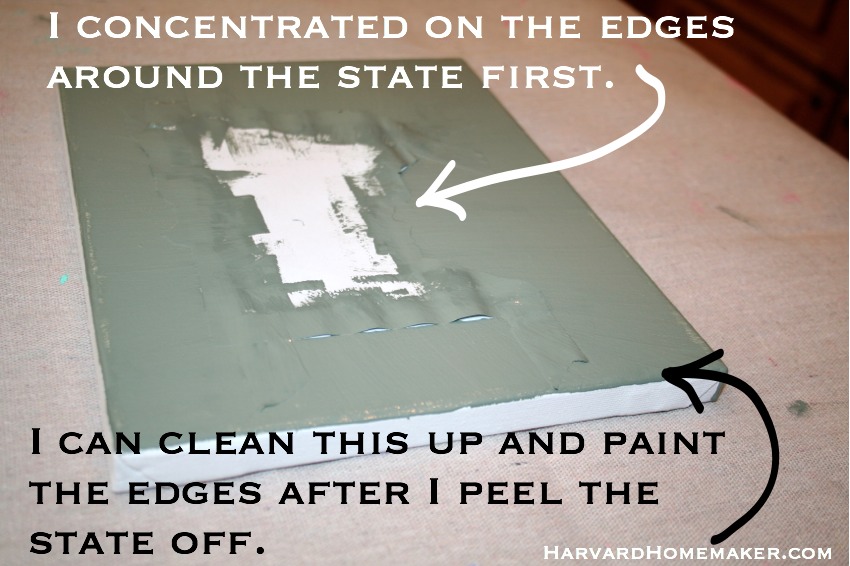
GO AROUND THE EDGES OF YOUR STATE WITH OUTWARD STROKES
Begin by painting around the edges of your state. Pull with outward strokes to help prevent the paint from seeping underneath the paper.

I focused on the edges of the state first. I knew once I peeled the state off, I could fill in the rest more completely.
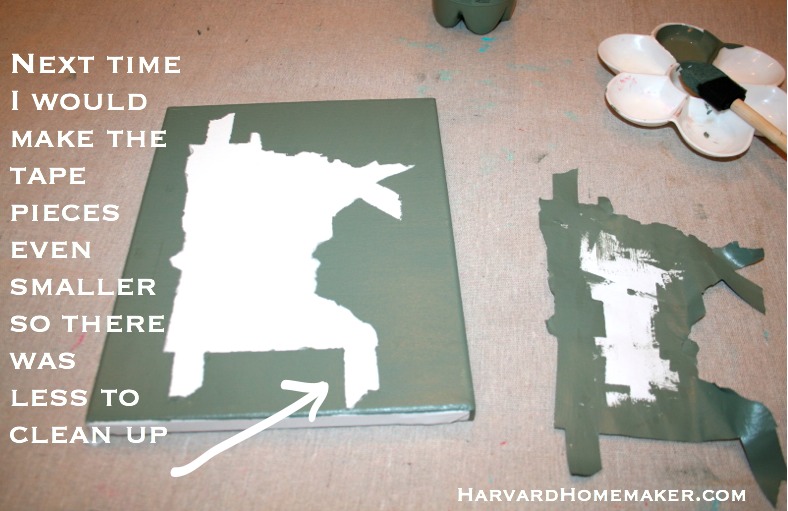
REMOVE YOUR STATE AND FINISH PAINTING
When the paint is dry (or close to it), carefully remove your state. Next time I would try to use the smallest pieces of tape possible to make the “clean up” portion even easier because you can still see the “tape spot” faintly even after filling it in with paint. I used my regular foam brush to fill in the tape spots, and I also painted around the edges of the canvas.
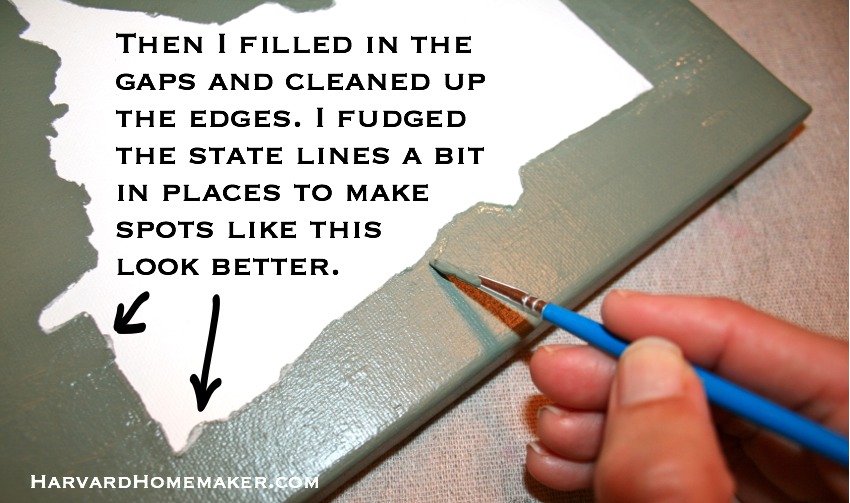
CLEAN UP THE EDGES
Next I used a smaller brush and cleaned up the edges where the paint had seeped under the paper a bit (this is basically inevitable). I fudged some of the state lines a little to make the edges more distinct.

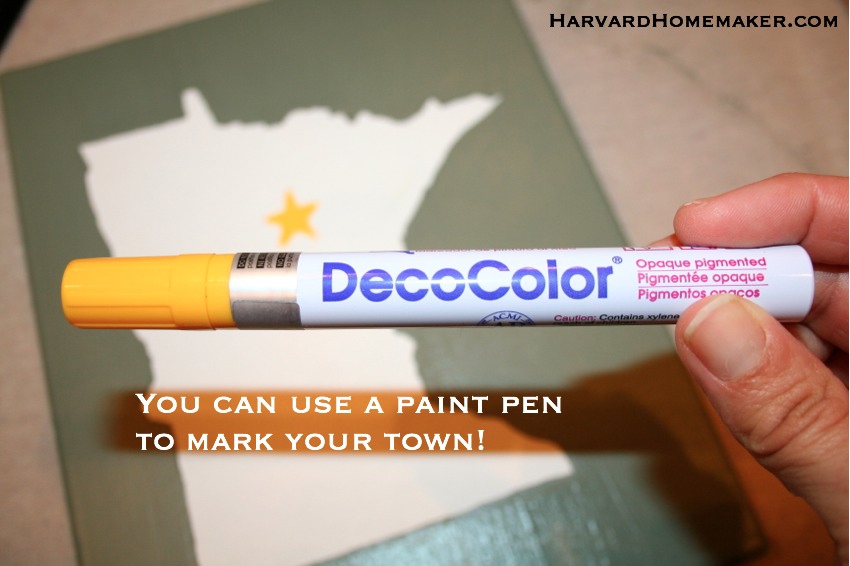
ADD A STAR OR A HEART TO MARK THE TOWN
I used a paint pen as shown below, and I simply drew a star on my hometown. On the Michigan canvas, I marked my husband’s hometown with a star as well, and then I drew a heart where we got married. You could also mark the place you met; where you spent your honeymoon; places you’ve lived, etc. Perhaps one day I’ll create a canvas for each state we’ve lived in and have a complete collection to help us remember all our stops in life!
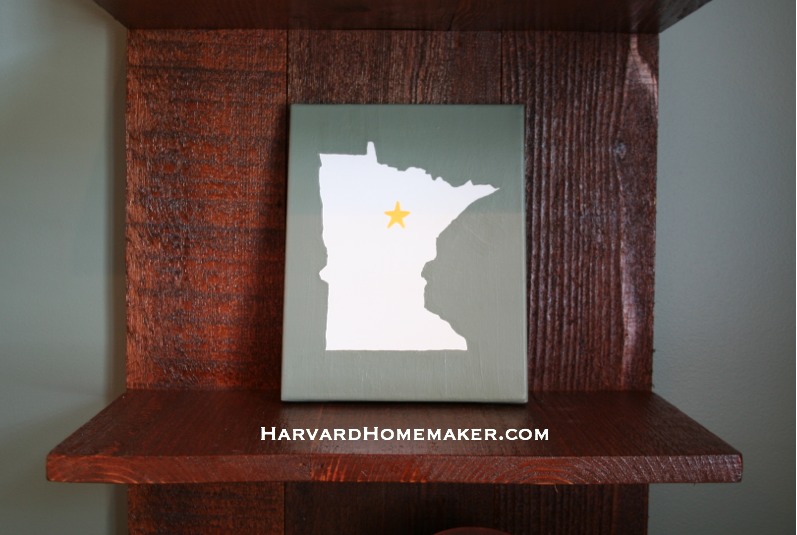
LET YOUR CANVAS DRY COMPLETELY AND DISPLAY IT!
I must admit that I’m pretty excited about how this turned out!
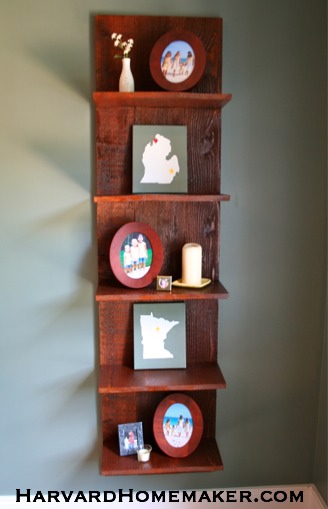
THE WHOLE DISPLAY
You can see that I added some rounded shapes on the shelf to break up all the straight lines, and the canvases also bring in a different texture for variety.
A note of apology: So sorry, upper peninsula of Michigan! I couldn’t get you to fit right on my small canvas. Do know that I think you are one of the most beautiful places in all of the United States, and I surely do love you! Please forgive me for leaving you out. :(
WONDERING ABOUT THIS PAINT COLOR?
Our (renovated) bedroom FINALLY feels complete! I love the addition of our new shelves and everything that’s on them! There was always something missing in that corner of the room.
If you like the color of our walls, it’s SHERWIN-WILLIAMS 6207. The color is called Retreat. It’s really beautiful in person. Kind of a gray-blue-green. We are so happy with it!
Like this State Canvas idea?
If so, please “Pin” the image below so your friends might be inspired by it, too!
Thanks for spreading the word!

Even if you aren’t too crafty, I bet you can pull off this project without any trouble! :) And you’ll feel so proud of yourself, too! I know I do!
OTHER IDEAS: You could also stain a board and then paint with a lighter color around the state. Or you could use the “stencil” part of the state’s outline (and discard the state itself) to paint the state on the inside and then have the outside edges of the canvas remain white (so your finished result would be the opposite of what I did). You could even paint the canvas all one color as the first step if you wanted your state to be any color other than white, or use painter’s tape to create a striped pattern perhaps. Lots of options if you let your mind wander!
Happy creating, my friends!
If you’d like to keep up with me and my blog, please follow along via Facebook, Pinterest, Twitter, Instagram, Google+, or you can sign up for my monthly newsletter in the footer of my site! :)


Great tutorial :) ..Thanks for sharing!
I enjoy the sharing! :) I hope you found some inspiration here!
I love this :) I am from MN (born and raised), and just recently moved to Savannah. I was trying to think of fun ways to incorporate my hometown into my new place. Thank you for this!
Yay for Minnesota!! And yay for living in the South now, too! :) We do love it down here, so I hope you’ll enjoy life in beautiful Savannah! The weather is pretty great in these parts, I must admit! Glad you found some inspiration in this post!
Oh I LOVE this! I am a Minnesota girl living in FL now. I was looking for something to put on a wall in our bedroom and this is it! So creative!
Where did you get the shelf the canvas are sitting on?
A carpenter actually made it for us. I love it!
Very cute and simple craft!
I did see where you apologized for not getting the UP in your Michigan picture but I believe you should have selected another state instead of only part of the state. Yooper