
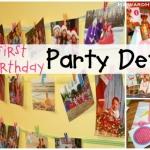
When my youngest daughter’s birthday was approaching, we happened to be at the beach for a few days–lucky timing for me! I think there is no better place to take pictures than at the beach. And I thought it might be fun to grab a bunch of balloons to add some color and mark our daughter’s one-year celebration. I’ve never used balloons on the beach before, but I really think they made the pictures extra special. (Click here to see how I used one of these pictures to create her first birthday party invitation and matching thank you note.)
Things almost went awry from the get-go, though. My husband ran out to the grocery store in the morning, and I asked if he would order a mix of balloons while there to be picked up later in time for sunset. He proudly came home with a colorful bunch of balloons already in hand; I didn’t have the heart to tell him that I wasn’t sure they would still be floating by that night! Sure enough, they were practically sitting on the floor eight hours later. Poor guy thought he was being so helpful by checking it off the list first thing in the morning!
Then on the way to the beach, we realized that it was pretty cloudy. There really wouldn’t even be a sunset–but at least it wasn’t windy and no one would be squinting! (You can’t have everything!) We were meeting my parents, and they weren’t even sure that it was worth taking any pictures because there was very little light left. I told them the photos would be dark, but I thought I could adjust the lighting afterward so they would still be useable–I wasn’t about to bail on the whole thing! I mean, I had just gotten myself and four girls ready and out the door!! And we had BALLOONS, people!!
So when we finally arrived at the beach, we headed out toward the water. I buried the little coffee cup that the balloons were attached to down in the sand, stepped back, and right on cue, the balloons proceeded to lie straight across the beach and on top of the baby. While my husband was throwing up his hands and muttering some nonsense about not even using the balloons, I quickly moved to plan B. (Not use the balloons?!! That was crazy talk.) I happened to have a scissors with me because I had promised the girls they could let the balloons go one by one when we were all done, and so I cut off some extra ribbon hanging from a few balloons and tied all of those pieces together. I took that one long piece I now had and tied it to the balloons, and then I wanted someone to hold that off-camera to pull the balloons up. (Meanwhile, the sun was going down quickly, and it was getting darker by the second… ah, the joys of a family photo session!)
My husband was already maxed out at this point with the balloon debacle, and we had yet to take a single picture. (Are all husbands this way when pictures are involved? Because it seems like some kind of rule to me!) So my dad came to the rescue, and he calmly took over balloon patrol. If you look really closely, you can see the ribbon he’s holding! :) It actually worked out pretty well because I like how the balloons sit straight up and then kind of curl over the top of the baby.
You can see how dark it truly was in a few before and after shots. Someday I will write a post showing you how I use iPhoto to edit my pictures. And yes, I edit almost every single picture I take. Even if it’s just some quick cropping or adjustment of lighting. It makes a world of difference–you can take a so-so picture and make it one to remember! I think the photos below demonstrate exactly that.
Hopefully these shots will give you a little inspiration! I think balloons add an element of happiness and fun to any photo for any age group!
And happy first birthday to my sweet girl! You’re the best little caboose our family could ever dream of having. You make us perfectly complete. xo

The Power of Editing
See how dark it really was in the photo on the left? The photo on the right is the exact same photo, but I played with the lighting (and I removed some beach debris). The picture above is actually the same photo as well. In all the photos below, I edited everything a little differently to help show you what a difference some simple clicks make! If you have never edited your photos before, I highly recommend it! I have tried various programs, but I keep coming back to iPhoto myself. And if you don’t have any photo editing software, you can always take a few minutes and make enhancements at some of the photo sites (such as Shutterfly) before you order any prints. It’s worth the extra minute or two to crop, adjust color, fix red-eye, etc.!

This is the first picture I ever got of her standing up all by herself! We were all cheering like crazy behind the camera! :) You can tell that she is not too sure of everything–I think she just didn’t want to sit down in the sand!

The picture above wasn’t anything special when I first uploaded it. But with some editing as illustrated below in iPhoto (just a few clicks), this shot is now one that we all love! You can see that I obviously adjusted the lighting, but I also cropped the photo, tipped the horizon, and I removed some of the beach debris that I felt was distracting to the eye as well.

This shot shows you the “antique” effect. I use this one a lot–I love the vintage feel it gives any photo.

The picture below is the same shot, just edited differently. The options are endless! I could spend hours messing with this stuff!!!

“If you’re happy and you know it, clap your hands!” I love how her little foot is peeking out in each picture, too. :)

Still clapping… we are all singing to her behind the camera! :)
Here’s a black and white version to give you another example of what editing can do. Again, this editing has all been done with a few easy clicks in iPhoto. (The software came with my computer–I didn’t have to purchase it.) And if you don’t like what you did, you can simply undo it and go back to the original. So there’s no worry about somehow “ruining” the original image.

Bring in the sisters! :)
We actually took tons of photos… sisters, our family, grandparents–and all kinds of combinations in between. Despite the balloon debacle, the cloudy night, and the fact that it was practically pitch-black by the time we were done, I’d say it was a successful 20 minutes! I’m so grateful to have all these special pictures to help remember our daughter’s first birthday!

Bye-bye balloons! It’s been fun! (It took them a while to make their way into the sky… not too much helium remaining!) :)


This was my first go-around using balloons for pictures, and I would definitely do it again. Although I think I would pick up the balloons on the way next time. :) If you don’t have a beach nearby, you could always head outside into a grassy area or a field. With the green grass and some colorful balloons, you would surely get some fun pictures–maybe even throw in a fun chair or a chalkboard sign. Or even an urban setting could be great: check out this amazing picture of a bride holding balloons with the city in the background from Lovely Life of Liz. So simple and yet so beautiful! Lots of ideas. I hope you’re inspired to grab your camera!

In the post that followed this one, I showed how I used one of these photos to create a simple party invitation and coordinating thank you note–take a peek if you’re interested!


I use a PC so iphoto was not an option. My husband found that I could download Google Picasa for free and it has been working great. I hope this helps other PC users. Still working on my photos and looking to make an invitation. Thanks for the great ideas!
Hi Stephanie! I have never used Picasa, but I’ve heard it’s great. Thanks so much for sharing that tip for PC users! :) I hope your invitations turn out cute!!