I love to create my own invitations. I actually used to have a hand-designed stationery business where I used my own handwriting as the font. But it was time consuming since I had to measure everything with a ruler to make sure it was centered! So eventually that went by the wayside after baby #2 arrived, but I still really enjoy cards, stationery, invitations, and the design process. I often make them on the computer and print them out, but I did things a little differently this time around.
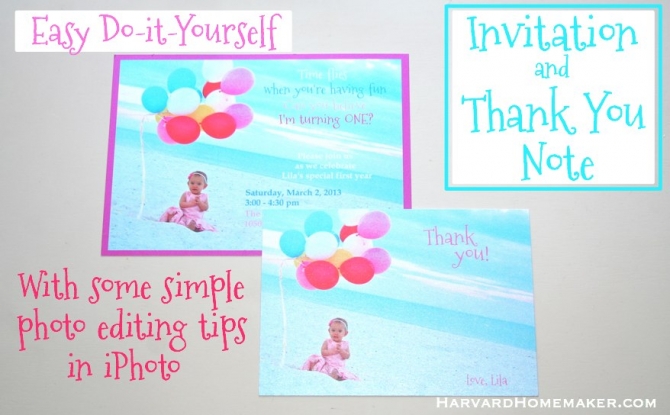
I recently shared a photo session of my youngest daughter where I got some cute pictures of her on the beach with balloons. Afterward I decided to use one of these pictures to create her first birthday party invitation. Side note: we don’t live near any family, so we were actually only inviting 6 of her little friends and their siblings to her low-key party (find many fun pictures of her playgroup buddies here), and I know an email to the moms could have sufficed, but it’s so fun to have a special invitation to tuck away–especially for a first birthday! I couldn’t help myself–and besides, I love this stuff!! You only turn one once! :)
Oftentimes when I upload my pictures to sites with pre-designed cards, the text ends up on top of someone’s face or I don’t care for the layout, etc. But I just discovered Wishing Tree Designs when making these invitations, and I love how you can be in charge of all that there! For this particular invitation, I did something even easier yet–I actually added the text myself using Skitch, a free program I downloaded on my computer, and then uploaded the picture all ready to go to Wishing Tree Designs. I was able to add a bright pink border there and print the cards on special paper that rivaled Minted’s “pearlescent paper” for about half the price! (And in my opinion, Minted’s paper is the ultimate when it comes to stationery!!! I am a huge fan. Although I will say that Minted’s envelopes were far superior to those from Wishing Tree Designs if that’s something you care about–but remember that you will save a lot of money at Wishing Tree Designs, and you can create your own design there, too. I also just received an email from them–they are currently offering 25% off your order plus free shipping with the code EASTER25).
Below I will detail the steps I took to create my cards. You could do just about anything you can dream up! Have fun with it… maybe you could even get a head-start on personalized cards for Mother’s Day or Father’s Day!


Edit Your Photo if Needed
I started with a picture that had a lot of room around her for the text. The photo was actually really dark, so I did some editing in iPhoto as shown below. You can obviously skip this step if you are happy with your photo! :)
I started by hitting “enhance,” and then I also used the “retouch” feature. I often remove blemishes, baby drool (!), or shine on a person’s face with that tool, but here I used it to erase some beach debris that I felt was distracting to the eye.

The photo was still very dark, so I pulled the “shadow” button completely to the right, and then I had to pull the “contrast” button to the right as well or her dress and the balloons would seem too faint. I also added a ton of exposure, but you can’t add too much or the photo seems almost futuristic! I continued to play with the saturation and highlights, too.

Ultimately, I decided to tip the horizon as well to add a little interest; I cropped the photo to a 5×7 size (what I was choosing the invitation to be–there are various sizes available); and this is what I settled on:

Add Text (or Upload Picture to Wishing Tree Designs to Add Text)
I then dragged the picture into Skitch to add the text. (This is the free program I use to add text and arrows to the pictures you see on my site.) While I don’t love Skitch in every way, it does what I need it to do for now. You can also skip this step and go right to Wishing Tree Designs to work on your layout if you don’t want to add your text first.
I used the font Mountains of Christmas (totally obsessed with that cute font these days!) and I also mixed in some Book Antiqua–that’s probably one that you already have on your computer. That was my go-to font when I wrote papers in college, so I have a fondness for that old standby, too. :)
Ta-da!
You can see that I erased some of the personal information, but you get the idea. I love that I could match the font colors to the balloons and drag the words exactly where I wanted them to be.

I was then able to upload this image exactly as is to Wishing Tree Designs. I chose the “luxe pearl” paper, and I was very happy with it when it arrived. Like I said above, the paper reminded me of Minted’s “pearlescent paper,” which I think is about as deluxe as you can get!! :) I went with a card that would give it a bright pink border around the edge, and I simply dragged the size of the photo until the border was the width I wanted it to be.

Once I realized how easy the process was, I quickly went back to Skitch and created a simple thank you note to match using the design below.

Here’s the card itself. It’s smaller than the invitation, and it doesn’t have the border. If you look closely, you can possibly see the “sheen” the paper gives off because of the pearl texture I chose. (There are various paper options.) I can write her note of thanks on the back of the card. (Note that the Wishing Tree Designs logo is printed on the bottom of the back of the card, but this wasn’t a big deal to me.)


I hope this little tutorial helped to give you some ideas! You could take any photo that you love and add text around it to create an affordable invitation, card, moving announcement, birth announcement, etc. The options are endless!
If you make something, I’d love to hear about what you create! :)


Thanks for sharing this wonderful idea, it was really a helpful one.
I appreciate your ideas here. :) Cheers!