I love to organize!!
Okay, that may be overstating things a bit.
Let’s rephrase: I love to be organized.
I think all of us love to be organized, whether we admit it or not. Let’s face it, there is so much less stress in life when things aren’t a complete debacle.
Sometimes I really have my act together on that front, and other times–not so much. When I can’t take the chaos anymore, it’s time to reassess! Every January, I always seem to get the bug to revise my “systems” because after a while, things just seem like they aren’t working. This has brought on simple changes in the past, like moving things around in closets and labeling bins; but it also led to a renovation project one year where we actually widened our hallway and added cubbies to create a mudroom of sorts. (Ahhhhh… so much less stress in the mornings now!)
With four kids, I always seem to have a hard time getting out the door. Being (somewhat) organized is practically a law for moms. Kids dressed: check. Bags ready: check. Shoes on: check. (Except for the time I forgot we were picking up one daughter and then going straight to the dentist–so two of my girls weren’t wearing shoes since I had told them they wouldn’t even need to get out of the car. Oops! Okay… so maybe it’s happened twice…)
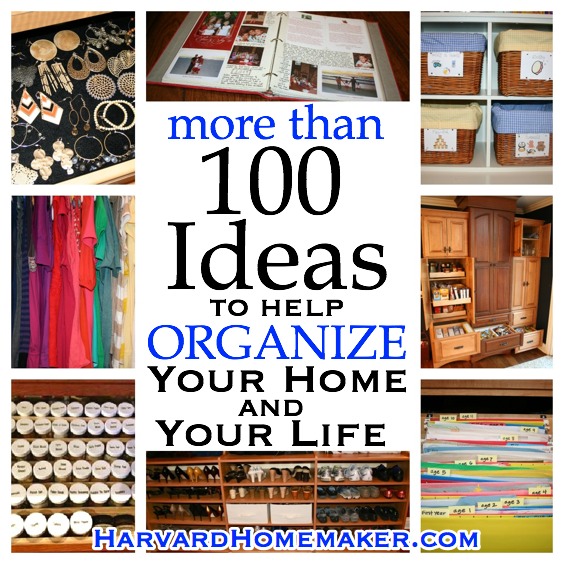
Anyhow, if this time of year also makes you feel the need to get more organized, this post is for you! Along with the help of some friends with super-smart ideas, I have detailed every possible way I could think of to help you tame the chaos in your home, and most importantly, get time back in your day! (Let’s note that I DON’T ACTUALLY DO ALL OF THESE THINGS!!! Ain’t nobody got time for that! These are simply ideas!)
This post is massive–there are over 110 ideas here–and it took me almost two months to write it. (I didn’t realize quite how ambitious I was being when I first started it!) I have made it as visually appealing as possible so you can skim it and stop to read certain sections that catch your eye. I’m honestly not sure that there’s anyone out there who will read every single word (except for maybe my dad!), but I hope various ideas grab your attention and give you some inspiration! Not everything may work for you, your family, or your home, but if even a few ideas help to make your life a little less hectic, then all the time I spent on this post will be worth it! :)
May 2013 be your best–and most organized–year yet!
(And as always, please share any of your own favorite tips in the comments below… I’d love to know what works for you!)
Disclosure: Some links in this post are affiliate/referral links. Please click here for further explanation.

LAUNDRY
Pre-sort Laundry in Bins with Dividers and Use Color-Coded Labels
THIS IS MY #1 TIP!!!
Using a three-bin laundry sorter saves us so much time!!! We have one in our master bedroom and one in our laundry room. When one slot is full, we simply throw that load in. It makes it easy to stay on top of the laundry and wash clothes throughout the week. We even have color-coded labels (print mine here) so the kids can sort their own laundry before they can read.
If you do just one thing on this list to help organize your life, this is it!!
For more ways to save time while doing the laundry, please read this post with 30 Tips to Help Keep Your Laundry from Making You Crazy.
Tip: Don’t get a cheap sorter! I did that, and then when I would push it down our hallway, the thing would bend at a 45-degree angle! I literally had to hold it together with my hands while I pushed it. The wheels also fell off constantly. I couldn’t stand it anymore, so I got this one (it’s actually featured in the ad below where you can save 10%), and it’s a million times better. You can always order replacement bags down the line, so I highly recommend that you get one with a sturdy frame. You’ll be glad you did, and it will last you a long time! Otherwise yours might end up in the garage like my crappy sorter did!

Use a Lost Socks Rack (or Have a System)
I got this Lost Socks rack about a year ago, and it has been awesome! In the past, I never knew what to do with all the poor socks I came across that had no friend. (Seriously, what happens to all the matches?! When I was little, my mom told me that the dryer “ate” them, and I honestly thought that was happening! But I swear, maybe she’s on to something because we lose an absurd number of socks!! And I mean absurd.)
I think this rack adds a little character to our laundry room, but it’s also functional–the clips are well-made and strong. Each clip can easily hold 4 socks or more. I really love it! But if you don’t want to buy a rack like I did, you could make one–it seems pretty simple to me. Just grab a board and glue on some clothespins… voila! I’d love to see your finished product if you get creative!! :)
And if you don’t have room anywhere for a rack, just come up with some kind of system that’s better than piling the socks on top of the dryer! (my former–and terrible–method) At least put the lonely socks in a cute bin or basket–love this owl bin! :)

Fold Sheets and Towels in Thirds: Saves Space and Neater
Try folding your sheets and towels in thirds. I think you’ll be amazed by how neatly everything stacks! See the difference below: I first folded the towels in half; then I folded the same number of towels in thirds. Look how much neater the stacks are when folded in thirds–and there’s room for more on the shelf, too!

Fold Sheets in Bundles: You Won’t Misplace Pillowcases
I have a thing for nice sheets–my mom always told me to try to find sheets with at least a 200 thread count, and I think that’s a good tip. Great sheets last forever, and there’s nothing better than climbing into bed and feeling smooth sheets all around you. I also really like when they are neat because I think they lay better on the bed if they had been folded well. I have always folded my sheets in thirds because they stack better (illustrated by the towels above), but I have also started to wrap my sheets in a bundle thanks to a tip from my friend. It’s really handy to have the pillowcases wrapped right in with the flat sheet and folded sheet. Just grab a bundle, and you know you’ve got everything you need for that bed. Easy!
The sheets below are all queen-sized, except for the cream sheets–those are king-sized! Look how tight the bundles are for sheets that big! Folding this way really helps make more room in your linen closet.


How to Fold Fitted Sheets for a Neater Linen Closet–FINALLY!!
The above idea is all good and fine if you know how to fold a fitted sheet… but that seems to be something we never learned how to do!
Do you start trying to fold a fitted sheet, and after having no idea what you’re doing, do you then just ball it up and shove it in the closet in frustration??! I used to do that. But now I know what I’m doing! :) It’s a great feeling–who knew there could be so much satisfaction in finally knowing how to fold a fitted sheet? Below I detail my method. I hope it’s helpful!


Don’t Keep Hampers in Your Child’s Room
I know this might seem counterintuitive when you are trying to stay more organized, but it really works! I can’t tell you how much neater our girls’ rooms suddenly were once we removed their hampers! No more dirty clothes spilling out of their hampers and all over their rooms! Luckily, our laundry room is fairly close to their rooms, so each night before bed they are expected to walk down the hallway and sort all dirty clothing by following the color-coded tags I attached. Even my non-reader can do that, and she feels so proud when she successfully put clothes in the right slot! It just takes a moment for them to toss in their clothes from that day, and I’m no longer walking from room to room to collect dirty laundry and then sorting it. This saves so much time!
I realize that not everyone may have a laundry room convenient to their children’s rooms, so perhaps you could collect your child’s laundry each night and then walk it to the laundry room yourself. It really is an efficient way to have a handle on the dirty laundry in the house, and it’s worth the minute or two it takes you at night to do this, I think–you’ll save so much time in the long run!

Match Socks Faster by Marking with Nail Polish
This is a great way to help you match socks when doing laundry! Just mark them with some nail polish… no more holding them up to the light to see if they’re black or navy… or striped or solid, etc. That used to make me crazy!! This is much more efficient, and you can have some fun with your marks, too. :)


Over-the-door Hooks for Beach Towels
My girls are on the swim team, so I am constantly trying to figure out what to do with all their wet towels! During the summer when we are also hitting the pool (remember we live in the south, and it’s HOT here!), the beach towel situation is out of control. I added an over-the-door rack with hooks on a door near our garage (where we come in and out), and it’s worked like a charm! We don’t go 10 steps before we have an out-the-way place to hang wet towels… and they can dry this way, too, so we can reuse them a couple of times before we have to wash them. No more towels hanging off any railing, doorknob, or chair my family can find–or worse, in a wet heap on the floor!

BATHROOM
Use a Tissue Box Holder to Store Plastic Shopping Bags
This is one of my favorite tips! Use a tissue box holder to store loose shopping bags–you won’t believe how many you can stuff into one box! I was just about to put this one in my “donation” pile, and then I had a lightbulb moment. Why not stick my million shopping bags in there? I used to just bunch them up inside one bag, but it saves so much space this way, and they are easy to access–you just pull one out of the top like you would a tissue!

Use a Clear Shoe Rack in Your Linen Closet for Medicines, etc.
This is another favorite tip. The back of any door brings with it unused space. If you have a linen closet or a small closet in your bathroom, this might be a perfect option for you!! Take a clear shoe rack and hang it on the inside of the door–it’s the best way to organize medicines and toiletries. With the clear shoe racks, you can easily see everything and find it in a hurry–especially at times when you or your child(ren) are sick and you are fumbling through things to find just what you need. You can hang medicines up high, out of your children’s reach, and keep items down low that are safe for kids. Think of all the space you can free up for other things!
And if you have a really narrow closet that won’t fit a shoe rack? No worries–just cut it! Works like a charm. The door shown below in the picture is a narrow door, but the regular shoe rack still fit anyhow–I just had to tuck it behind the handle.

Label Bins to Find Things Quickly in Linen Closet
As suggested above, if using a clear shoe rack to organize your medicines, etc. isn’t for you (and you have plenty of room on your shelves), then you can group things into various bins with labels. When you have a sick child or if you are ill yourself, it is awful to be digging through a mess of bottles in search of what you need–or worse, if someone is bleeding and you need to locate some first aid items in a hurry. By simply grouping your items and labeling your bins, you will locate what you need in a snap!

Build Shelves Into Shower Tile
This is a great way to organize everything you need in the shower! Before tiling, you build shelves in between the studs.
If you aren’t planning to re-tile your shower anytime soon, you could try using a tension pole shelving system like this.

Baskets and Holders for Toilet Paper by Every Toilet
I don’t know about you, but I cannot stand it when I reach for toilet paper, only to realize there is none! That is never pretty when you are trying to figure out what to do at that point! :) Also annoying: having your children screaming, “Mom!!!” when the same thing happens to them, and so you have to drop what you are doing to help out.
I now have a basket of toilet paper or some kind of holder by every single toilet in our house–it’s within reach, so you don’t even have to move. If you grab the last roll, you are responsible for heading to the linen closet to find more to replenish that basket. I hear “Mom!!!” a lot less now. (Please note that I have girls… and the toilet in our master bathroom is within arm’s reach of the linen closet, so my husband can just reach in there to grab more toilet paper if needed. If you have boys, having an open basket next to the toilet may not be the most sanitary idea!! :) For those with sons: perhaps you can have a basket across from the toilet! Or go for a holder like this where the toilet paper is completely covered. Another option: this holder actually hooks right to the toilet so it’s up off the floor–kind of neat and saves space, too!)


Use Hooks Instead of Towel Bars
I feel so strongly about this idea that I did an entire post about it! We now have hooks for towels in all of our bathrooms (even the master), and I love this new method so much!! Especially for the kids–we have the hooks hanging low enough so even they can reach them and be responsible for hanging up their own towels. Before, they used to try to throw their towels up on the bar, but they usually ended up on the floor. We adults are often hurrying, too, so it wasn’t very often that we took the time to hang our towels neatly on the bars. And now we can hang more towels up to dry, too, since the racks easily hold 4 or more towels. Our bathrooms are so much neater now!
For our bathrooms, we had a carpenter (unfortunately, we aren’t handy ourselves!) nail up a board and he then trimmed it out. The hooks were bought separately and added. You could also buy a ready-made rack with hooks. I recommend using hooks that angle upward slightly and are long–something like this. The rounded hooks that stick straight out do not work as well, and the towels will slip off the hooks. With a long, angled hook, you or your child could practically throw the towel up into the air and it will still land on the hook–and stay put! :) Easy!

Hang Hooks Behind Door for Robes and Towels
Just like I love hooks instead of towel bars (especially for the kids–hang them low so they can reach!), I also love our new hooks behind the door in our bathroom. They provide a perfect place for robes or longer towels. We had ours built in (the carpenter simply nailed up a board, trimmed it out, and then added the hooks afterward), but you could also buy a rack that’s ready to go.

Install Large, Deep Drawers
If you are thinking about switching out your cabinetry in your bathroom like we recently did, I highly recommend big and/or deep drawers! I love how almost every product I use can stand straight up in the drawer below. This allows for more to fit, and I can easily see everything as well. There is also plenty of room in the bottom drawer for things like my hair dryer–no more fighting to get that thing to fit! That used to make me crazy!!
If you pan down a bit to the picture where I suggest subdividing your drawers, you can also see how well that large drawer works. That drawer isn’t deep, but it’s big. I love how I can see all of my makeup, etc. at once. No more digging in multiple drawers or in a makeup bag I keep under the sink–I have everything right at my fingertips and then I simply close the drawer! Love it!

Subdivide Your Drawers
This one is a no-brainer. Do not just throw stuff in your drawers!! Not only will you find things more quickly if you take the time to organize them, but it’s also much easier to remove your bins and wash them rather than clean toothpaste, makeup, and hair out of the drawer itself–yuck! Use a junk drawer insert (this can be used for more than just a junk drawer!), small boxes (one of my favorite methods–you can use both the box itself and the lid), or plastic bins pieced together as shown below. I like to use plastic bins when anything might get wet. In a desk drawer, though, I often just use some pretty boxes that I’ve kept.

Use Clear Glass Jars for Pretty Storage
Pretty jars are so handy for all kinds of things, especially in a bathroom. It’s typical to store things like Q-Tips and cotton balls in them, but I also use one to store my makeup brushes. They are handy and easy to grab, and since they are inside such a nice container, it still looks presentable, too.
Another thought: you could store a bunch of unwrapped soaps in one and keep it within reach of the shower. No more tip-toeing, soaking wet, to grab another bar of soap! Kudos to my friend for this idea. I think she’d heard her husband shouting her name from the shower one too many times! :)
KITCHEN
Use Plate Racks to Store Pans
My friend came up with this idea–genius! She bought a wooden plate rack (and added a little wood glue inside the peg slots to add extra strength) and used it to organize her pans! So smart!

Use Online Grocery Shopping
I cannot even begin to tell you how this has changed my life!!! I wrote an entire post about online grocery shopping! It has given me so much time back each week. I wish I had started doing this sooner–especially when all my girls were babies. Think about it: do some clicking in the comfort of your own home at night; drive up to your local grocery store the next day and push a button; the groceries magically appear and someone loads your car up for you! You (and your children) don’t even have to get out of the car!! Give it a try!!

Keep List Handy with Pen Attached by a Ribbon
I would bet that most of you have a list handy in your kitchen for things you need to remember to buy. But is there always a pen handy? And is that list low enough for your children to reach and use? (the ones who can write anyhow!) If not, I bet a lot of things you run out of never make it on the list!
Our rule is “if you are the one to finish it, you are the one to write it down.” And if it doesn’t make the list, mama doesn’t buy it!! It’s not my responsibility to keep track of all that. We are a team, and my family can add things to the list just as easily as I can.
Our refrigerator isn’t magnetic, so I keep a notepad on our bread box where the kids can reach it. (Not sure if you can see in the picture that my daughter wrote “Fruit Loops” followed by “Just Kidding!” Apparently she thought they were a long-shot! She’s probably right…) There is also a magnet there on the right holding a long ribbon attached to a pen. Miraculously, I have had the same pen there for almost 3 years! It still hasn’t run out of ink. I’m telling you, this system works, people. :)

Cabinets and Drawers for Compartmentalized Storage in Lieu of Walk-In Pantry
This is a great option! Every dreamy pantry doesn’t have to be the walk-in type (although those are amazing, too!) You could also build your “pantry” into your cabinetry. See below. With the deep drawers and pull-out shelving, everything is compartmentalized and easy to find.

Organize Shopping Bags By Size
If you are like me, you cannot bear to get rid of shopping bags. (And nowadays so many stores have the really nice ones with–gasp!–ribbon handles and such!) I had shopping bags coming out of my ears, and I could never find the size I was looking for. I also store mine up high, so when I would reach for one, they would fall on top of me–ugh! I finally divided them up and labeled larger bags to hold them. It has worked like a charm, and I’m not digging for just the right bag anymore! So much more efficient.

Remove Paper Products from Plastic–Easy Access and Neater
This seems so simple, but it really works: when you buy paper plates and cups, do you keep them in the plastic? I used to do that. I would have like 3 plates left, and I would still have them inside the plastic–not sure why?! Finally I realized that if I simply removed all the packaging and stacked it all, everything was so much neater and easier to access. Duh! What was I thinking?!


Save Space: Remove Snacks from Boxes
If you keep all of your pre-packaged snacks in their original boxes, they are surely taking up a ton of space! Try removing everything and organizing them somehow–in baskets on a shelf, in containers in your pantry, or even in baskets that hang underneath a shelf to make use of unused space, etc. I simply pour our “lunch box items” into two large baskets inside a drawer in our kitchen. The left side is “treats” and the right side is “snacks”–there are some happy girls around here when I tell them they can choose a snack from “any side”! :) This saves so much space, and it’s easy to grab something in a hurry, too! I also realize when we are low on something because I can see it all–when the box is in the pantry, on the other hand, sometimes you don’t realize there’s only one granola bar left inside–or maybe the box is even empty and your kids (or husband!) put it right back on the shelf!

Install Drawers that Open Both Ways for Easy Access
Love this–my friend was so smart to install these cabinets with drawers that can pull out in either direction. She can unload the dishwasher into the drawer on one side; and then she can set the table from the other side near the table. Brilliant!

Always Double Meals When Possible and Freeze One
Thanks to some great advice, I started doing this when I was pregnant for the first time so that I wouldn’t have to worry so much about cooking when I had a newborn who needed my full attention! I have now been doing this for 10 years and it’s so helpful! It really doesn’t take that much more time to make two lasagnas instead of one–or to double a soup recipe. So for that (little) extra effort, the next time you can simply thaw and heat, and dinner is made for you! Very efficient!
* A reader emailed me and shared this great tip: she lines a pan with parchment paper (bottom and sides), and then freezes the meal (like a lasagna). When the meal is frozen, she pops it out of the pan so she can keep using her pan in the meantime. She then tucks the meal–now a “frozen block”–into a large plastic bag and returns it to the freezer. When it’s time to use it, the meal then fits right back into the pan perfectly–and even better, there is basically no cleanup because she can cook it right in the parchment paper! BRILLIANT!!! I can’t wait to try this!

Store Kids’ Dishes Down Low Where They Can Reach
I am all about teaching my kids to be independent. If they are old enough to reach the sink (with a stool), they can get their own water. They can help set the table. They can bring me their plate if I am serving up their dinner. That all starts with being able to get to the dishes! :) Consider keeping your kids’ dishes down low where they can reach them so they can start doing more for themselves–and that makes your life easier, too! (I found some fun personalized dishes here!)
* Another tip: I have learned that plates with squared-off edges are easier to store because they take up less space, so I snagged all the yellow plates below when I saw them a few years back! They even have dividers–love plates like this for kids!
* One more side note: Shutterfly (my go-to for just about everything photo related) now makes photo plates!! I like to give photo plates as gifts (and I write a little note on the bottom with a Sharpie) and now I can have them made right at Shutterfly where I already upload all my pictures anyhow for safe keeping–saves me a step! I often use a close-up picture of the child I’m giving the plate to–they think it’s so fun to eat and see their face start to become visible as the food disappears! It encourages good eating, too. :)

Hide Appliances Behind Cabinet Doors
I love this idea from my friend!! Hide your coffee maker, mixer, toaster, etc. behind retractible cabinet doors. Open it when you need access to everything, and then close it up to make the kitchen look neat! The second drawer shown is actually a bread drawer–perfect when you are going to make toast. And notice that the coffee cups are handy as well. What a functional space!

Install Refrigerator Drawers for Most-Used Items
Check out these handy refrigerator drawers! You can store the things you use the most right at your fingertips. So handy and it frees up space for other things in the refrigerator.

Create a Recipe Binder Instead of Using Recipe Cards
I abandoned my recipe box years ago–I got so tired of digging through worn cards to find what I needed. I still keep a folder of recipes that I want to try, and of course there are cookbooks that I flip through. But if a recipe is a hit and will surely become a family favorite, only then does it get a place in the esteemed recipe binder! I even copy favorite recipes from cookbooks so they get filed into the binder as well. It’s much easier to come up with dinner ideas when they are all in one place. And since the pages are made up of plastic sleeves, they are water-resistant; so when things splatter in the kitchen, I can just wipe the page clean–no more smudged recipe cards!
* If you have a collection of special recipes, you could also have a cookbook made at a place like Shutterfly or Blurb. When my brother was getting married, we put together a cookbook as a wedding gift for him and my new sister-in-law filled with favorite family recipes (and photos) from our entire extended family. Almost everyone ordered a copy for themselves, too. It’s a great way to keep track of family recipes that have been passed down for years! (Pan down in this post to see a picture of our family cookbook under the “keepsakes” section.)


Pull-Outs for Spices and/or Baking Items
These pull-out cabinets are so handy when cooking and baking. One shows olive oil and spices right at arm’s length near the cooktop; the other shows measuring cups and things you use for baking underneath the island. Love this!

Hidden Spice Rack Inside Cabinetry
Okay, are you kidding me with this?! The pictures speak for themselves. Look how there is a hidden spice rack in there!! There is no handle–the door opens with a gentle push. Such a great use of space, and everything is visible and easy to access. So smart!!

Transfer Spices into Uniform Jars and Store in Drawer
My friend deserves some kind of award for this genius move. Holy organization!!! She used to store all of her spices on a rack at an angle in her drawer, but she felt like that took up too much space and she couldn’t get everything to fit. So she bought uniform jars that would fit in her drawer (make sure you measure your drawers!!) and then poured her spices into them with a funnel. She then labeled everything with a label maker (every organized house needs a label maker!! I use mine to label light switches, bins, closet shelving, etc.) To keep the jars in line, she then added drawer dividers. And to top it off, she alphabetized them all!! Seriously–I think she needs a round of applause! So jealous of this amazing system!


JEWELRY
Insert Velvet in a Drawer for Jewelry–No Dividers Needed
I LOVE THIS TIP!! If you have any extra drawer space, consider making it into jewelry storage by inserting some black velvet. If you are afraid you will ruin the furniture, you could velcro the fabric down using removable strips (or you could glue it if you aren’t worried about the drawer). Make sure you choose some fabric that is on the rough side. Or go for the fool-proof method and buy an insert. Your jewelry will hardly move as you open and close your drawers–even the necklaces stay put! You can store more because you don’t need dividers for everything… give it a try!

Hang Necklaces on Tie or Belt Racks
This is the system I use for all my daughters. The tie racks hang low enough in their closets so they can reach. It’s not a perfect solution since it has to be fairly balanced, but it’s better than tucking them inside kids’ jewelry boxes (what they had been doing before). No more tangled necklaces! You could also nail a tie rack like this up somewhere (maybe inside the closet?)–then it wouldn’t move on you.

Use a Ring Holder Tray for Earrings
This is a great idea from my friend. She stores her hoop earrings in a ring holder. Smart!

CLOSETS AND CLOTHES
Use the Hanger’s Direction to Help Determine What You No Longer Wear
Hang all of your hangers in one direction. As you wear something, turn your hanger around. After a certain amount of time–maybe a year or so–if you have yet to flip a hanger around, there is a good chance it’s time to say goodbye to that article of clothing! I love this visual! It’s a fool-proof way to tell that you aren’t getting enough use out of something. You can clean out your closet in a snap! And you won’t have to feel badly about passing it on–either through consignment or donation–because there will be someone out there who can get more use out of it than you!
* Speaking of clothes, I want to share this new find with you! I recently stumbled on a site called ModCloth when I was looking for a dress with a vintage flair. They have great stuff! It reminded me of Anthropologie a bit (probably my favorite store!), but their clothes were much more affordable, and the selection is enormous! You’ll have to check it out! It will definitely be a site I will frequent now when I’m looking for something unique!

Keep Bags Handy for Donation or Consignment
It can be very overwhelming to go through your clothes to decide what works and what doesn’t. Most of us don’t do it often enough and we have closets jammed with things we hardly wear. To make it easier on yourself, try keeping some shopping bags in your closet or somewhere nearby so the next time you try something on and you know it’s seen its day, you can immediately put it in the donation or consignment bag and free up that space in your closet.
And if you want to consign anything, keep in mind that the stores like to get clothes that are in season. So to make it even simpler, you can divide your items into separate bags as shown.

Organize by Type and Color
Find what you are looking for in a snap by hanging your clothing by type and color. This might seem over-the-top to some of you, but it really helps you dress quickly, and you are less likely to forget you have something (because it was smashed in between things)!

Use Over-the-Door Straps for Handbags, Backpacks, Hats, etc.
There is always unused space on doors–use it! I hung an over-the-door strap on this closet door. My girls hang their sports bags here. You would be amazed by how well these straps work. They are adjustable, and it’s really surprising to me that the hooks don’t slide around. And their bags are often pretty heavy! (In fact, the hooks almost work better, it seems, if there’s a little weight on them.) The anchoring hooks (at the top that go over the door) are not particularly wide, but they fit perfectly over this rather thin door–just something to keep in mind. This would be a great place to have your children keep their backpacks for school. You could also store handbags, hats, umbrellas, etc. on hooks like this up and down any door.

Use Pants Hanger to Neatly Store Scarves and Wraps
This is a great way to keep your wraps and decorative scarves wrinkle-free! Simply hang them on a pants hanger with bars. You can even layer them on top of one another, so you can probably fit all of yours on a single hanger. Easy!

Add Hooks to Make Use of Wasted Space
If there is a wall, there is space to be used! We have this great walk-in closet underneath our stairs by the garage. We are so lucky to have all this space, but I was still having a hard time figuring out what to do with kids’ coats for four daughters! I finally realized that I had even more useable space in the blank walls. So I added hook racks all over. This has been so helpful! Maybe you have some space somewhere, too, that you can make useful!
Tuck Bags Inside of One Another to Conserve Space
If you are jamming bags somewhere in your closet, try tucking them inside of one another. You will save so much space and make room for other things, such as the iron I now keep in my closet! :)

Keep Iron and Ironing Board Handy in Closet Instead of Laundry Room
As you can see in the picture above, when I tucked all my random bags inside one another, it freed up some space for my iron! I used to keep my iron in the laundry room, but then I realized that I’m not someone who irons things and then hangs them up ready-to-go. Nope. I hang things up a wrinkled mess, and then I frantically iron just before walking out the door! So rather than run to the laundry room to hurriedly iron something, I started keeping my ironing board in the corner of my closet and my iron up on the shelf. It’s a much better system for someone like me!
I came across this handy thing, too: you could actually hang your iron and ironing board over the back of your closet door. Smart!

Use Hooks Behind a Door for Belts, Hats, or Bags
There is so much great space behind a door, and it’s out of sight–perfect for storage! Here some hooks were placed for things like belts and hats.


Install a Handy Pull-Out Tie Rack
How cool is this pull-out tie rack? It barely takes up any space–you mount it in your closet, and it pulls out for easy access. Simple! They also have similar racks like this to store belts.

Layer Bras in a Row
I used to fold my bras, but I now store them like this, thanks to a tip from a smart friend who shared this picture with me (and you!) My bras are easier to see now, and the drawer stays much neater this way.
* Speaking of bras, I feel that it is my duty as a woman (!) to tell you about the best bra on the planet!! My friends and I were recently talking about bras, and we were all agreeing that the “no back fat bra” (as we call it) is ridiculously amazing. Honestly, with the exception of when I’m wearing workout clothes, I wear mine virtually every single day. It is so comfortable, it gives you good shape, and you will have the smoothest back possible–even the most fitted shirts will look sleek across this bra. It’s made to minimize the bulges under our armpits that we all get as a result of our bras pinching in that spot on our backs, and I can’t believe the difference this bra makes–so flattering! I really think you will love it and wish you had bought one sooner!! I bought the full-coverage style in a larger size when I was pregnant. I didn’t discover these bras until pregnancy #2 (out of 4) but I wore mine every day during my last three pregnancies, and it’s still in good shape now (just too big for me–those days are over!) :) These aren’t cheap bras, but they last forever (I take care of mine by washing them in a Bra Baby because I’m too impatient to wash anything by hand). I think it’s a good investment when you wear something almost every day, and I know I feel better about myself in this bra because I feel like it makes me look better. :) Only my opinion, of course, but obviously I’m a big fan!

Use Hanging Drawers to Make Use of Space All the Way to the Floor
I love hanging drawers! Because they hang down to the floor, they help make use of space that is often wasted. I use them in kids’ closets since they can’t reach the highest rods anyhow–perfect for clothes or toys!
Here I am showing one in the closet near the door to our garage. It is so perfect for our winter gear–hats, scarves, mittens, etc.–all organized by person. No more digging through baskets that everyone shares to find your stuff! It used to look like some kind of winter explosion by our door each morning during the coldest months, but finally we have a system that is working. :) You can see that I also have some bins (that were removed from another set of hanging drawers where I just used the open shelf) underneath the jackets and coats. In a closet, I really try to make use of the space from the ceiling all the way to the floor!


Fold Clothes and Stack in a Line so Everything is Visible
I love this idea from my sister-in-law! I just started folding my daughter’s shirts this way–she was always digging through her drawers to find what she wanted, and she was like a professional mess-maker! Why even bother to fold at that point?! We had so much success with it that I am now moving around the house and rearranging all our drawers. I even wrote an entire post about layering clothing in this way–view it here. I share many pictures (before and after) to show you what a huge difference this makes to save space, keep drawers neat, and to allow everything to be visible at a quick glance. So smart! I will never go back to stacking clothing in drawers again!


Use Shower Clips to Hang Bags
If you have a spare closet rod, you could use it to hang bags! Just grab some shower clips–easy! (As you can tell by the before and after pictures below, simply moving things around and using more of the hanging space also added a lot more storage in this closet!)

Keep a Storage Ottoman in or Near Closet
This serves three purposes: 1) It gives you extra storage; 2) It provides a seat to sit on for putting on your shoes; and 3) It becomes a stool to (carefully!) stand on for reaching things on high shelves in your closet. Very handy!

Make Use of Wasted Space Behind a Wall by Building in Drawers or Shelving
If you have wasted space behind a wall, you can make use of it! Here is an example of how drawers were built in. What a great way to find function even in the smallest area!

Use Bins with a Window or Labels to Help Keep Track of What’s Inside
To give yourself a visual, store things in bins where you can see what’s inside or simply label it.

SHOES (so many options!!)
Keep Shoe Rack Near Door–Great for Kids!
This was my system before we were able to add some cubbies in our back hallway recently. I used to hang a shoe rack on a door, and the bottom slots were low enough for even the little ones to reach their own shoes. They had to find a pair and put them on themselves before we left, and then they were responsible for returning them to the correct slot when we returned. It really worked much better than keeping their shoes in their rooms–back then I was always running around to find shoes as we were racing out the door, and oftentimes I could only find one?! Annoying! I am stressed out just thinking about those days!
Note that little kids’ shoes can often fit together in one slot, so you can fit twice as many pairs. Flip flops of all sizes can also fit in one slot. It might not be the “prettiest” option to use a rack like this, but it is so functional, and it’s better than tripping over a pile of shoes on the floor!! And if it’s by the back door, you’re usually the only one who sees it anyhow!

Use a Bench with Baskets Underneath it for Each Person
If you have space for a bench, add some baskets beneath it for each person and have them keep their shoes in there. Easy enough!

Store Shoes in Drawers
This is our system now. We widened our back hallway by our garage and added some cubbies–and beneath the bench seat everyone has a drawer to store shoes. We can all find our shoes easily, and off we go! I dream of cubbies and drawers now when I sleep–love this system! :) (Now if only I can get my five-year-old to actually put her shoes inside the drawer and not on the ground in front of it… is it really that difficult?!)


Attach a Picture of Shoes to Shoeboxes so You Know What’s Inside
This is a technique some genius friends use. They take a picture of their shoes and attach it to their shoeboxes. That way they always know what’s inside, especially if the boxes are stored up high on a shelf in their closet. Smart!

Install Shoe Drawers in Closet
Shoe drawers! How awesome are these?! Enough said.

Install Adjustable Shelving for Shoes & Boots
Another great option. Add adjustable shelving for shoe storage underneath clothing rods to make great use of that lower space–can fit boots and shoes of all heights (and the shelves are deep enough to fit another pair behind the front pair of shoes). The center baskets hold slippers and flip-flops. The top shelf also allows for more storage–you can see in the picture that clothes are stacked across the top shelf under the hanging items. What a functional space!

Install Shoe Racks that Adjust
Yet another great option for shoes! Adjustable shoe racks–perfect for men’s shoes, in particular, that are more uniform.

GARAGE
Use Tennis Ball Cans for Easy-to-See Storage
I play tennis, so I always have tennis ball cans coming out of my ears! I am constantly looking at them to try to figure out how I can make them useful! :) I have started using them in the garage for storage–they are so handy since they are clear so I can easily see the contents. Use them for anything you can imagine!

Use Clear Shoe Holder to Organize Tools, Paint, etc. in Garage
I mention in this post that I love to use shoe holders to help organize medicines, toys, and of course, shoes! But you could also use one in your garage. Hang it from a shelf or a door, and you’re in business! You could even stick some tennis ball cans (see above) in the slots–they’re a perfect fit!

No Mud Room? Use Lockers in the Garage!
I have some friends who either had built-ins installed in their garage, or they bought some type of locker system. The pictures below show built-ins. Amazing, right?! I am jealous of these beauties! (Love the chalkboard name plates, too!) What a great way to create a “mudroom” in your garage if you don’t have space for one inside. They are also the most perfect way to store sports equipment–you could even make them large enough to hold golf clubs or skis.
If you don’t want to go the built-in route, I came across some really fun lockers recently–see the purple one down below. They come in all different colors. I thought they were awesome–what a fun way to add some color to your garage! I don’t know about you, but if I pulled into a newly-organized garage and saw a happy row of colorful lockers, I think it might help to put me in a good mood before I even stepped foot inside the house! :)


Parents: Keep Garbage Bin in your Car
My minivan is always a wreck. With four kids and carpooling, that car is well-loved, that’s for sure! (I have a friend who has her dog zip around in her car occasionally to eat up all the snack remains… she says it’s easier than vacuuming. LOL! Brilliant!) One thing that has finally tamed the beast at least a little bit, however, is adding a garbage bin in there! Simple! At least the snack bags don’t end up in every drink cup holder anymore!
Actually, now that I think about it, my minivan itself helps me organize me life! I resisted getting one for so long, but then I wished I had gotten one sooner. They are “mom-mobiles” for a reason, ladies! (my husband even requests switching cars with me when he’s driving the kids around because it’s that much easier to get the kids in and out of the van!) I’m already on my second one, and I will definitely get another one when this van has seen its day! The automatic sliding doors alone are amazing! Embrace the minivan, moms–that’s what I say!! :)

FOR THE KIDS
Label Toy Bins with Pictures for the Non-Readers
After 10 years of parenting, I finally got smart and labeled our toy bins with not only words but PICTURES!! (get the printables I made for all my bins and baskets here–keep in mind that I have four girls!! But I do have a “trains” label, thank you very much, and some other gender-neutral ones, too!) :)
Why didn’t I think of this sooner?! Just because little ones can’t read doesn’t mean they can’t clean up–and now they can put things away in the right places since they just follow the pictures. So easy!! Our playroom is so much neater now, and the kids can actually play with their toys because they can find all the pieces to everything! This has honestly made a world of difference!! And if you are a new parent, I would suggest resisting the temptation to get the cute basket liners embroidered with any words like “books” or “toys”… over time, your children will love different things, so chances are, you will revamp your toy area over and over again. If you have to get something with a label, maybe you can get the type with a chalkboard sign so you can easily change the word or draw a picture for a visual?? :)
* Side note: I have recently seen the cutest storage bins and baskets at The Land of Nod. Each one is cuter than the next!! I may have to revamp our playroom. We still have the gender-neutral yellow and blue bins that I bought 9 years ago back when we only had one daughter. I think it’s finally time to girl it up!!

Color-Code Laundry Tags so Kids Can Sort Their Own Dirty Clothes
I mentioned this briefly up above where I talk about how having a three-section laundry sorter has made a world of difference!! (Note that the sorter I use is featured in the ad below–you can save 10% on it–and your entire order–with the code HH6359!) So much more efficient to pre-sort your laundry!!! But with that, it’s also key to label the bins if you have young children. If they are old enough to know their colors, they are old enough to help sort laundry!! And trust me, your child will be so proud when he/she does it correctly–just you wait and see! Your house will be cleaner before you know it!
You can get the printable here that I made. I simply printed this on cardstock, cut them down into tags, and then attached the tags to my bins. (I just stapled them right on!)

Use Clear Shoe Racks for Toys
Shoe racks are very useful for kids and babies, too. Use them to hold stuffed animals and toys down low. The kids think it’s fun that each animal has its own “room”… they can play like this for hours (okay, maybe a large number of minutes!), and it keeps their room tidier, too! Parents can use the highest slots out of reach for quick access to things they need like diapers, wipes, pacifiers, or even medicine and a thermometer–great in the middle of the night when your child is suddenly ill! There is always space to use on the back of every door–so make use of it, especially if you are in tight quarters! And it’s hidden when the door is open–perfect!

Keep Clothing Low for Kids–Can Use Double Rod so They Can Reach and Maximize Space
I am all about teaching my kids to get themselves dressed. They have certainly chosen some interesting outfits over the years! But they are continually gaining confidence by doing things for themselves, and getting dressed alone is a great way for them to feel independent. And really–is it the end of the world if their clothes don’t match? I’m to the point where I think it’s highly entertaining now. :) But I’m four kids deep at this point! With my oldest, I was less “flexible” in this area when she was little–ha!
This all starts with your children having access to their clothes. If they can’t reach them, how can they get dressed alone? If your closet rods are too high for them to reach, try adding a double hanging rod. That will double the space in the closet (their clothes are so small that they don’t hang down too far, so you can use the area beneath their clothes more efficiently), and they can reach the bottom section, too!

Encourage Your Child to Get Dressed Alone–Builds Confidence and Saves You Time
As I was writing the tip above, I realized that having my girls get dressed by themselves is a tip in and of itself! My kids were on their own (more or less) to get dressed around age 3 or as soon as they had the dexterity to dress alone–just make sure they can reach all their clothes (see above)! My three oldest girls get dressed every morning and come downstairs ready for breakfast–this saves me so much time because I am not involved in the whole process. And let’s be honest, it can cause some stress when a parent is involved because we like to “guide” their choices. :) So let your child exhibit some independence and develop more confidence simply by dressing alone… and you will get a lot more time back in your morning!
* Side note: you will have to let go of your image of what he/she should look like, however. This is hard at first, but trust me–soon it will become highly entertaining! The picture below shows what this daughter chose to wear for preschool pictures one year while all her classmates wore their Sunday best. (The hole in the knee of her jeans isn’t visible, nor are the black fuzzy boots she had on in the 85-degree-weather, darn it!) At first I started to object–it was picture day after all–but when she was adamant that she was already wearing her very favorite outfit, she won. (And yes, that is her “My Mom Rocks” shirt–how could I argue with that?!) She is smiling so proudly in this picture while wearing her “favorite outfit”, and you know what–it’s now my favorite preschool picture that has ever been taken of any of my kids! It really sums up who she was at that point in time–a mommy-loving little girl with a mind of her own! It’s now framed in my bedroom so I can see it every day. :) It’s not the end of the world if your child isn’t “presentable” at all times! And in the meantime, you will have a lot less stress in your life if you can let these things go!
P.S. I had about 20 pictures of this daughter I could have used for this part of the post. She puts some doozies together, that’s for sure–I will definitely have plenty of material someday for a wedding video perhaps?! :)


Age 5 & Up: They Make Their Own Bed
As long as we are discussing our children’s independence, here is another parenting tip that also ties in with organization: starting with their 5th birthday, have your child be responsible for making his/her bed every day. And I mean every single day. Trust me, it soon becomes a habit and they will forget about whining about it. When my third daughter turned 5, she was actually excited about making her bed–I think because it meant she was a “big girl” like her sisters! (Along with making their bed every day starting with age 5, our rule is that they also have to give up their blanket–in time for kindergarten–and then they have proven that they are mature enough to get their ears pierced. This has worked like a charm three times for us, and I have some happy girls who are quite proud of their pierced ears!)
When beds are made in every bedroom, the house somehow seems more pulled together, even if everything else is a disaster. But if you are the one racing around to make all the beds in the house, that can add up to a lot of time for you! Train your family to help you. You are a team after all.
One last tip that my own mom gave me: when your child makes his/her bed, refrain from fixing it!! Do not touch it. They will go from feeling proud to feeling like they somehow disappointed you. Have patience and praise them for their hard work. They will get better at it! Below is a picture I took on the morning of my daughter’s 5th birthday when she made her own bed for the very first time (she was excited and actually wanted me to take a picture!) I took the next picture only 6 months later… see how much better she’s already gotten?!
P.S. We purchased her beautiful bed here. The rest of her set is all hand-me-downs that have been painted white, and we added dark knobs to tie in the dark stain of the bed. I was afraid her bed might seem too “old” for her, but it’s perfect–my favorite bed in the house!! Someday I will do a post showing how we made a mix of furniture work for her–I just love her sweet room. :)

Keep Hair Accessories for all Children Together: Do Their Hair at the Breakfast Table!
Years ago I was telling my friend about how we had hair bows, headbands, and clips all over the house in various bathrooms and in my girls’ bedrooms–it was making me crazy! With this house full of girls, I needed a better system! She suggested a “hair tackle box”–something like this. What a great suggestion! I now keep all their brushes and accessories in one place. It is so much easier!!
We even have a bench along one side of our kitchen table, so as our girls are eating breakfast, I go down the row and style each daughter’s hair. :) It’s pretty funny, actually–they “order” what they want: “Today I’d like two braids into one, please, and then tuck it into a bun at the bottom and wrap this matching ribbon around it.” Not kidding. Although most of the time we are short on time, and I am just saying, “Ponytails today, girls! Ponytails for everyone!”
If you don’t have a bench, just have your daughter spin her chair to the side. That way you can get at her hair to style it. And while your daughter eats, she will be somewhat distracted, so surely having her hair done will feel a lot less like torture!!

Backpacks Need a Designated Spot
This is a must for families with school-aged kids! How many times is the bus just about to pull up and your family is running around the house looking for backpacks? Such a stressful way to start the day. :( To help, I would suggest that you declare a spot for backpacks: on a chair, hanging from a hook, on a doorknob, even lined up in the hallway near the back door. Just find a spot that works for you, and declare it a “rule” to your family! See if it helps with your morning routine…

Keep a “Restaurant Bag” Handy for Kids When They Need to Sit Patiently
If you have younger kids, it’s often handy to have a bag of tricks up your sleeve when your children are going to need to be patient–at a restaurant, sitting in a doctor’s office, watching an older sibling’s game, etc. I found myself frantically grabbing coloring books, crayons, toys, snacks, water, etc. on my way out the door all the time. I finally put together a “restaurant” bag that I never unpack. We parents know that it’s tough to get out the door on time with your children, so when you realize at the last second that it would probably be a good idea to have a bunch of stuff to occupy your child for a while, next time you’ll already have a bag ready to go! I know I usually have a few small things in my purse or the diaper bag to busy my kids (and there’s always my iPhone these days if I’m desperate!), but when I need more “tricks” than that, I grab my “restaurant bag.” Very handy!

Put Goodie Bag Items and Fast Food Prizes into a Treasure Box for Donation to School
Cut down on clutter before it even starts! I have started “sneaking” some items from my kids’ goodie bags after parties and the toys they get at fast food chains. After all, how many “little things” do kids need?! They never even notice they are missing. I created a “treasure chest” filled with all of these items. My house stays a wee bit neater, and I now have a box of goodies I can donate to a teacher to use as rewards for good behavior in the classroom! We all win!

KEEPSAKES AND MEMORIES
Create a Christmas Album: A Perfect Gift for Newlyweds or New Parents, too!
What to do with your own holiday cards? Start an album! This is one of my favorite keepsake ideas! You could also give a blank album (I buy all my albums here) as a gift with a special note on the first page–perfect for a newly married couple or new parents! (If you struggle finding the right words, I’m attaching the letter I have used when I have given an album as a wedding gift. You can modify it to make it work for you–hope that helps!) I bought the album below at Exposures, and although the cover for their Christmas album is slightly different than mine now, the inserts are identical to those seen below. * Note that the page inserts are sold separately since people sometimes want different types of inserts. They have really high-quality albums that will last a lifetime!
The idea is that each year you take your holiday card, a few pictures that sum up that Christmas, and then write a description of how you celebrated the holiday. Even if you are terrible about keeping up with these kinds of things, you only have to do 1 or 2 pages per year!! And if you send holiday cards anyhow, all you need to do is print a few pictures and write some words–done!
I started our album with our first married Christmas, but you could start one anytime–it’s never too late! We pull the album out every year around the holidays–everyone loves to look at it, especially our kids. It is so fun to see the chronology of our life together thus far–with each year that passes, our family has grown and changed, and we can look back and remember how we spent each holiday. What a precious keepsake that we can pass down to our children and grandchildren!
* In the photo below, you can see one of my entries. This will give you an idea of what your pages could look like:
There on the left is our Christmas card (from Tiny Prints for like the fifth straight year… although this year I went with Minted, even though I felt like I was betraying a dear friend!) On the far right you can see the inside of our Christmas card. We had a white Christmas that year (very exciting for us!) so I included some special “snow” pictures, and I also pasted in a copy of the thank you notes I had made at Shutterfly that year. (I have started having photo thank you notes made every year. I love to send a note with a few pictures so our loved ones far away can get a little glimpse of our Christmas.) I then added some text about how we celebrated, and voila! An hour of time for me but endless memories for all of us!!

Keep a Copy of Your Family’s Christmas Card for Each Child
When you print your Christmas cards, have a few extras made for your children. You can tuck one away for each child as a keepsake in a file every year. What great keepsakes! (The card shown below is another one from Tiny Prints. I have gotten my cards from there at least fives times… they are awesome!) :)

Keep a Single Growth Chart for All Your Children to Compare Heights
Many of you probably keep growth charts for your children, but we’ve found that it’s fun to track their heights together on the same chart. They love to compare their heights at various ages.

Have a File Drawer (or File Box/Bin) for Each Child and Be Selective with What You Keep!!
As a parent, you feel pressure to save things to help your children remember their childhood–but it can be overwhelming to figure out the best way to do just that. I finally found a system that I love: I have a file drawer for each child, categorized by age. I only save very precious things, and I force myself to discard the rest (as hard as that may be). I file things like report cards, their birthday invitations, a copy of our Christmas card each year, artwork that is very special and sums up their abilities at that time, special notes or letters, etc.
My kids know this is the system, so if they see a picture they drew end up in the garbage, I will say, “Listen, I can’t keep everything. That was a beautiful picture, but ask yourself–when you are a grown up, will you want that picture framed in your house? Is that a picture you will love to see years from now?” Usually they shake their head–but if not, we dig it out, and it goes in the file! (Or I throw it away more discreetly next time!) :) But they are pretty good about realizing what is extra special. Oftentimes now they will hand me something and say, “I want to keep this in my file, Mom.” And usually they are right–they know when something is a keeper! :)
If you don’t have file drawers, you could get some stacking file boxes like these.


Make a Time Capsule to Open at Graduation
I love this idea! Our older daughters have had the same first grade teacher, and at the end of the school year in first grade, their teacher helped them put together a time capsule to be opened when they graduate from high school. Parents, siblings, relatives, etc. could send in notes, pictures, and trinkets–anything that might help bring your child back to first grade in their mind. The teacher writes a note as well.
Their time capsules (a shoebox) are now taped closed and waiting in the top shelf of their closets. It will be so fun for all of us to open them one day–I didn’t even peek! :) The teacher has said that she often gets calls from former students when they open their time capsules as 18-year-olds! :) What a fun birthday idea for a child, too!

Collect Family Recipes and Make a Family Cookbook Online: Everyone Can Order a Copy!
As I mentioned briefly up above in this post, we created a family cookbook at Shutterfly as a wedding gift for my brother and his wife. What I didn’t really think about at the time was how great it would be for everyone else to be able to order a copy! Almost everyone ordered one–it’s filled with recipes that have been passed down through generations, as well as pictures, new and old. It’s really an amazing resource for all of us, and I know I refer to mine often. What a special way to organize your family’s favorite recipes so they are never lost!

Hang Onto Baby Teeth and Create a Keepsake
Kids love losing teeth. If you are in kindergarten and your name gets to go up on the “lost tooth” chart, it’s like some kind of status symbol. So it can be fun to document these big moments in your child’s life. My kids have been given tooth fairy banks like the one below (from a dentist–what a fitting gift!) You can store the teeth in the slots as shown, and there’s a spot on the underside to write the date on which each tooth fell out. Just be sure to ask the tooth fairy to leave the teeth behind, of course. :)
I also thought this tooth fairy box was adorable and would be another fun way to create a keepsake with all those tiny teeth!

Keep a Document or Journal and Jot Down Memorable Things Kids Say and Do
Kids say the darndest things! :) But oftentimes we forget these hilarious moments that we’re sure will stay with us forever. My kids can say something funny, and I will even think to myself: “Remember this so you can tell Daddy later after work…” and then I still forget!!
Now when they say something particularly classic, I try to briefly write it down in a note on my iPhone so I don’t forget. Later I will eventually add it to a document I keep on my computer. Once in a while we’ll read through it–we had already forgotten about so many entertaining stories! I also saw these neat journals that you can personalize at Minted when I was ordering my Christmas cards this year–these would be perfect for jotting down stories, too, in mom’s own handwriting. What a great idea. (I didn’t know Minted had anything but cards?! Good to know!!)

Keep a Single Pregnancy Journal for All Your Pregnancies for Comparison and Reference
Similar to the idea above, you could also keep a pregnancy journal. I did my best to keep up with The Pregnancy Journal that I filled out for each of my girls, but self-admittedly, I didn’t do quite as well for babies three and four! But they do each have something to keep that’s at least partially filled out! :)
I found over the course of my four pregnancies, however, that I liked writing in a single journal more. (That’s mine below–I love that I bought a blue one and then proceeded to have four GIRLS! Maybe since I’m a sports girl, I subconsciously thought I’d have boys?!) I would write in mine once a week or so–maybe less–and at the top where I dated it, I also wrote how many weeks I was as well as my weight. I’d write about how I was feeling, the stories of telling people about my pregnancy, details about doctor’s appointments, etc. I would even tuck in pictures from my ultrasounds which still flutter out when I open it. I really loved having that information in one place because if I had concerns or was curious about how something was different, I could easily flip back and compare the pregnancies. Even after each baby was born, I would make notes of how the weight came off or detail strange things that happened to me (hair loss, night sweats, numbness in my leg, skin pigmentation changes, etc. We ladies go through a lot to have these babies, don’t we?!)
One day maybe my girls can pass this journal around when they are expecting, too. Perhaps their mom’s words will help them in some way! Back when I started my journal, I just picked up a basic one at a book store, but there are so many fun options now! If I could do it again, I would probably get a personalized one–but then again, I’m a sucker for anything with a photo or a name on it! :) Just keep in mind how much you think you may write and how many pregnancies you predict you may have–you don’t want to run out of pages!


Keep a Baby Book for Each Child
As the youngest of three children, I have a baby book that my mom filled out–sparingly. But it’s better than nothing! The information that I do have is fun to reference–especially my length at various points in time. It’s amazing to me how closely my girls’ growth charts have mirrored my own! Now that I have four girls myself, I have vowed that they will each have a baby book, and you know what? It’s really not that bad to keep up with it! (* If you just don’t think you can keep up with a baby book, though, check out this post where I show you how I made a quick photo book for my daughter as a first birthday gift.)
Sometimes I write a quick note to myself and indicate the date my daughter did something so I can go back and fill that in later (you think you’ll always remember, but you won’t!) There are certain pages (such as our family tree) that I may not fill out for years, but I will get to it eventually!! And on each girl’s first birthday, I always write a heartfelt note in the front of the book, and then give it to her as a very special gift from mom. (Even if I don’t actually finish the book for five more years!) :)
I know it seems daunting to keep up with something like this when you are already sleep-deprived and overwhelmed with a new baby, but I try to keep the book out where I can see it so I don’t forget about it. And it usually just takes a second to fill something in quickly. Some sections can even be filled in before the baby arrives. You can also bring the “footprints” page to the hospital, and the nurse will even do that part for you shortly after birth! You won’t believe how tiny those feet will seem someday!
I especially love the books that have the section where at the end of each month, you summarize that month and add a picture, as shown below. The pictures are never added until my child is well over one, but I always write in the summary as close to the “month birthday” as possible–if you don’t do it right away, they change so quickly and the months start to run together in your mind. It really is so fun to look back at all the various stages! Don’t give up before you start–it’s really not that terrible to fill out a special book like this, and it will surely be something your child will appreciate someday–a wonderful keepsake, filled out with love by mom. :)


If you don’t think you have it in you to keep up with a traditional baby book, check out the post below. Making a simple book like this could be a great option for you–and this makes for a very special first birthday gift for your child, too!
Keep a School Book for Each Child
This is such a fun and convenient way to organize your child’s school years. I actually have one of these school books myself that I filled out when I was a kid. It’s hilarious to look at it now! (In kindergarten I wanted to be a “stor keeper” because I thought it looked fun to work a cash register!) I now have these school books for each of my kids–they are the best!! It starts with kindergarten and goes through the end of high school. There are also pockets for each grade that are perfect places to tuck in report cards, pictures, awards, etc. My kids love to draw a picture and put that in their book on the first day of school–their artwork improves so much from year to year! (By the way, if your child is just starting school, don’t miss this post with 10 Things to Think About Before Your Child Starts Kindergarten!)


Create a Wedding Album with One Page for Each Wedding You Attend
I love weddings! (and I have four daughters–imagine the fun ahead!!) If you are anything like me, you can’t bring yourself to throw away those beautiful wedding invitations and programs. I finally started an album so I had a good place to keep them. Each page represents one wedding we’ve attended. I save the invitation, and sometimes a program or even a thank you note. And then I add a picture or two. I love how when I flip through the album, each wedding seems so fitting for that particular couple–they are all so different and yet each one is perfect in its own way. As the years pass, it’s really neat to look back at these special days when our dear friends and family started their life together! Time flies…


Keep Birth Announcements You Receive in an Album or Folder
Just like I can’t bear to throw away wedding invitations, I can’t part with birth announcements either! They are all so precious and filled with love! There is nothing like bringing a new baby into the world. I have had all the birth announcements we’ve ever received in a file, and I finally bought an album and had “Birth Announcements” put on the front of it. I have yet to fill it, but someday I’ll get to that! In the meantime, it’s fun to flip through the announcements when I come across them. Some of the kids are teenagers now–wow!
An added bonus: I can easily flip through the announcements if I need to look up a birthday! :)

VIDEO AND PHOTOGRAPHY
Family Videos: Use DVD’s Organized By Person or Event
I love this system!!!! Trying to maintain any type of organization when it comes to family videos can be completely overwhelming, but seriously, this is a great way to organize your footage!! I like to use our video camera that uses tiny DVD’s–we have a Sony similar to this one. (Our model is about 6 years old now–never had a single problem with it, knock on wood.)
This is how my system works:
Instead of filling one DVD with anything and everything and then moving to the next DVD, I have about 15 DVD’s going. Each child has her own Birthday DVD–she also has her own Special Events DVD (sports, school programs, etc.). As a family, we have separate DVD’s for all the holidays–Christmas, Halloween, Easter… and then we have a DVD for “piano recitals” or anything the kids do together. This works to keep the footage separate.
Here’s an example: on one daughter’s birthday, I will film a short “interview” with her (I would rather hear what she has to say at age 3 than see her blowing out candles), and I only allow myself 5 minutes at the most. (Down the road, watching 20 minutes will get boring; 5 minutes or less is perfect to give you a glimpse of that moment in time!) After the interview, we say, “See you next year!” and I stop taping and put that DVD away until the following year. The next year I will do the same thing, and so on. Years later, we have a complete DVD of one daughter’s birthday through the years, completely organized without me having to upload any footage to the computer to edit! Simple!!! All we have to do is finalize the disc once it’s finally full (takes 3 minutes right on the camera) and pop it in the DVD player to watch it!
At Christmas this year, our family watched our “Christmas Through the Years” disc. We laughed so hard as we watched year after year of footage, all on the same disc. Yes, I do film on my iPhone a bit, and I know my way around iMovie, but I love my handy DVD’s to do the bulk of the “keepsake” stuff. Also, using a true “video camera” allows you to zoom much more closely, and the overall quality of the footage is better in my opinion.
I am quite proud of this system! When my kid are older, if they ever want any of their DVD’s, I already have the footage separated out for them with their own personal discs! :)

Have a System for Organizing Your Digital Pictures and Stick to It!
Keeping track of digital pictures can be just as overwhelming as organizing your video footage! My advice: figure out a system that works for you, and stick to it! And if your system stinks, don’t stress about going back and fixing it all. Just start from today with better organization! That’s better than nothing. :)
This is what I do:
I have a MacBook Pro, so I use iPhoto to catalog my photos. I upload my pictures and then delete them immediately from my camera. I drag all the pictures from one month together into the same event. If we also took a trip where I shot a large number of pictures, I will let that trip be a separate event. On the left side of my screen, I can also create folders. (Any pictures dragged into the folders are simply copies of those in the events.) I have folders for each child, months, trips, etc. This is another way I can cross-check myself to find pictures I’m looking for. For example, if I love a certain shot of my daughter, I will try to remember to drag that one into her folder. I could go on and on about this, so maybe one day I will write a separate post! :)
To back up my photos (and everything on my computer), I have an external hard drive set up to continually back up my computer wirelessly. But I still worry about losing my pictures (can you imagine?!), so I also load them all on Shutterfly where I have them organized by month each year. This way, if something terrible happened and there was a fire, for example, my digital images would all be safe outside the home. (I think uploading to an outside source is even more important than saving pictures to discs as a back-up since discs can be damaged.) I also then have my pictures ready to go on Shutterfly for prints, photo books, cards, calendars, etc. This might seem like a lot to keep up with, but at the end of each month, I will simply start the pictures loading onto Shutterfly and then go to bed. When I wake up, it’s done, and they are all safely online!

Portraits: Have a Set “Schedule” for Each Child
My sisters-in-law got me started with this system when my oldest was born, and I am so thankful for the tip! For each child, I take them to a portrait place at the same ages (I used to take them to Sear’s but they closed their portrait studio; now I’ve been taking them to JCPenney). We are in and out pretty quickly, and JCPenney has great deals and coupons. I love knowing that even if I am lacking at certain points of time in taking my own pictures, each daughter will be able to point to these portraits and know exactly how old she was. (As a bonus, it’s also fun to compare the pictures of the girls at the same ages–just like I discuss here.) If you are on a budget or don’t have a handy portrait studio nearby, then just be sure to take a nice picture of your children at the same points in time and stick to your schedule so you don’t forget. :)
I take my girls to get their pictures taken at the following ages because they change so quickly: 3 months, 6 months, 9 months, 1 year, and 18 months. (That might seem like a lot to you, but I like pictures, and it’s amazing to see the changes!) Starting with age 2, I take them around their birthday. It’s now become something they look forward to (but I have girls!) :) They get to feel like they have a little modeling session on or near their birthday each year, and usually lunch with Mom is involved, too. :) Fun for both of us!
Below you can see how I have a file set up where I can find any of our girls’ pictures at any age…

One Album with Child’s 8×10 Pictures Through the Years
Each year your child comes home with a school portrait. You might frame it. But the following year when a new picture is taken, what do you do with the old one? I started an album for those pictures. As I discuss above, I have always had a “schedule” for getting my kids’ portraits done. And then starting in kindergarten, you can order pictures through the school. Simply tuck each 8×10 into an album, and when your child graduates from high school, you have a perfect gift for him/her with photos from birth on up! (I bought the album below from Exposures and had my daughter’s name and birthdate put on it to personalize it. I often give an album like this as a new baby gift, too. My friend knows how much I love these albums, so she actually got my younger three girls albums that match the one below as gifts when they were each born–what a precious gift, and something that will last a lifetime!! I have tried lots of albums over the years, but Exposures definitely makes the ones that will stand the test of time.)

Make Photo Books Online–Only Print Photos for Framing
Say good-bye to boxes and boxes of (bent) photos that you keep meaning to put into albums!! Don’t get me wrong, I used to love scrapbooking (and I still do for things like our Christmas album that only require a page or two each year). But I can’t keep up with that anymore–there’s just not enough time in the day (for me anyhow)! So I now just make photo books–or I plan to make more in the future…
I have all my pictures uploaded at Shutterfly, and one day I will go back and make some books for my girls as gifts–upon turning 16 with pictures of birthdays through the years, or maybe one for graduation filled with childhood highlights. I love that all you have to do is create the album (or even have a book “auto-filled’ quickly) and then you can print as many copies as you’d like–you can’t do that with a scrapbook! So I could have a copy printed for myself, and I could also print one for my daughter to take with her once she’s off on her own.
* If you are looking to print photos on canvases for your home, I have become a huge fan of Canvas on Demand!!! See how I hung a wall gallery of canvases in our entryway by using a template–it was so easy to hang everything the first time around without having to move any nails. I also show you how you can hang a canvas (or frame) by marking it with toothpaste (of all things)! I know I’m discouraging you here from printing all your photos, but I’m by no means saying that I think all your pictures should remain “trapped” on your computer until you have time to create a photo book. On the contrary. I believe it’s important to have family pictures all over the place to help your children feel secure in the love that surrounds them–I think that helps them know that they are growing up in a loving home because they can actually see it all around them!


Take a Video of Everything in Your Home in Case of Fire
If there was ever a fire in your home, you will be so glad if you were organized enough to think of this! One day walk around and take a video of every room in your house. Open drawers, shoot footage of valuables, etc. This is a great way to have proof of your belongings, and then keep the disc in a firesafe box or outside your home somewhere.

Take Your DVD’s Out of the Cases and Store in an Album: Saves Space!!
My kids love movies!! They always have DVD’s on their wish lists for Christmas and birthdays, and they watch them constantly. To save space, I took them out of their cases and organized them in a DVD album. I finally got tired of flipping through the zillion discs, so I also organized them by type–I simply taped a piece of paper into the album to mark off each section. You can’t believe how much space you save by discarding the cases!

GIFTS AND SHOPPING
Keep a Birthday Book–Never Forget a Birthday Again!
My grandmother gave me this birthday book for my thirteenth birthday. (Find a similar one here.) I still plug birthdays into it. It’s a great tool of reference, and it’s fun to see how my handwriting has changed! :) If you are tech-savvy, you can also keep track of birthdays in your contacts online and then set it up so it syncs with your online calendar. You could even send yourself an alert as a reminder. Never forget a birthday again!

Keep Brown Bags and Kraft Paper Handy to Wrap Gifts for All Occasions
Are you always running to the store at the last second for appropriate gift wrap? To make sure you are ready for any occasion (and to save space), you can just keep basic supplies on hand–I like to use brown bags and kraft paper. Just change the ribbon, and you’re ready to go! Store less paper this way, and your packages will always look pretty and classic. It can become your “signature look”. :)

Use a Spreadsheet to Keep Track of Holiday Gifts You Buy
As the years passed, it got more overwhelming to manage my Christmas list–happily, more babies were born on both sides of the family, and great teachers came into our lives! I was always worried I would forget someone special, so I created a spreadsheet a few years back. I couldn’t live without it now!
Each year I delete out last year’s gifts to create a new list–and I can always refer back to previous years to make sure I don’t give someone the same gift twice! (I love to give books, for example, and it can be hard to remember which books I’ve already given to a person.) This year, I merged my documents into one large spreadsheet, so now the previous years are in tabs along the bottom for easy reference. Click here to get your own blank Excel spreadsheet that you can fill in. After 2013, you can right-click on the tab on the bottom and copy the spreadsheet into a new tab. Then clear the contents, and you’ll be ready for 2014! I hope this helps you manage your shopping, too!

HOLIDAY ORGANIZATION
Make Decorating Easier: Write Yourself Notes, Label Things, Take Pictures, etc.
It can hard to remember how you decorated each year. To keep a handle on what worked (and what didn’t!), leave yourself notes, label things, take pictures, etc. Below you can see that I labeled all my wreaths that I hung on our windows this year since the ribbon lengths are a bit different to fit the various windows (I wrote on the back of the ribbons with a Sharpie–why didn’t I think of this sooner?! I’ve only been hanging these same wreaths for 13 years!!) I also took a picture of my mantle so I can remember how I set it up, and I left myself a note about the stocking holders. (I tried to put up the garland and the lights first, but then I couldn’t set the stocking holders on top of the garland–so I had to start all over… annoying! Next year I will know to do things in reverse the first time!)
The holidays can be stressful, so make things as easy on yourself as possible. I always think I will remember things like this, but I never do!!

Use Pipe Cleaners to Keep Lights Neat For Storage
After the holidays, oftentimes we are anxious to get the decorations down, but take 10 extra seconds to secure your lights with a couple of pipe cleaners (after wrapping them from your hand to your elbow). Next year when you are taking everything back out again, you’ll be so glad to have neat lights to work with!! Untangling Christmas lights is about as fun as having a root canal, so save yourself the stress!
I’ve had the same package of pipe cleaners for more than 10 years, and I’m still in no danger of needing to buy a new one. You can reuse them over and over, and they are longer than twist-ties and easier to use than rubber bands. They’re also handy to keep big plastic bags closed (I like to use huge, heavy-duty shopping bags with handles to store my garland and large wreaths… so save those bags if you get a good one while shopping between now and next Christmas!) You can also use pipe cleaners for hanging just about anything… very handy to have around!

Cut Boxes to Create Storage Slots for Ornaments
Ornament boxes are awesome, but they can be a little pricey. It’s pretty easy to make your own, and your precious ornaments are much safer when they’re in slots like this rather than wrapped up in newspaper. Just find a nice, big box to use. Then cut another box into strips. Cut halfway into the strip where you want a slot to go; then cut halfway into the other strip and join the two pieces together. Continue this process until one layer is full. Cover that layer with a piece of cardboard (or even pieces of cardstock taped together) and start again with layer #2.

Use Holiday Cards to Take Pictures for Your Phone’s Contact List
I first saw this creative way to organize your contacts with photos here by Ashley Ann Photography on Pinterest (she has amazing pictures to share on her blog, by the way), and I thought it was brilliant–so I’m passing on the idea! You know how it’s so fun to have a picture pop up on your phone when someone calls? Well, unless you already tossed your cards (mine are still up in my kitchen… they’ll probably be there until Easter since I love being surrounded by the faces of friends and family!), you have pictures right at your fingertips for your contacts. So smart!!

Save Envelopes from Holiday Cards for Help with Next Year’s Cards
When holiday cards arrive in the mail, I always hang them immediately in our kitchen, but I also hang onto the envelopes. After the holidays pass, I will go through each one quickly and cross-check to see if I have current addresses for everyone in my spreadsheet that I use to create labels (and then I finally recycle the envelopes). Quite often people have moved, and I didn’t even realize it!
For those who write out their cards by hand, this is a fun way to stay organized:
My mom keeps her cards until the following year in their original envelopes, and plays a “game” as she writes out her own cards. She pulls one out of the stack, re-reads it, and then addresses that person’s card using the return address as shown. She says its fun to see which card she grabs, and that dictates the order in which she writes her own cards. This way she also knows she’s using the most current address possible; she can be reminded of events friends may have mentioned in their card so she can comment in this year’s card to them; and she knows she is reciprocating by sending cards to those people who send to her. I think this is a great system, especially for someone (like her) who would rather stay off the computer! :)

TRAVEL
Create an Online Packing List–Never Forget Anything Again!
My smart friend told me to do this when I pack, and it was so helpful! I tend to always forget something or another when we travel–it’s not always a big deal most of the time–but if you have a child in tow, for example, and you forget the blankie or favorite stuffed animal that must be slept with, you are up a creek! Or what if you forgot daily medicine that was a necessity? Ugh! So stressful to sort that stuff out when you get to your destination… vacations are supposed to be relaxing and a break from the chaos of everyday life, right?
So based on my friend’s advice, I created a quick document on my computer with everything I could possibly think of that I might need for traveling. Now I print the sheet off when I start packing, and I simply cross things off as I go. Easy! * A super smart reader left a comment saying that she also has a master packing list, and she keeps it in a plastic sleeve. She then simply uses a dry-erase marker to check things off as she goes. That way she doesn’t have to print the list every time, and she can save a few trees, too! Brilliant!

Keep a Travel Journal to Help Remember Favorite Spots–Great for Kids, too!
When you travel, it can be hard to remember things that you think will stay in your mind forever. You can keep a travel journal to help you remember favorite restaurants, hotels, shopping spots, etc. If you return to that area, you will have notes about things you liked (and didn’t), and you could also easily make recommendations to friends. It also serves as a fun way to capture memories of great trips you’ve had the joy of taking throughout life!
You could also get a children’s travel journal and the child could fill it out–what a fun gift before a first plane ride or a special trip!

Hang Ribbons on Luggage for Easy Identification
Luggage often looks the same–and sometimes, it is exactly the same model, especially if your suitcases are black. To help make your luggage stand out, simply tie some bright ribbons on all of it. That will help you spot it more easily, and even more importantly, it will tell someone else that the luggage isn’t theirs!
We had someone take our suitcase by mistake once–darn it that I didn’t have my handy ribbon on that one!! Yes, that suitcase was my husband’s, and he had taken off my girly ribbon–which he later regretted… not that this a case of who’s right and wrong, of course! (We did eventually get the suitcase back.) Also, if your luggage happens to be misplaced, you can tell the people helping you in baggage claim that your suitcase has a bright pink ribbon hanging from it–that is much more descriptive than “it’s black with wheels…” There are instances where all identification tags have been ripped off somehow in transit, so if you can describe your suitcase more distinctly, that can be very helpful to locate it if lost.

GENERAL TIPS
OHIO: “Only Handle It Once”
I can’t even remember where I heard this tip, but it makes sense! Just remember “OHIO: Only Handle It Once.” The idea is simple: why handle something, only to set it down in a pile, where it then needs to be handled again? Take care of it the first time around and be done with it! For example, if you bring your mail inside, try to sort it immediately: bills, recycling, reference. And keep it off your counter where it can mount up over the course of the week and become overwhelming.
This is easier said than done, but it really is something to live by!

Install Handy Outlets in Unique Places
Outlets aren’t just for walls anymore. You can install them in all kinds of places if it will help you stay more organized.
Some ideas: place one in a deep drawer for your hair dryer or electric toothbrush; put one in a storage closet or large cabinet to charge a vacuum (we have a cordless, rechargeable vacuum in our kitchen–I charge it using the outlet installed in our cabinet–so handy for quick pick-ups after meals, especially with the baby); or put outlets in your mudroom or in shelving as shown below. We added an outlet in each person’s “cubbie”–perfect for charging mobile phones and anything else that might need charging! (That also sets a precedent that when your children head to bed, electronics do not go with them.)

Use iCal or a Similar Calendar that Syncs with your Phone
In today’s day and age, it is so helpful to use an online calendar that syncs with your phone!! I resisted doing this for so long because my system was working in my mind–each month I would fill in my calendar by hand. If I took my kids to the doctor, I would go home, reference my calendar, and then call them back to make future appointments. I could keep track of all that I needed to, but I finally realized this system was not efficient with all the new technology available to us now.
When I got a Mac for the first time (and cried for three days because I was sure I had made a terrible mistake), I forced myself to use iCal, the calendar program that came with the computer. (My kids have taken over my first Mac–I have a MacBook Pro now. Love it. Once you adjust to a Mac, I don’t think you’d ever want to go back to a PC!! Especially for us homemakers–they are simply so user-friendly when it comes to photos, movies, calendars, music, email, etc.–what we ladies typically use our computers for!)
Anyhow, iCal syncs to my iPhone automatically without me even plugging in the phone. I can color-code events, so each person in my family is a different color. I can even set up repeating events and alerts for birthdays.
I now make appointments on the spot using my iPhone–and when I get home and check my calendar on the computer, sure enough, there’s the event I just added! It synced automatically. Pretty sweet. There’s a learning curve with anything, so be patient with yourself, and try whatever calendar program you have on your computer–or find one and download it! Once you get the hang of it, I think you’ll agree that it’s a much better way to keep track of “life” these days!

Basket on the Stairs
We received a basket like this as a gift a few years back. It’s become such a part of my life, I’m not sure how I got by without it before! Our laundry room happens to be upstairs, so our stair basket has become our place to toss dirty laundry (such as towels, rags, and bibs from the kitchen) and then I eventually take it upstairs and empty it in the laundry room. But you could also use a basket like this to carry things up (or down) the stairs that simply collect on the wrong floor! It’s a much better system than just piling things on the stairs for people to trip over, and it’s easier to carry everything this way. Very handy!

Label Everything!!!
Labels make my life easier. It’s inevitable that we’re going to misplace things, but at least with the labels, we have a good chance of getting our stuff back! I have labels like these that I purchased years ago (through a school fundraiser–great idea!), and I put them on everything: water bottles, lunchboxes, backpacks, umbrella handles, even on the inside of my sunglasses. (Once someone called me because I had left my sunglasses at the tennis courts, and my label told them they were mine! So pumped to get those back…) I also just found another site with labels if you want to compare: Mabel’s Labels. I thought their name was catchy, too. :) I ordered some labels recently from them, and they came out great! I just used our last name on them so they would work for all 4 of my daughters (and my husband and me, too).
You can’t believe how well labels like these stay put!!! They will not peel when wet–you can even put them through the dishwasher. They also make them for clothing–perfect for inside jackets. This is such a great way to help you and your family keep track of your things. And if you don’t have labels handy, simply grab a Sharpie and write. It will rub off on things like water bottles over time, but it’s better than nothing!


Multitask: Wear a Headset and Do Housework with Two Hands While on the Phone!
I love my headset phone!! I can do so much multitasking with it on. I can make dinner, fold laundry, feed the baby, change diapers, clean, and simply walk all over the house while talking on the phone. If I’m on hold, it doesn’t bother me a bit–I just keep working and eventually someone comes on the line. Even when I’m not doing something else at the same time, it’s so much nicer to talk with the headset rather than hold a phone up to your ear–especially for long conversations. My husband wears it, too! (I’m sure he’d love that I told you that!) :) He actually got me my first headset as a gift when my first daughter was born (at my request) because it was so hard to get everything done with her in tow!
My friends think I am a sight when I am using my headset, but that’s efficiency at its finest, people!! :) My family is used to it, however. Below is a picture of my daughter years ago pretending to use my headset. Because the cord would sometimes snag on kitchen knobs, I would always stick it in my bra!! So apparently that’s how she thought it was supposed to be worn! Works like a charm!! (Speaking of bras, this is the best bra made in the history of the world. Doing my duty as a woman to tell you about this! Back fat, be gone!!)

Use Shareist to Keep Track of Things Online: Similar to Pinterest, but with Private Pages (or Choose to Make Them Public)
Finally, let me introduce you to my newest find that has changed my life for the better: Shareist! Shareist helps you organize your ideas online, and it’s pretty darn awesome. After much research and trying other options, I chose Shareist to power my blog, but I also have a separate (and private) online notebook. I have posted a page from that notebook down below so you can see what I’m talking about.
Basically, Shareist is similar to Pinterest in the sense that you can put ideas you find online in one place for easy reference. But you get to choose what is public and what is private–that’s the great part. My blog is essentially an online notebook that I have chosen to make public. But as I work on various posts, there are many, many pages that are private until I choose to publish them.
For you, Shareist could be a great place to keep track of gift ideas you find or travel information like hotels, restaurants, shops, etc. If you’re a teacher, maybe you collect reference materials, videos, and ideas. Or maybe you start a blog like I did! :) The options are endless.
Check it out, and see what you think!


Alright everybody–I think that’s all I’ve got!! I hope you are on your way to feeling more organized already! And if reading this has actually made you feel more stressed in a way because you feel like you have a lot of work to do, I’d suggest just starting with one room–or even one closet or one drawer. You don’t need to tackle everything you’d like to organize at once. Just a few changes here and there can make a big difference in your day-to-day life. Maybe by the time 2014 rolls around, you will feel like you’ve found a lot more time in your day and a lot less stress in it, too! I hope so anyway! :)
What have I missed?? I’d love to know the tricks that work for you to stay more organized. As always, comments are welcome!
If you’d like to keep up with me and my blog (I’d love that!), please follow along via Facebook, Pinterest, Twitter, Instagram, Google+, or you can sign up for my monthly newsletter in the footer of my site! :)


I have really enjoyed reading your tips and I will look into a few wishing I had these things when my kids were young. But I shared it with my daughter who is struggling with organization as well. I have a tip for your wall as well. Years ago I had a very big dog that left behind a long choke chain. as I do not get rid of things I re-purpose lol I found a use for it next to the front door I have a calender and this chain hung with small s hooks in it for all the keys I use, I have a pretty bow at the top and the bottom, and my daughter used to collect key chains, so they are displayed there as well. I can always find the keys to the shed or luggage keys. I change out the bows for seasons for fun.
Smart, Grace! Thanks for sharing. I am all about finding a new purpose for things, too! I even save cans as I show in this post – I might drive my husband a little bit crazy with all that – ha! :)
Hi writing here from Scotland – loved some of your ideas and will try to be more organised – wished I had seen your site before now – thanks x
Hi Carol – all the way over in Scotland! :) So glad you found me! I hope you find some ideas here that work for you to help simplify life just a bit. Take care!
very useful ideas, we don’t think to do or we neglect sometimes or we say, we’re going to do it after….<3
Thanks, Leila! Glad you found some tips here that might work for you!
Hi Christy,
This is the first time I have ever responded to a blog, but I have been so inspired and impressed with your ideas that I could not help myself and just felt I too wanted to give my comments.
I am a mother of 5 wonderful children aged between the ages of 26 years to 7 years! (Yip, you read right!) When our youngest child was 12 years old I fell pregnant with our last who is now 8 years old. Then about a year and a half ago we started fostering a little boy who is now 7 years old.
I never had the opportunity to study before I had children, due to certain reasons. But from the day I had my first baby, it just felt so right and natural to be a stay at home mom and so I quit the job I had at the time. Why I am actually telling you all this is that it is never too late to resume your dream career or go and study once your children are older as I have had the privilege of doing just this! When our last child turned 6 years old, I decided to go and study a short course in ECD teaching, which I had always wanted to do. I am now in my second year of teaching and loving it as I still get to be with my 2 youngest in the afternoons, when they finish their school and I also get to spend all 4 school holidays at home with them. I am turning 48 this year and just want all those stay at moms to know, that life doesn’t end when you choose to be a stay at home mom. There is still so much time left to go and pursue all those things you wanted to do after the children grow up! Instead invest in the time you are privileged to have right now and be there for your children, you will pick the fruits from it!
Keep up the great work you are doing Christy!
All the way from South Africa
Mandy.
Mandy, thanks for this nice note!! I feel honored to be the first blog on which you’ve ever felt compelled to comment! :) You make such great points! Good for you for jumping into a career later in life to fulfill a dream you’ve always had. You sound like a wonderful woman, and your children are certainly lucky to have you. I’m so glad you found me, all the way over in South Africa! Take care!
Hi,
fantastic ideas . Like name HarvardHomemaker being Alum of HBS.
We are completely renovating our penthouse in Barcelona and its v helpful.If you think some thing needs be done during such renovation , please let me . Highly appreciate your work.
Loved these ideas! 7 people in tiny house and a bunch of Not Naturally Organized People can Equal chaos at times!
One thing you might like—In addition to your stair basket—are “Crap Baskets” –this is an idea from SEW MANY WAYS and she has made baskets for everyone in the house and labeled them and when she finds–well–Crap!–lying around in the basket it goes. These live on her stairs too but you could place them on a bench or book case if stairs are not in the picture.
Some things we DO manage to accomplish::: over the door hooks and or shoe holders on EVERY door that can accomadate them— one side will have hooks and the other a shoe holder or you can even place a few single hooks or a hook rack on the SAME side of the door if you stash stuff you don’t need all the time in the top pockets of the shoe holder. Over the cabinet door holders:: we have zero room in the bathroom and kitchen so have added the chrome racks–one under the bathroom sink for a sponge (dries nicely in there too!) and also holds a small bottle of dish soap for spot treatments and a small travel size bottle of laundry soap for hand washing. In the kitchen we added a double height one for extra sponges and the like–we have NO kitchen drawers except the four shallow ones in our island (aka the Harbor Freight Wood Work Bench slightly re-purposed!). So every spot has to earn it’s keep!
Another HUGE space and time saver was adding a multi shelf wire rack to a formerly underutilized shallow wall area–this holds everything from soup cans to spices and can be highly personalized. I also love the IKEA risers–these can have the small colorful IKEA bins underneath as a small drawer for soup and spice packages or other small hard to corral stuff but let you raise things up so they don’t get lost and make more room in your cabinets or countertops. So many of those sort of risers waste the space beneath–when every inch counts you can’t waste space!
Thanks again!
Love your blog! I also love organizing. My kids are grown, so I’ve had plenty of time to figure out many of your organizing tips on my own. I do have two things that work well for me. I have a majority of my spices in alphabetical order in two wire racks from the Container Store hanging on the inside of my pantry door. They are easy to see when the door is opened, and the racks hold large and small containers. Then I have a different way to sort my laundry. I have three bins in my laundry room, but I sort by water temperature. Hot, warm, and hand wash. When I’m in a hurry, I pull out like-colored items from one bin to wash. I don’t have to worry that my black “wash in cold ” cami will accidentally get washed in hot water with my brown guest towels or black kitchen dish towels. This just makes it easy for me, since I am the one in charge of the laundry, but it might not work for most people.
I truly enjoy reading your blog. I am from Singapore. I too have 4 girls, they are between 8 and 13. I became a homemaker just a few months ago and have been trying to organise my home better. Your posts have been very useful for me. Thank you for sharing such wonderful ideas.
I have attached a zippered lingerie bag to my sorter. Socks go in there when sorting. When I do a load of colors I zip it up and toss it in. I haven’t had mismatched socks since I started doing this.
Thanks for all of the great ideas! I have one that has helped me tremendously. We each have a lingerie bag hanging on closet doorknob for dirty socks. Throw it in wash and all socks come out together and for each family member already sorted!
So I am looking to organized recipe cards. I saw your post to keep them in a binder, but how do you see the back of the recipe? If I tape it, then I have to reach in the clear folder and up-tape it and it ruins the card.
Yes, that can be tricky. I either recopy the card so it’s all on one side, or I will recopy just the back and then tape it in underneath the original card – so then I have a front/back on 2 separate cards.
I’m so bad at organization :( I get completely lost when I have to organize something, I don’t know where to start! You are great and I love your advices! I’m so glad I found your blog!
Muchas gracias, son muy buenas ideas, mas me gustaron la de fotos, saludos desde Chile, Viña del Mar
WOWZERS !!! I just spend the most productive few hours thisp morning on your site getting such great ideas that to I never even thought of. Thank you for all the great ways to keep myself and my family organized. Well done
This is awesome! As a teacher, mother and wife I really needed this. Thanks!
Concerning idea of using shoe holders over the back of linen closet or bathroom doors to hold bathroom supplies & medicines.
You put the comment to put medicines up high out of reach of children ; there is no such thing as out of reach ; they can get to anything.
Also the picture that accompanied this showed a linen closet that a child could use the shelves as a ladder.
All medicines should be in a lockable cabinet up high.
I have an extended suggestion on the wrapping up the sheets idea at the top of the list.
I fold my sheets as you do. But then feed them into one of the pillowcases and roll the extra one inside. This also gives you a way to stop the sheets from accidently getting “pulled” out of the closet, lets you see the set easily and is very tidy. They are contained, can be tossed into a car easily for camping trips and can be used as a “car pillow” on long trips. i also put a button on the cuff (or stitch on a snap or ribbons to tie it closed).
Much easier to clean than an actual pillow, and can be used as a throw pillow on beds instead of using valuable closet space.
Most people have 2 sets per bed. Why not keep them handy and functional when not in use, And who likes to sort through a closet at 2am to change a childs bed?
I too have a spot for lone socks, however, on December 31st, I will bundle up all of the lone socks in an elastic, label them with that years date, and start a new pile. The rule is that socks can only come out of that bundle for matching purposes, they are never added. On the following December 31st, the previous years bundle gets tossed, the current years stack gets bundled, and I start a new stack. The theory is that if I haven’t come across a match in a year, I probably won’t.
On your sock idea – my boys were “white only” so I used a black marker on the toe (no one would ever see it!) One dot for oldest & 2 for youngest – that way, if the sox lasted long enough to be handed down, I could add another dot. Of course, Dad didn’t get any dots. When the boys got older that was good to know because they all wore the same size! Thanx for all the ideas!
Teri, what a great idea!!!! So smart! I love that you just add a dot as the socks are passed down. Truly brilliant!
Lost sock issue, wash and dry in lingerie bags.
I’ve been using some of the ideas posted as well. But putting anything on the floor or near a toilet is very unsanitary! Water and germs splash out when the toilet is flushed, as well as when a male uses the toilet. Even the walls get splattered.
I saved room in my closet by using a shower curtain ring and hanging all my tank tops on the ring.
I use the large school portrait envelopes for each child to store their school year drawings and accomplishments for that particular school year. Each envelope already has their name, grade, mini school year photo, and teacher’s name. I can then place each envelope into the filing cabinet.
What a great idea!! Thanks for sharing!
I have 3 little boys and I have also found the 3 sectioned laundry basket to be wonderful. Additionally, I keep another smaller basket next to ours. I hate, hate, hate sorting through laundry to find those socks that just get mixed and folded into the rest of the clothes. So, the small basket is for socks and underwear. My oldest started when he was 4 and got the hang of it very quickly; now the 2 year old does it because he wants to be like his big brothers. lol.
All socks and underwear go in the basket and get their own wash. And since they are usually the dirtiest, too, I can run the pre-wash and/or hot wash on them and not risk the rest of the clothes. When they come out, I’m not digging through a mountain of clothes to find the pairs. If the load is small, then I might wash it with some sheets. The sheets are easy to pull out and fold up leaving just the small pile of socks to finish. I also have the boys help find the “brothers”. :D
It might seem counter-intuitive to run an extra wash for just socks and underwear but when done I can pair and fold in a matter of minutes instead of having a basket that seems to breed singles. And since I’ve assigned the sock basket, I’ve had a lot less missing socks.
One more tip, I have found that planning out weekly dinners helps keep the kitchen more organized and clean, the fridge cleaner, keeps the food budget on track, and even helps to reduce our grocery bill each week. My husband and I sit down and pick out 4-5 meals, plan which days get meals and which get leftovers, then I start the grocery list with the items not on hand for those meals.
This has really helped us not over buy items which end up going bad too soon. There are no questions about what is for dinner because it is on the list for the week. Dinner tends to be more on time because we know what we are making and how long it will take to prepare. And since it is all laid out, if I am feeling out of sorts (darn morning sickness) then my husband knows what is planned and that everything is there ready to be assembled (so he cant just feed the kids cereal for dinner anymore…heehee).
So many great tips here!! Thank you for taking the time to share them! I hope you are feeling better soon… congrats! :)
I LOVE these tips! I’m definitely using these while cleaning my bedroom!
Yay! So glad you found some ideas that may work! :)
Thank you so much for great suggestions, I was not able to stop reading until I completed all tips.
Thanks for taking a moment to leave a comment. I hope some of the ideas come in handy! :)
Talk about evergreen content! Thank you.
-You have some great new ideas here as well as refined or revamped tried-and-true classics. I’m very glad to have landed on your blog.
Thanks, Patty! :)
I really enjoyed all of your wonderful tips for organizing. I have one more you might want to share with mom’s who can’t quite embrace their kids “creative” outfits or have kids who get too bogged down trying to decide. When my 5 where little I just made outfit bundles with everything together. I put pants,shirt,socks,underwear, even hair accessories for the girls and placed the piles on low shelves in their bedrooms. They had a choice I could live with, everyone could pick clothes on their own, and my ADD kids didn’t pull everything out and get stalled out every day. It also makes it easier for Dad or older siblings to help the littlest ones because they cooperate better when they have picked the bundle. Since we were tight on space this also insured that only things we were actually using took up prime space. It saved me a lot of time and frustration, hope it helps someone else. I know it can be hard at times to stay home but it’s really worth it. I have never regreted my choice to give that time to my children.
Great idea!! Thanks so much for taking the time to share with us! :)
I like many of your ideas. There are some that I plan to utilize. However, there is just one comment I would like to make. You suggest keeping your spices in a drawer separated my tension rods. It’s a cute idea. However, unless you use a lot of spice and replace the bottles frequently, I find that my spices stay much fresher by keeping them in the freezer. I simply store them in the door shelves. Some spices are very expensive and I hate to throw them away when they become stale. They last much longer in the freezer and really take up very little space.
Such a great idea! Thanks, Brenda!!
Hi there, I didn’t catch the name of the fabulous bra you were referring to. Could you please share? Thanks!
Sure! It’s this bra by Spanx. BEST BRA EVER! I’ve had mine for years and years (12+). So flattering and comfortable! The only bra I wear, aside from sports bras!
Your post is so useful.
I’m a 66 year-old grandmother with no kids at home, but I’ve moved from a six room house into a one-room boarding situation. I’ve donated and tossed a lot, but some things you just need!
If you have a newsletter, please add me to your list. I’m slimming down my inbox by cancelling most of my newsletters, but, from what I’ve read here, yours will turn out to be the most useful, as well as one of the most entertaining.
Many thanks!
Thanks, Pam! I did have a newsletter, and then as life got crazier, that went by the wayside. Ugh! I’m so glad you found my blog, though! I hope you’ve found some useful ideas! Take care.