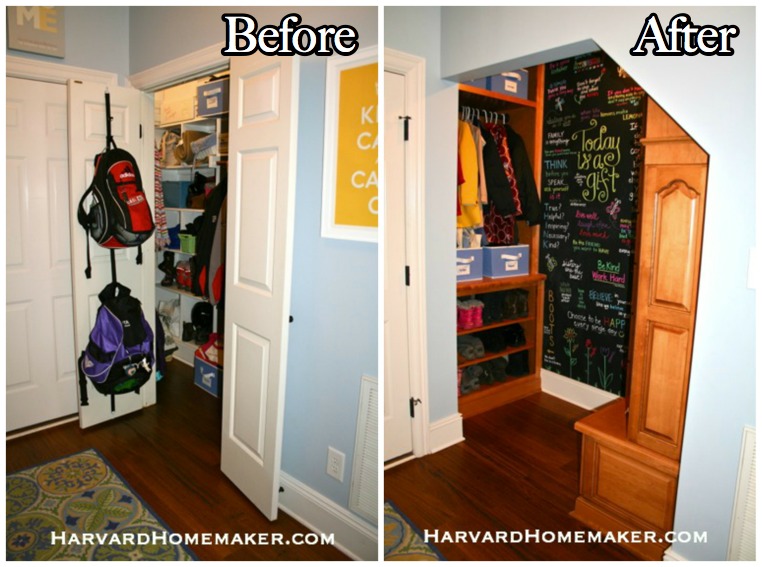
I am SO EXCITED to show you this change we recently made in our house! I absolutely love not only what it looks like but how it functions – what a difference! We took the closet under our stairs (near our garage where we go in and out), and we transformed it to create an awesome mudroom space!
We also realized we’d end up with a large wall in the back of the space. After considering various options, I ultimately decided to create a chalk wall there – and I LOVE IT! We simply painted the wall with chalkboard paint (the more coats of paint, the better!). What a simple and inexpensive way to make a big impact in a small space!
I like how these positive sayings on our new chalk wall are right in front of us each day as we head out the door, reminding us to enjoy the day we have before us. That tiny corner has now become one of my favorite spots in the house! I’ve even found my daughters writing some of the quotes on things like their school notebooks, so I know the positive messages are reaching them, too. (If you, like me, are trying to encourage your children to have an optimistic attitude toward life, you will enjoy this post: How to Teach Your Children to be More Positive with a Happy Jar. This is one of our favorite family traditions!!)
See below for all the details on how we turned the closet under our stairs into a fun, functional extension of our mudroom! I hope you are inspired by what you see!! I have been dying to share this with you! :)
For another small change that can have a big impact, check out this simple fireplace update!
Disclosure: Some links in this post are affiliate/referral links. Please click here for further explanation.
OUR FIRST MUDROOM RENOVATION – ENTER: THE MAN CUBBIE!
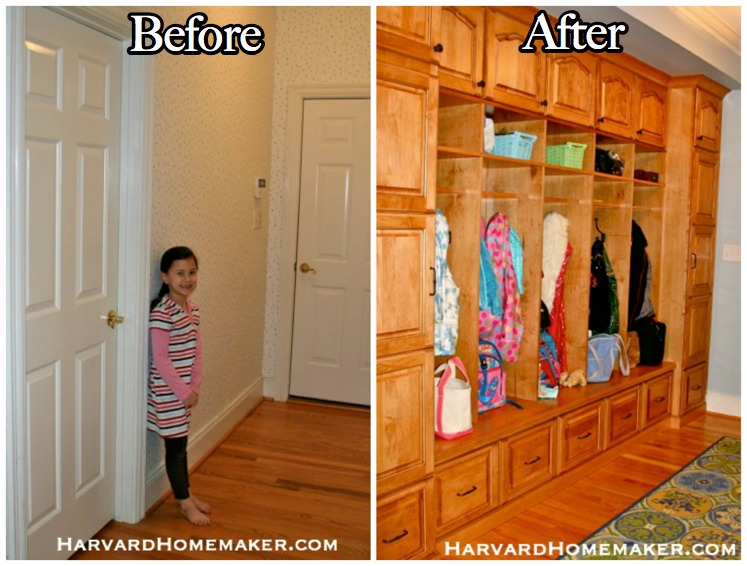
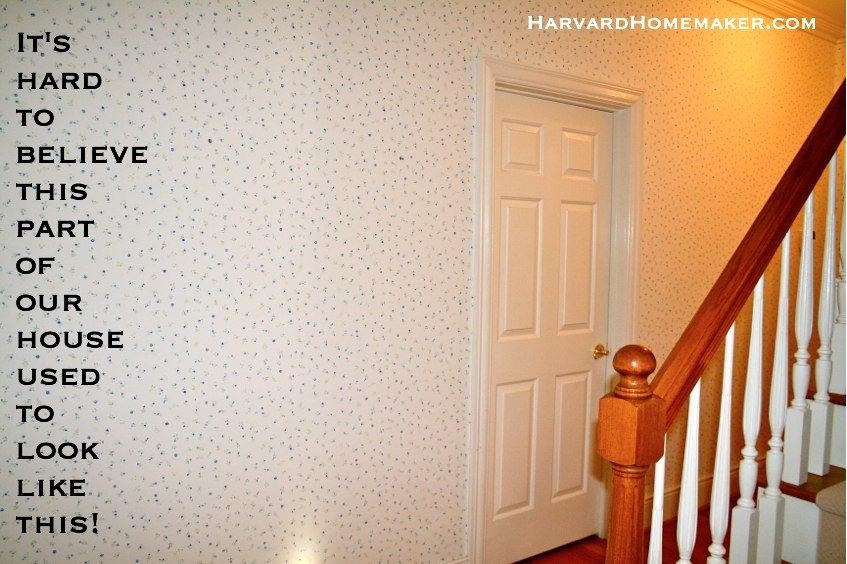
Before I get into the transformation of the closet area, I need to explain the rest of the mudroom for everything to make sense. About 5 years ago, we decided to widen the hallway leading to our garage (so we took some space from the playroom which is through the door you can see on the left in the “before” picture down below.) With the wider hallway and by moving the door to the end (rather than centered on the wall), we now had room to create a mudroom in our back entryway.
We added the built-ins and created a cubbie for each of the five people in our family (at the time). This is the first renovation we ever took on in our home, and it was life-changing!!! We now had places to put our jackets, shoes, bags, etc. and we could get out the door on time for a change (more or less)!! We even installed outlets in every cubbie, so each person could charge their electronic devices out of the way. I would fall asleep at night, dreaming of cubbies! It was pure Heaven for this mom!!
When we first started talking about having one more baby, then, (read all about our struggle with that decision here) – I kid you not – the first thing I said was, “But we only have five cubbies!”
After daughter #4 was born (we ultimately decided the shortage of cubbie space wasn’t a reason to not have a baby!), her diaper bag just went into my cubbie – no big deal. But as time passed and she got bigger, her little jackets and shoes seemed to be multiplying, so one day my husband pulled me back to that corner of our house and said this (God love him):
“I know the baby is going to need her own cubbie soon, and so that means somebody is going to get the boot… I’m pretty sure that somebody is me! So, I was thinking, maybe we can open up this closet and put one more cubbie over here? I’m not ashamed to admit that I’ve really gotten to like having my own cubbie, and I’m really going to miss it. So perhaps I can have my own ‘Man Cubbie’ of sorts over here?!”
Brilliant!
Worth noting: I just used the word “brilliant” when it comes to one of my husband’s ideas. The poor guy doesn’t get that kind of support too often when living with all of these women!
And so, we now refer to this corner of our house as “Daddy’s Man Cubbie” – I think it’s so perfect that his “own” space has been reduced to a 4-foot section of the house that he shares with five girls!! He is truly a gem.
By the way, look how cute my oldest is below in the “Before” shot! She was only 5 then! Time flies – she’s now 11 and going to middle school next year. Hold me.
PICTURE BELOW: BEFORE & AFTER WHERE WE CREATED A MUDROOM IN OUR HALLWAY
THE CLOSET BEFORE
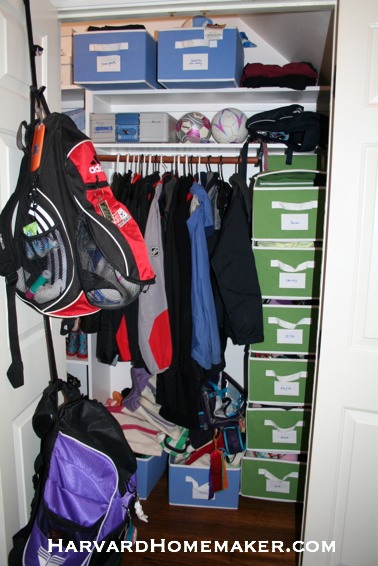
Our original closet looked like this. It really was a nice, big closet. As I suggest in this handy post with 10 ways to make the most use of your space, I added some hanging drawers all the way down to the floor to make use of every inch of vertical space. We stored our hats, mittens, etc. in those drawers – each person had one, and it really worked well.
I also made use of the wasted space on the inside of the doors. I hung a strap like this to support even my girls’ super-heavy sports bags. You can tell by looking at the picture just how bulky those bags are, and yet the hooks could still hold them without sliding.
While this closet was certainly nothing to complain about, I was excited by the idea of opening up this area to make it easier for all of us to use.
When the doors to the closet were open, they would interfere with the door to the garage. So if someone happened to walk in while you were in the closet, you would get knocked around a bit! It would be nice to remove those doors to keep this from happening.
DURING CONSTRUCTION
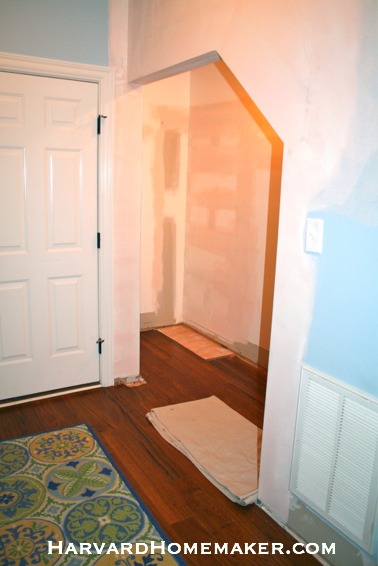
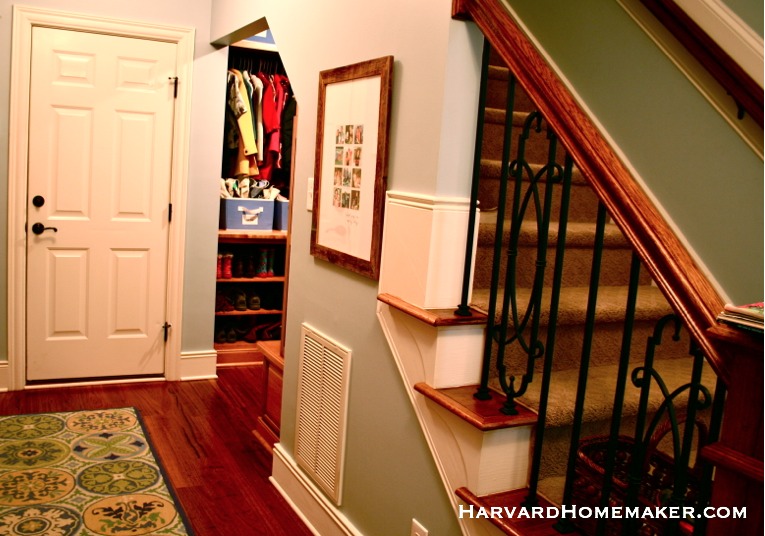
You can see that we ripped everything out, and we were able to cut a little more space out under the stairs to add even more room – we just had to allow for the air return to remain (you can see that the opening is now closer to the vent than it was in the picture above).
AFTER: OUR NEW MUDROOM SPACE!
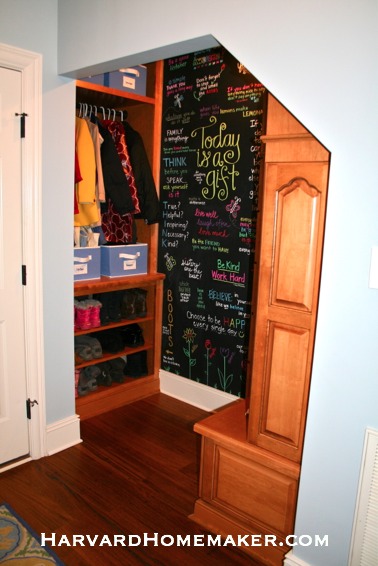
What a difference! The space is now neater, easier to access, more functional, and I am in LOVE with the chalk wall and all of its positivity!
THE FEATURES – RIGHT SIDE OF THE SPACE
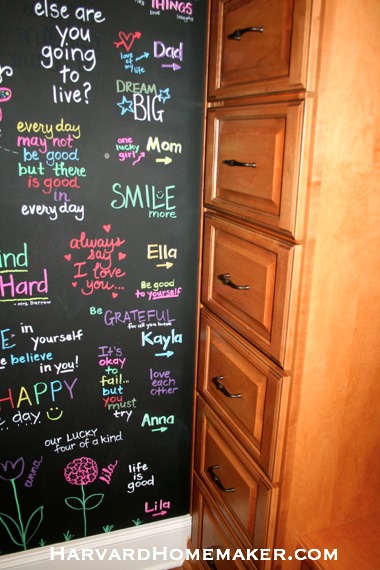
Because I loved how each person had a drawer in the old closet for hats, mittens, etc. we did the same thing in our new space.
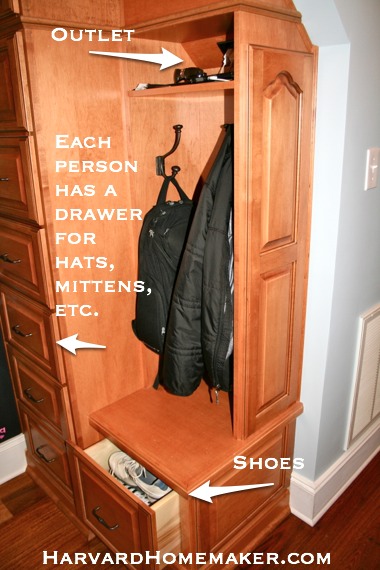
Here is a good view of “The Man Cubbie” itself! :)
The big drawers store so much for each person!
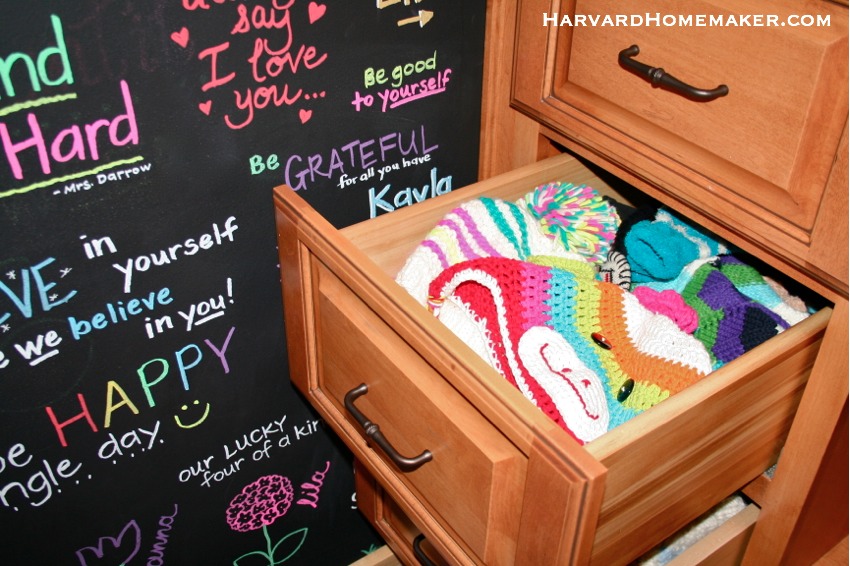
ABOUT THE CUTE RAINBOW SOCK MONKEY HAT BELOW :)
By the way, how fun is that Rainbow Sock Monkey hat in the drawer below?! My daughter (#2) has a rainbow sock monkey stuffed animal, and it’s her favorite-favorite-favorite! So for her birthday, I had this hat made for her here over at Etsy. I love Etsy and how you can support “the little people” who are running a business, often from home! You can find almost anything there, and it will be cheaper, too, because you are dealing directly with the person selling it without a middle man being involved. And you can have something custom-made, just for you! This hat, for example, was really meant for a baby, but Jamie from Sew Hot Mommies was sweet enough to size it up to fit my nine-year-old.
One more side note: After I wrote this post with DIY Minion Costumes, I became known as “The Minion Lady” I think! I saw that Sew Hot Mommies also makes Minion Hats like these – what a riot!!
Anyhow, just spreading the word and helping support those out there who are trying to run their own small businesses – keep up the great work!
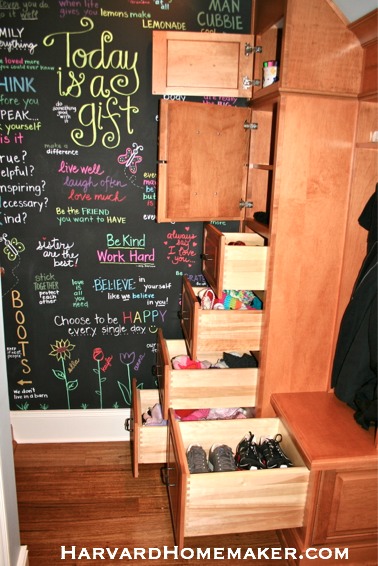
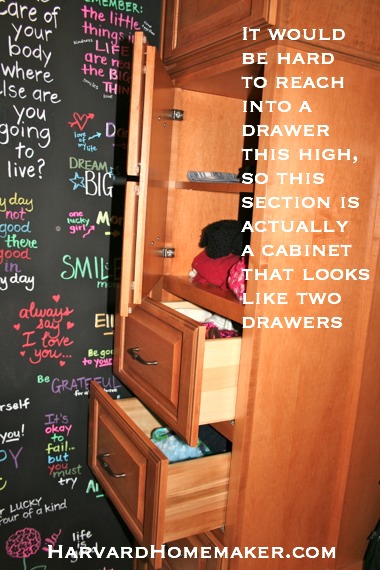
The woman (yes, woman – girl power – yeah!) who was our contractor pointed out that the upper drawers would be hard to reach into, so we ended up creating the illusion of drawers up high. The upper three “drawers” are actually cabinets made to look like drawers. How cool is that?!
With everything open, you can see just how functional this space is!
Just like we installed outlets on the other side of the mudroom in each cubbie, my husband also has his own outlet. It’s so handy for charging things out of the way! The shelf is also the perfect spot for him to throw his keys, wallet, sunglasses, etc.

THE FEATURES – LEFT SIDE OF THE SPACE
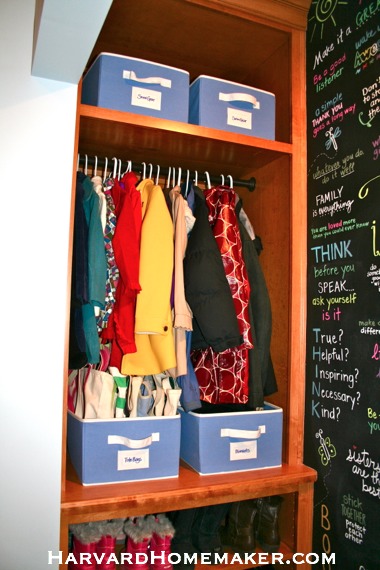
Opposite the drawers, we have even more functional space. I was able to reuse the large bins that were in our original closet, and some extra jackets hang within arm’s reach (well, at least within the reach of my husband and me!)
On the top shelf, I store lesser-used items in labeled bins to help us all know what’s inside. (In North Carolina during the winter months, the snow gear and the swim gear are both infrequently used!)

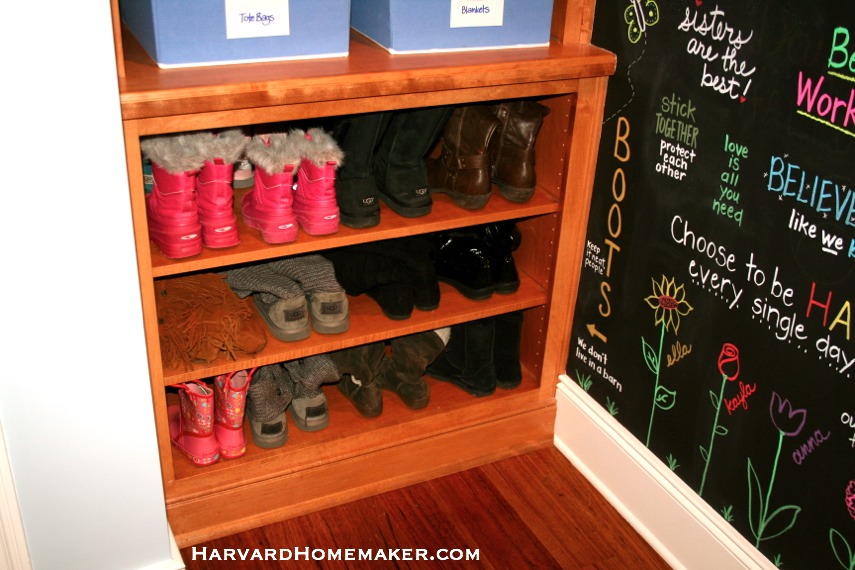
Down low, we installed some deep, adjustable shelving. That’s where I keep our boots. The deep shelves allow space where I can store soon-to-fit boots behind those that are currently being worn by my girls. There are lots of hand-me-downs to keep organized when you have four daughters!
THE INSPIRATIONAL CHALK WALL
Even though I love how this entire space turned out, my favorite feature is definitely the chalk wall! We simply used chalkboard paint to create it (we painted right on top of the drywall like regular paint).

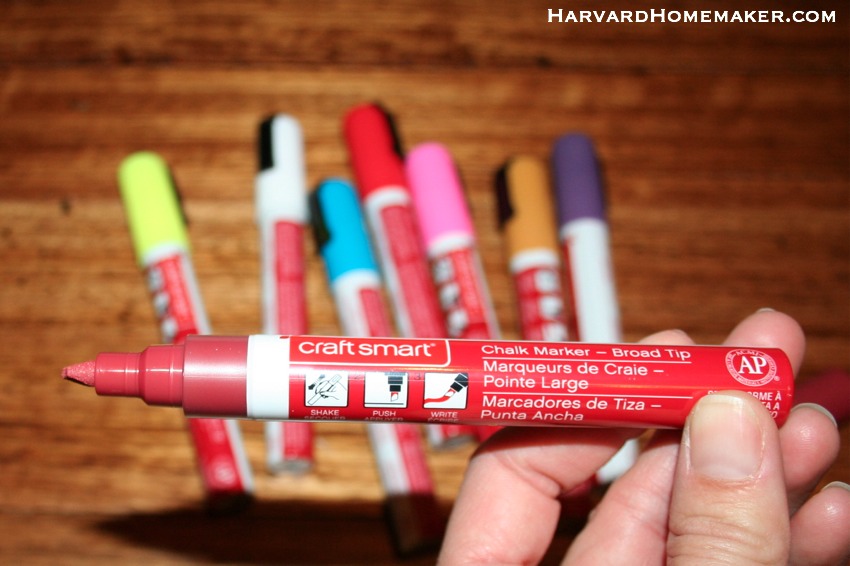
I used chalk markers like those shown below so the writing was “cleaner”. If I wet down a rag, I can still wipe off what I’ve drawn, yet the chalk doesn’t smear when it’s brushed against. I knew with jackets being pulled out all the time, regular chalk dust would end up on the clothes.
I will say, however, that from certain angles, I can still vaguely tell where I erased and started again. Perhaps the chalk markers perform a bit differently because the chalkboard paint is on drywall and not on a completely smooth surface. My original plan was to change the wall around at times with the seasons and holidays, but at this point, I think we’ll leave it just like this forever! It took me a while to get all that written!!
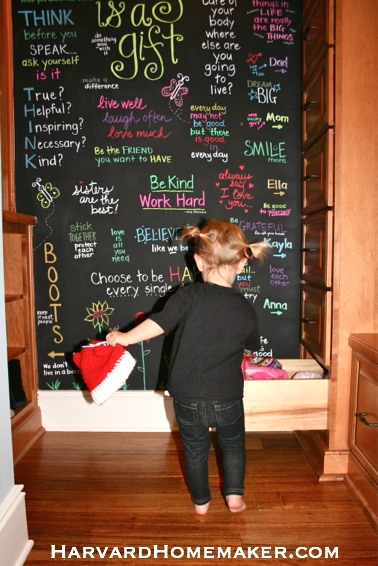
I started by writing “Today is a gift” and then I just kept adding different quotes and small drawings to fill in the space. I wrote everything free-hand, but I do have naturally neat handwriting, so that worked in my favor, I suppose! (I used to have my own hand-designed stationery business.)
Doing something like this is right up my alley, but even if it’s not your forte, I would suggest just letting it turn out as it may. I had no “plan” – I simply kept changing the colors and seeing where gaps seemed to exist, and then I’d write in that space. Just keep the letters fairly even, and take your time. I worked on this over the course of a week or two. And if you mess up, you can always erase and start again! :)

My girls love that I wrote, “Man Cubbie – cool guys only” up in one corner! I also wrote each of our names next to our designated drawers.
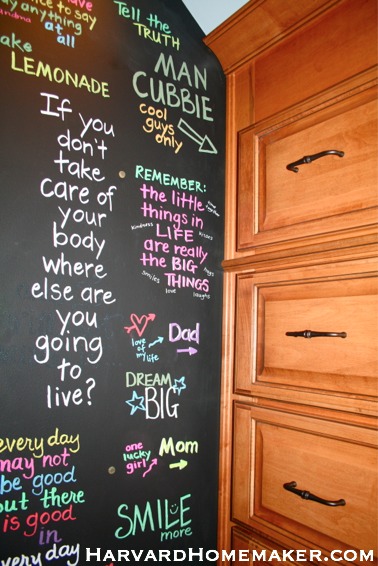
Another line that makes my daughters giggle: “Keep it neat, people. We don’t live in a barn!” I wrote that near the boots section. For some reason, they think that’s so funny!
You can see here how my youngest (fittingly) has the lowest drawer. Even she can reach her things!
WHAT A TRANSFORMATION!
I can hardly remember when our back entryway looked like this! Carving out a mudroom on both sides of this hallway has really changed how this family of six functions.
ABOUT THE CUSTOM PHOTO WALL ART THAT’S VISIBLE
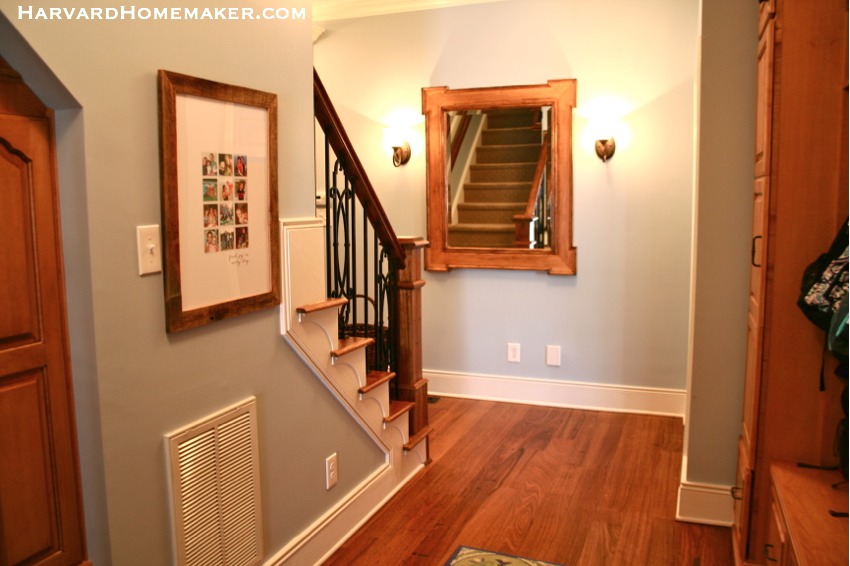
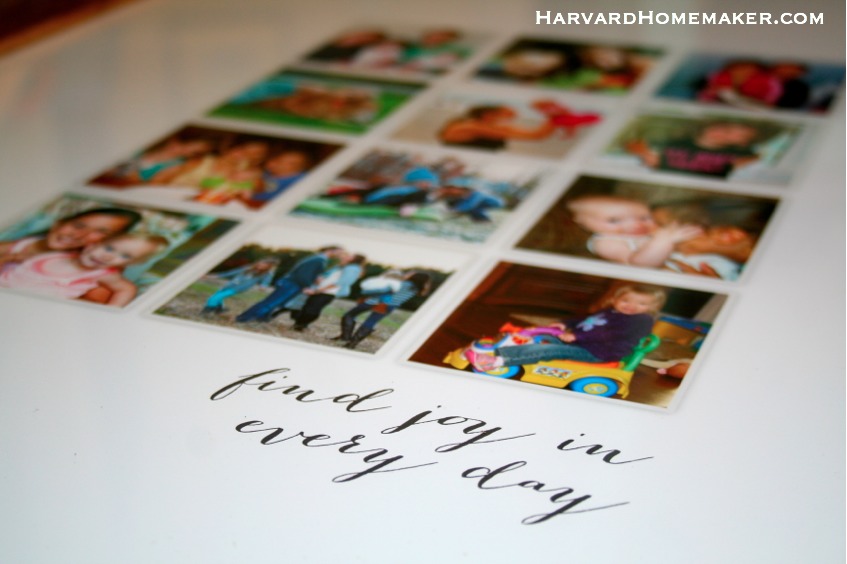
I am also super-duper excited about my new Find Joy in Every Day wall art that hangs in our mudroom. You can see it there on the wall in the picture below, but check out this post for a closer look at the piece. I had it made by changing the text on this A Year in My Life print at Minted – LOVE IT! The quality is outstanding.
I am a huge fan of anything made over at Minted! I only recently discovered how much great wall art they carry, but I’ve always been especially impressed with their holiday cards. As I share here in this post, I have ordered my Christmas cards from them the last two years, and I am not sure I will ever order from another company again. They are at the top of my list now for sure! (Find 15 great places to order your holiday cards here – with Minted at the top!) :)
This is what it looks like as we come in the door from the garage.
THE PAINT COLOR IN OUR MUDROOM
It’s hard to tell in these pictures (there is no natural light in this back corner of our house!), but the gray-blue paint color we chose for the mudroom is really pretty in person! If you’re interested, it’s Benjamin-Moore 2129-60, and the color is called Mt. Rainier Gray.
This new photo collage I had made makes me so happy!! I love how it features the “less perfect” pictures (as opposed to the ones where we’re posed and in coordinating clothes – although those are great, too!). But I feel like this print reminds us that we’re constantly making memories in our daily life, even in those small moments. Each day is precious, and it should be treated as the gift that it truly is!
See more about how I made the collage below in this post.
WHAT HAPPENED TO ALL THOSE SPORTS BAGS?
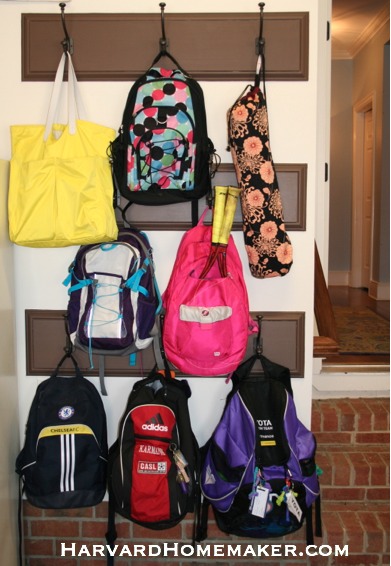
Remember how I had the sports bags hanging from the handy over-the-door strap on the old closet doors? If you’re wondering what happened to those, we ended up creating this system just outside the mudroom in our garage. It’s been great! The sports gear is often wet or muddy, so now it doesn’t even need to come inside the house, and there is less clutter inside, too.
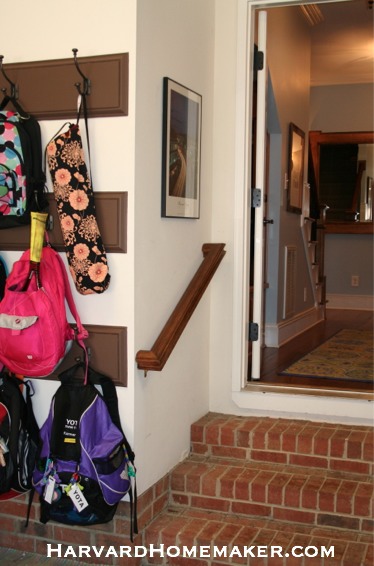
A carpenter nailed up a board, trimmed it out to make it look more finished, and then painted it. We then added the hooks. Note how we hung the hooks in a staggered fashion so the bags would hang without knocking into one another quite so much.
Did you find this post to be helpful or inspirational?
If so, please “Pin” the image below to share it with your friends.
Thanks for spreading the word! :)
I hope this post has inspired you in some way! I honestly can’t say enough about how much I love this change in our home!! I think we all feel just a wee bit happier as we head out the door each morning because it was easy to find what we needed, and our chalk wall sent us on our way with a smile! :)
What small changes have you made in your home that have had a huge impact on how you live?
If you’d like to keep up with me and my blog, please follow along via Facebook, Pinterest, Twitter, Instagram, Google+, or you can sign up for my monthly newsletter in the footer of my site! :)











Wow, fantastic transformation. You’ve given food for thought for our own coat closet! Love your blog!
Thank you! It’s really been a wonderful change for us. I appreciate the note! :)
Wow, I dream of a mud room one day. I love your blog and all of your ideas. Thank you or all the inspiration.
Thanks, Michelle! I always dreamed of a mudroom, too, and it really has been so great since we were able to carve one out of the space we had available! I hope this little dream comes true for you one day as well! :)
I need you to come decorate my house please. Immediately.
You are too funny, Ashley! There are plenty of corners of my own house that need attention. I’m just showing you my best one here. :)
I am in love with your rug! Can you tell me where it’s from?
Thanks!
I ordered it about 5 years ago, and I think I got it at Ballard Designs, but when I looked at their site just now, I couldn’t find it. I peeked at the back of my rug, though, and it’s made by Company C. I couldn’t find the exact one I have, but I did find this one in the multi-colored version. Sorry I’m not more help, but I hope that gives you a lead anyhow in tracking it down! Thanks for stopping by my blog! :)
Thanks! I appreciate your research :)
I love everything about your remodel! Can you tell me where to get the bronze hooks you used in the mudroom and the garage? I love them!
Thanks, Stacy! It’s been such a nice change in our home! You can find the hooks here at Restoration Hardware – ours are oil rubbed bronze. We have them inside in our mudroom cubbies as well. I love how sturdy they are – and the style keeps things from sliding off. They’ve been a great choice for us!
Hi There, stopping by from Strut your Stuff Saturday! Love this amazing transformation. I especially love the chalkboard wall. I love all thinks DIY chalkboard related. Thanks for the pic of the chalk pens you have used. I need to invest in a set :) Looking forward to following you here and Google+.
Heather :)
Hi Heather! Thanks for stopping by! I appreciate it – I will have to check out your blog! Take care!
Hi there! I’m enjoying reading through your blog as a new visitor! You’ve got wonderful ideas/projects and a beautiful family & home! I, too, love using the chalk markers instead of regular chalk and have found that using a magic eraser (or personally I prefer the HDX (Home Depot) brand since its cheaper!) works even better that just a wet rag… if you swirl in a circular motion, it tends to hide the old writing even better – hope it helps!!
Hi Steph! So glad you found me and my blog! :) Thanks for the tip on the magic eraser – so I assume it doesn’t take the chalk paint off with it then? I will have to try that!! Awesome!
Oh goodness, let me clarify before you erase your beautiful board – yes, it will remove everything, especially the chalk marker! I meant that if you’re changing up the art or writing and want to erase the chalk marker completely so that you don’t get that shadow leftover that happens with just a wet rag, then the magic eraser sponge is the way to go!
Okay, great! Yes, that’s what I thought you meant. I just wanted to make sure that it didn’t do its job so well that the actual chalkboard paint came off right along with the chalk marker! I can always test a little corner first to make sure, too. I have a feeling the chalkboard as is will be there for a long time (it took me a while!), but if I ever want to switch it up, I will take your advice for sure. Thanks again! Have a great weekend! xo
Hello! I just came across your site while looking for ideas to transform my entry way closet. I love you design! I’m curious if you could tell me the approximate dimensions of your space? Thanks!
Hi Sherice! I just measured for you. From the deepest part of the space (former closet) to the other wall (that we opened a bit more after pulling out the closet), it’s about 8′. So it’s fairly long. The space we actually stand in is about 46×42. The built-ins take up the rest of the space. Hope that helps!
I love the wall. My only concern is that because it is chalk, it will smudge or erase over time. I am thinking of dedicating a part of a wall I have in the house for a similar thing and once it is to my satisfaction spraying it with something to make it “permanent” Any suggestions?
Hi Jacki! I used chalk markers for this same reason – it won’t rub off unless you wet a rag to remove the writing. I did read that you should “season” your chalk wall by rubbing it with chalk all over and then erasing it all before using it for the first time. The little chalk bits fill the porous holes – if you don’t do this, apparently the first thing you write will be “burned” in and hard to completely erase. I never erased what I wrote – I left it as shown. Hope that helps!
Swing open shoe racks have made a huge difference with my three kids. Trones shoe storage stacked in threes and across two has made a HUGE difference in my home. We also have a Hemnes shoe cabinet for the adults.
I’m an immigrant in Canada and have had to adjust to both the practical need and local custom of taking shoes off at the door. Need because winter slush and spring/autumn are extremely muddy. The weather can just be so unpredictable day to day here. It’s hard to know which shoes we’ll need today. I still have rubber trays for shoes to dry on before putting away, but this cuts down dramatically on tripping on all the shoes in narrow entrance.
That chalk wall is fun and beautiful. Love it.